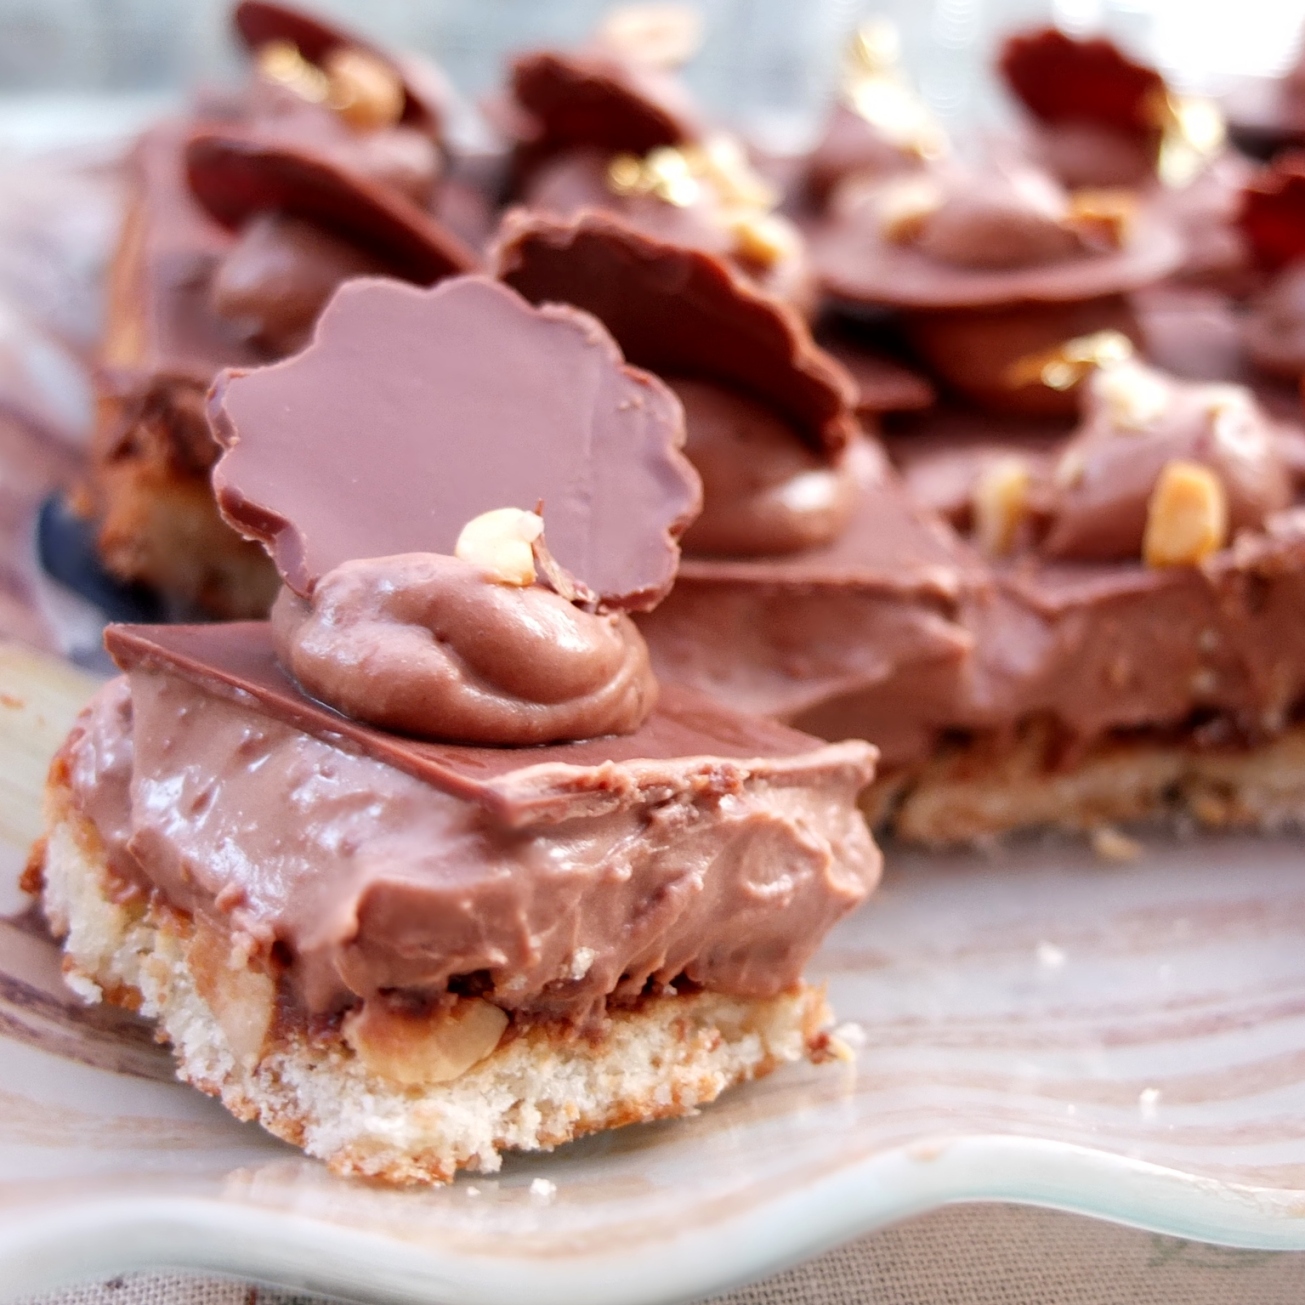
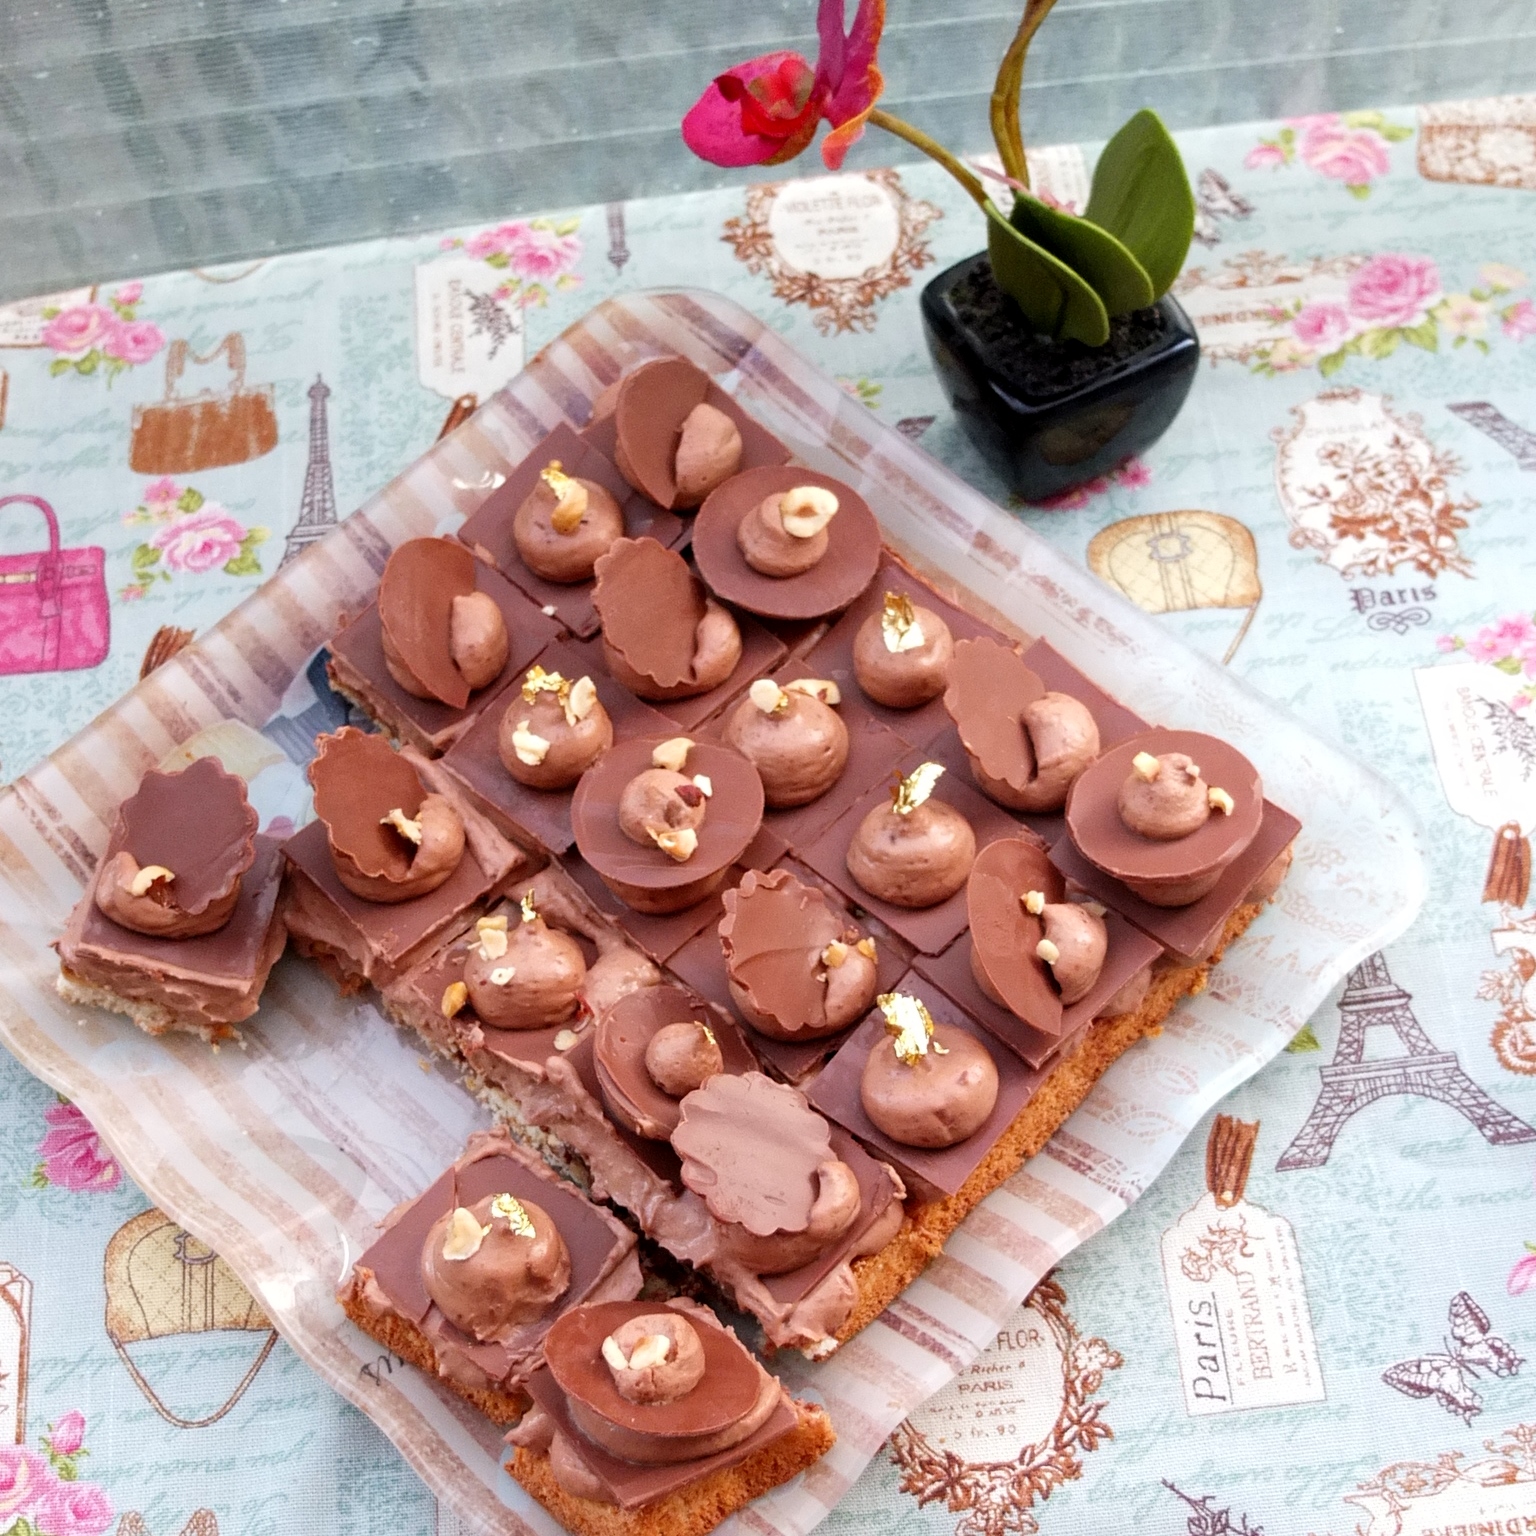
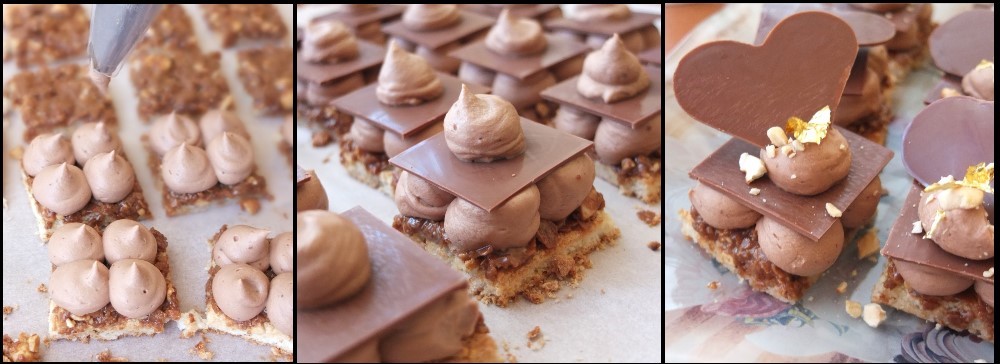
Would you like an incredibly yummy chocolate treat? These cakes are for you! There’s a chewy meringue dacquoise base covered in a praliné or Nutella layer combined with crispy wafer and toasted hazelnut. Then there’s a milk chocolate cream mousse topped with a slim chocolate square, another swirl of mousse and a decorative chocolate shape. Chocolate heaven on a plate, aka dreamy chocolate and hazelnut dacquoise mini cakes. Perfect for all kinds of occasions and to chase away the blues. Chocolate makes you happy and these cakes make you swoon. Am I giving money-back guarantees? Um… maybe! 🙂
THE RECIPE
These mini cakes are an adaptation of the Heavenly chocolate cake (douceur chocolat) from the Cordon bleu course. I adapted the ingredients to simplify the recipe and changed the quantities so the dacquoise and chocolate mousse layers are thinner, making small individual cakes and not the big one which was dramatic but more difficult to cut neatly.
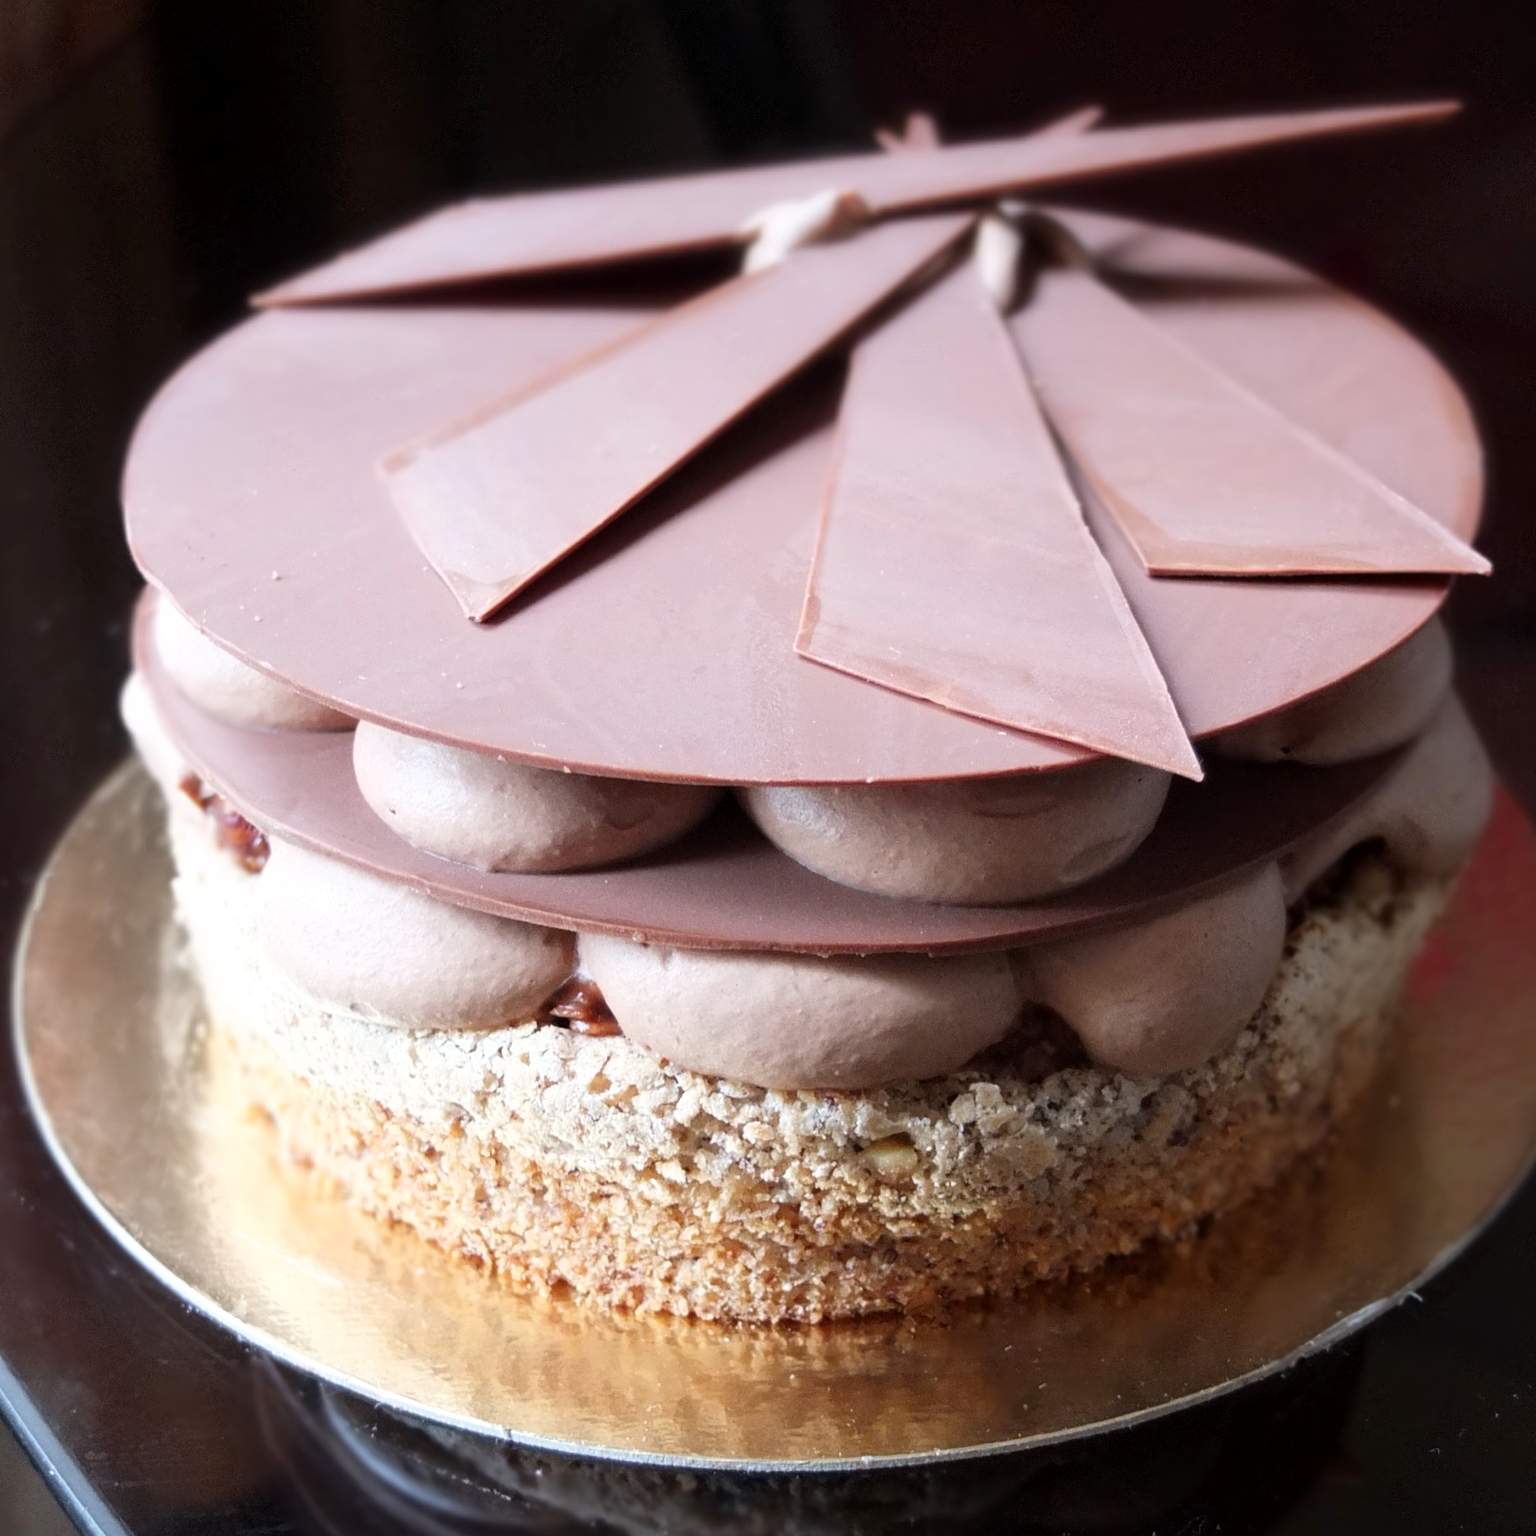
Douceur chocolat – Heavenly chocolate cake
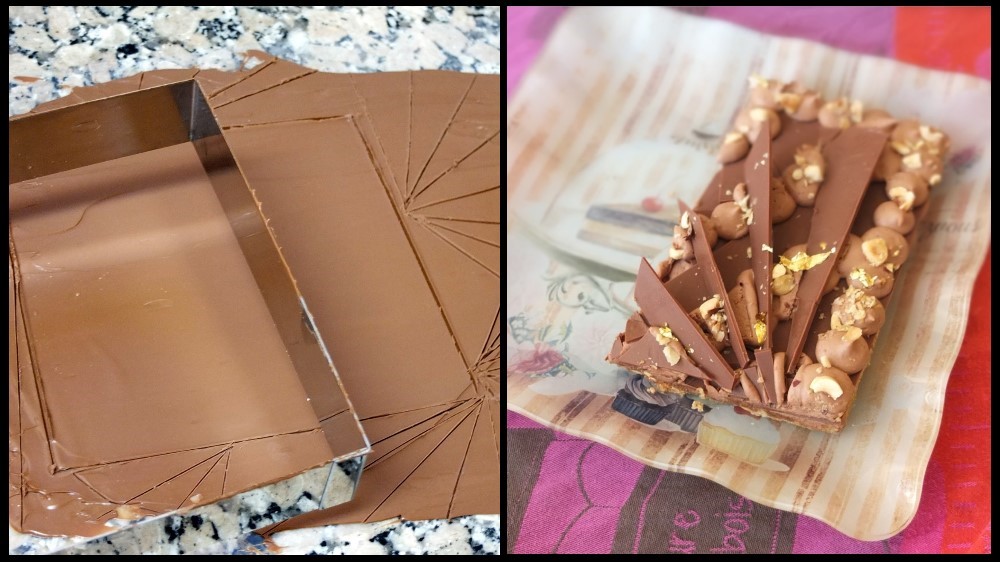
You could also make a large flat square cake with a 16cm/6inch square mould, cutting one tempered chocolate square and shards for decoration.
The layers are nice and slim so you can savour them all in one bite. In some versions I experimented using Nutella in the crispy layer instead of praliné (you might not find it or want to make some). Yes, the French side in my head said ‘Mon dieu, Nutella in a cake! What are you doing?!!’ Um… actually it’s yummy and very convenient. But feel free to use praliné. I love both versions.
My friend’s Catalan and Spanish workmates all adored these little treats but the earlier prototypes were slightly messy as the squares were cut after piping. Anyway, they disappeared in a twinkling, a nice Monday treat at her office. 🙂

Dreamy chocolate hazelnut dacquoise mini cakes
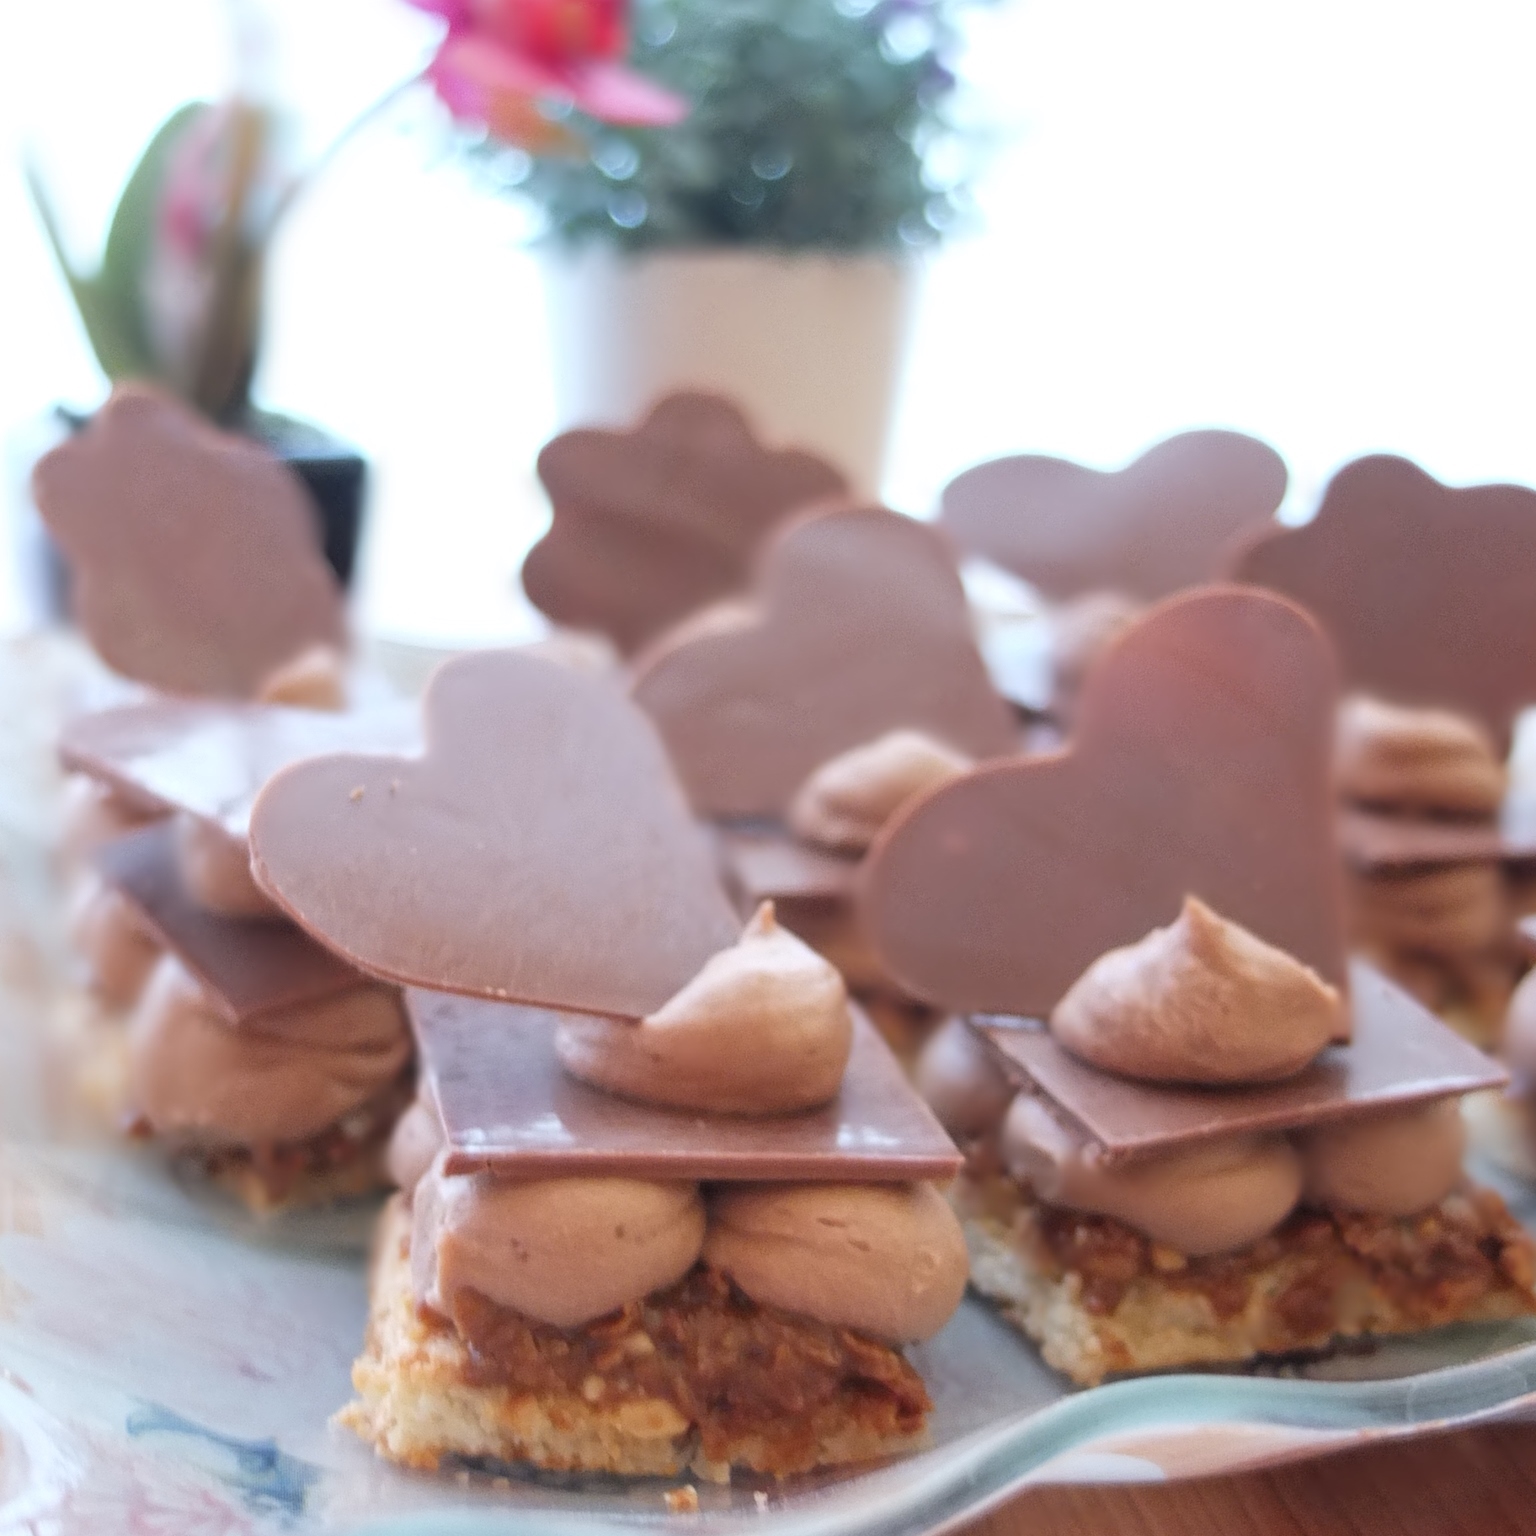
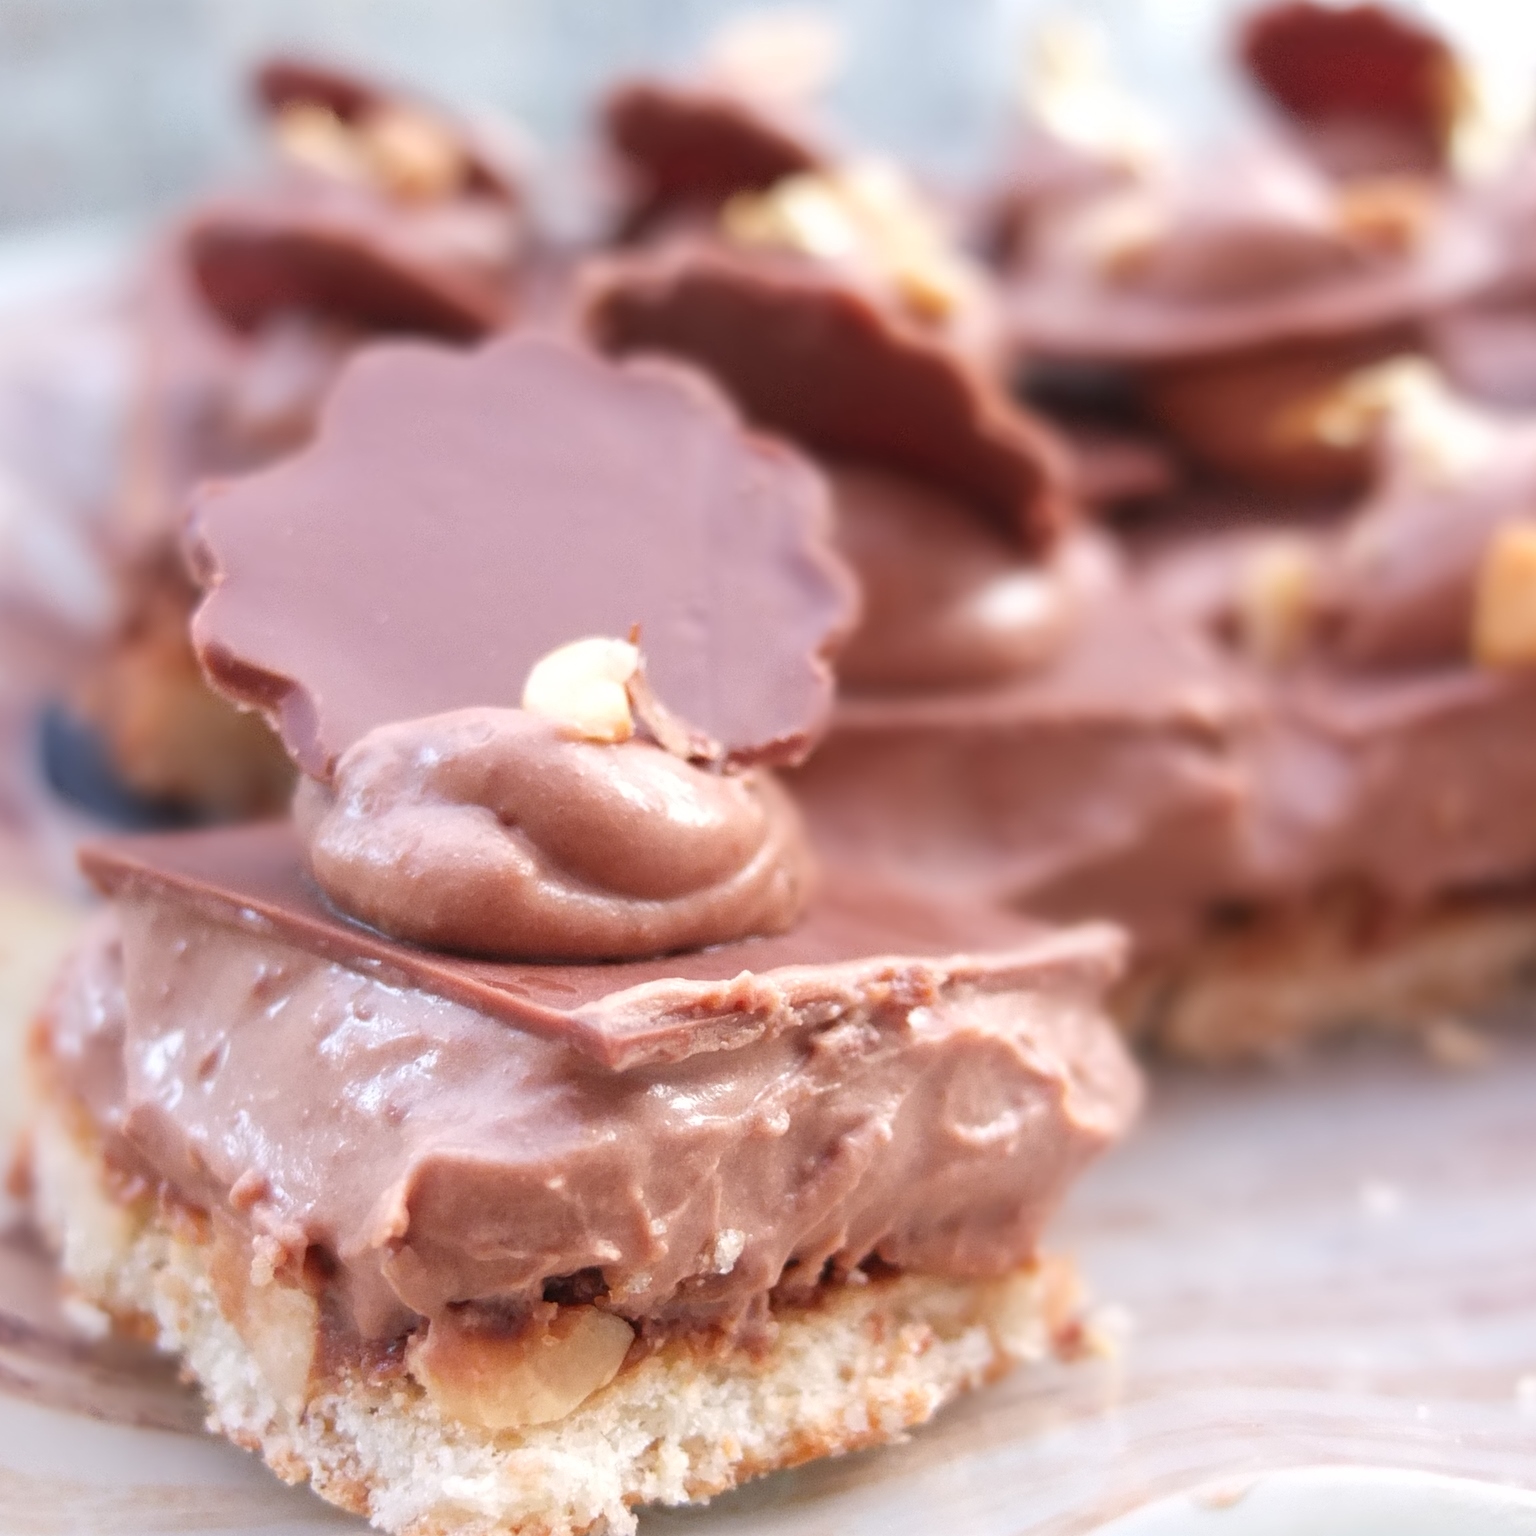
The texture of the mousse is important. In the photo above you can see the mousse is very creamy even if it doesn’t hold as well as the one below, which isn’t as soft or melt-in-the-mouth. What you need is something in between. The good news is both are delicious but I’d go towards quite soft and creamy next time. Also, the mousse stays neater if you cut the dacquoise into squares before piping. The hearts were for Valentine’s Day but they’re a bit big and smaller shapes are better. Anyway, you can play around with these cakes! 🙂

Suggested timings
Day 1 – make the tempered chocolate shapes the previous day and store in the fridge. Or buy some Lindt chocolate thins and avoid tempering completely!
Day 2 – make the dacquoise, chocolate mousse and crispy praliné layer. All these layers are fast and simple to make (about 10-15 minutes’ work each).
If you prefer, make everything on the same day.
Dreamy chocolate hazelnut dacquoise mini cakes
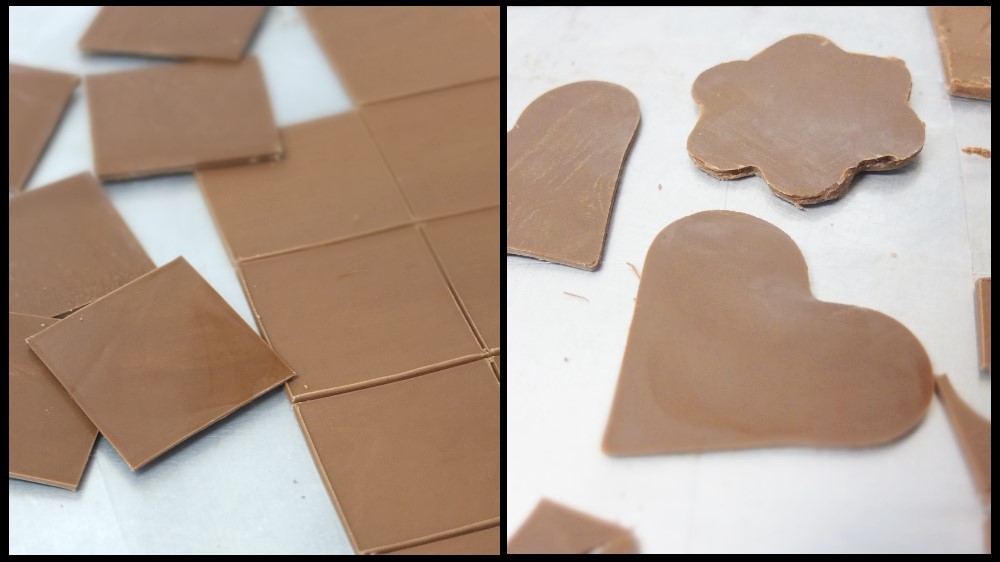
Tempered chocolate shapes
Prepare a work surface with a plastic sheet (used for food), a metal spatula knife, a ruler, small sharp knife and the cutters you’ll be using to make shapes. Everything must be clean and dry.
Temper your chocolate (please go to my tempering chocolate – ice bath system page for full instructions).
- 200-250g milk chocolate (good-quality like Lindt or Valrhona) broken into small pieces

When your chocolate is tempered and at the correct temperature (28-29°C/82.5-84°F) use it immediately to make shapes. For instructions see my page on making thin decorative shapes with tempered chocolate.
Dacquoise
I don’t sprinkle icing sugar on it before baking to make the outside crispy, but it’s an option. I liked the idea of a chewy dacquoise layer without extra added sugar.
- 75g/three-quarters of a cup ground hazelnuts or almonds
- 75g/two-thirds of a cup less 1 tablespoon icing sugar
- 2 medium-large egg whites (80g)
- 30g/2 tablespoons caster sugar
- 25g/3 tablespoons roughly chopped hazelnuts, to taste (or put in a paper bag and hit with a rolling pin till crushed)


When cooled turn around and peel the paper off very carefully off the bottom of the dacquoise. If it’s in a square ‘ring’ very carefully cut it out with a small sharp knife. If your dacquoise starts breaking a little don’t worry. Push your square together on a plate. When all the layers go on top they’ll help hold the little squares together.

Chocolate mousse
Don’t do the last part of this mousse (whisking till it holds) until you’re ready to assemble your cakes.
- 200g/7 ounces milk chocolate
- 300ml/g whipping cream

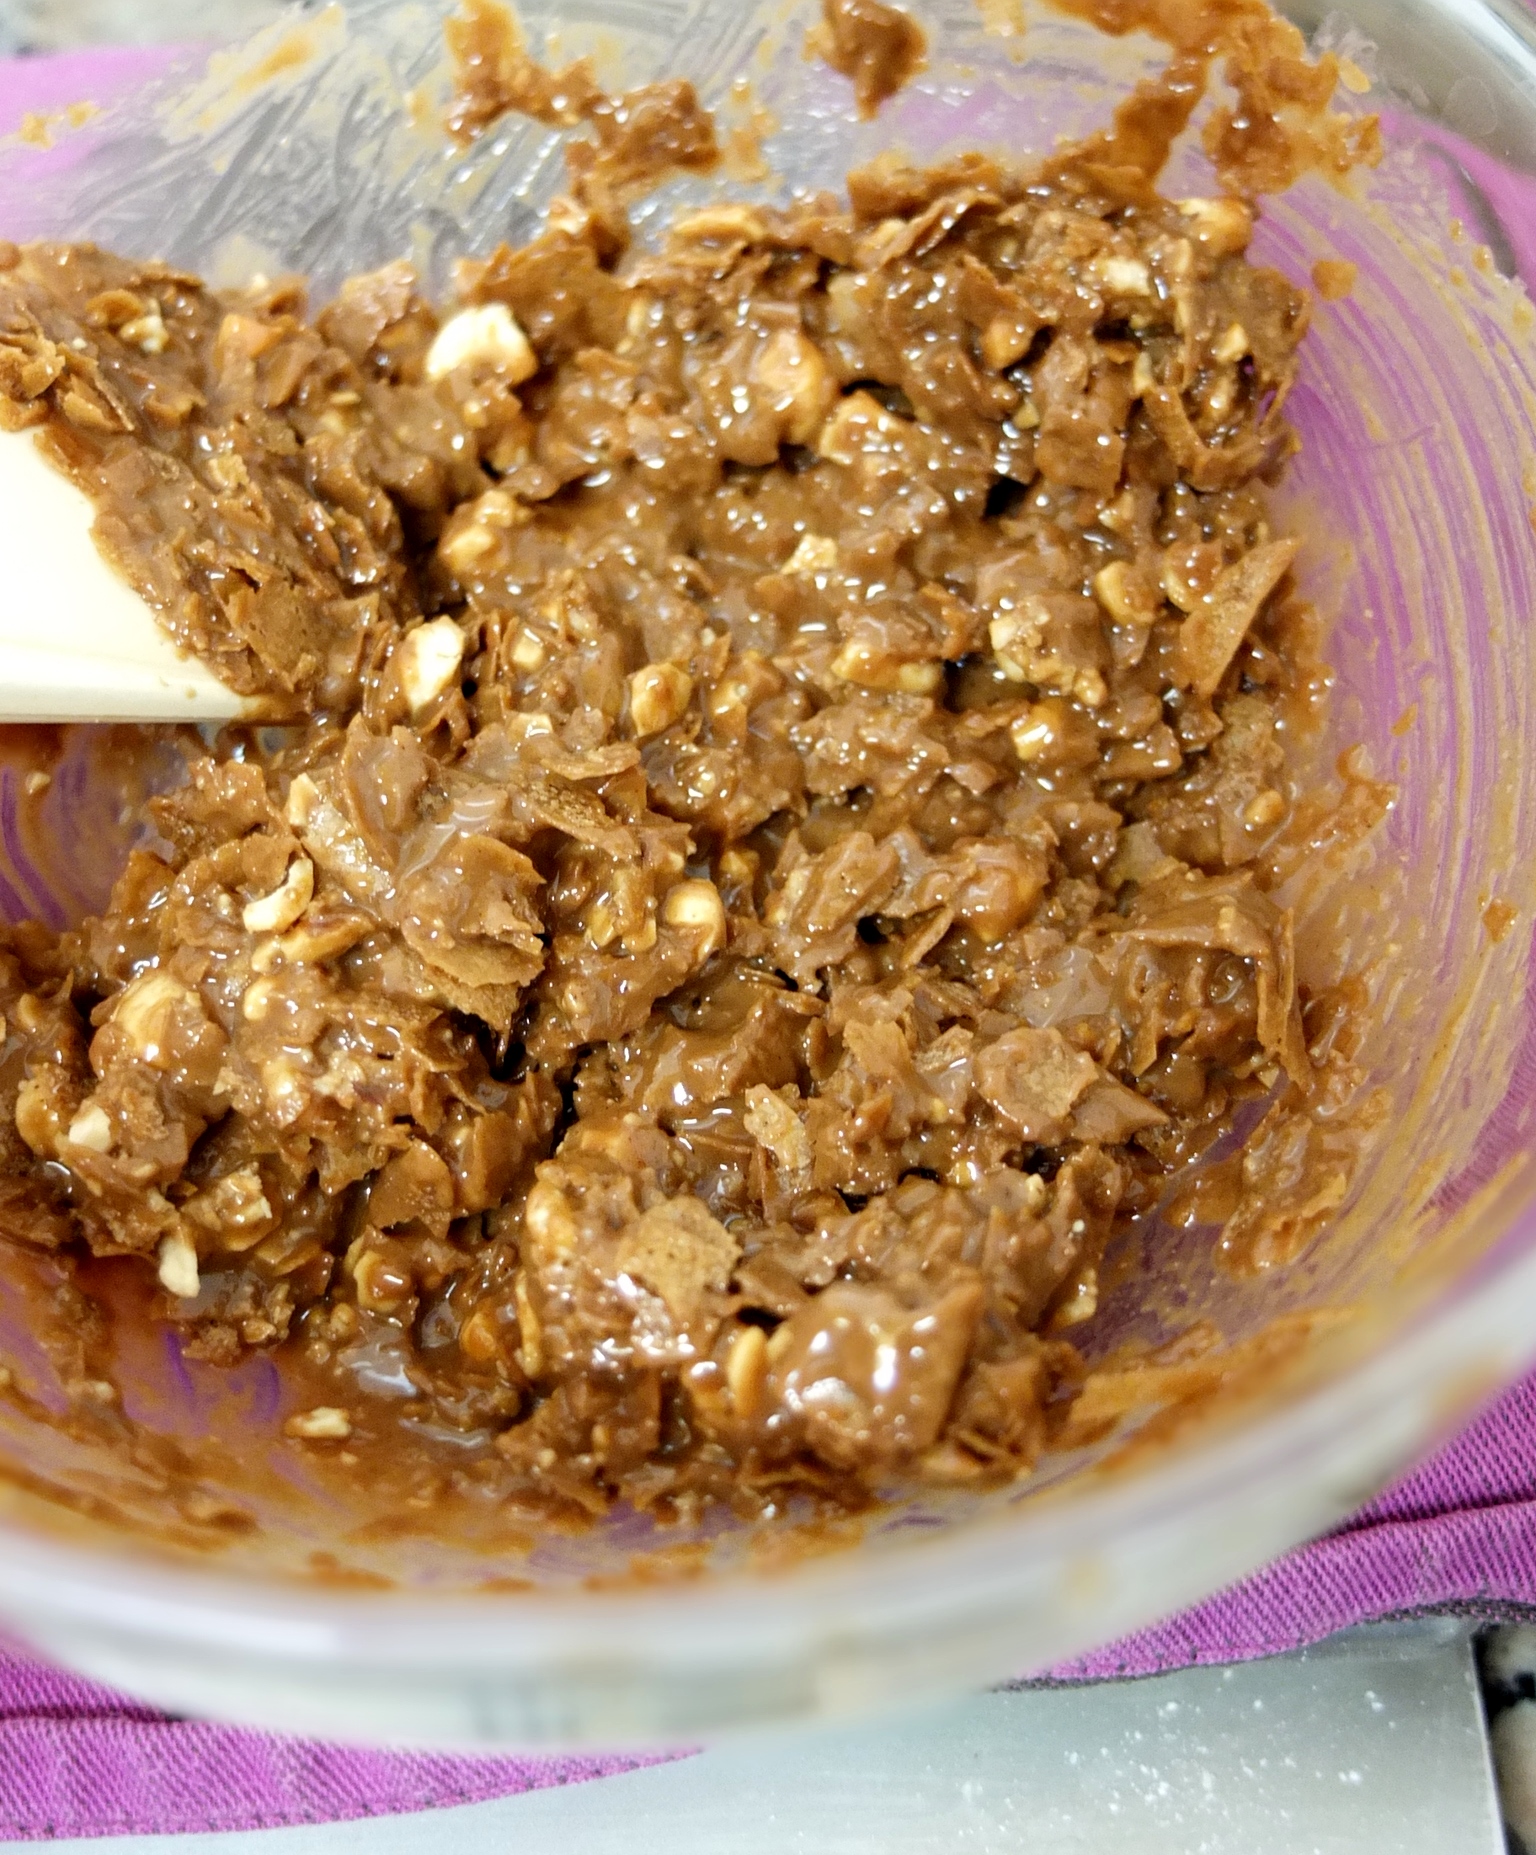
Crispy praliné/nutella layer
- 20g/three-quarters ounce milk chocolate
- 10g/1 scant tablespoon butter
- 50g/2 and a half tablespoons praliné hazelnut paste or Nutella
- 30g/a quarter cup plus 2 tablespoons crushed Gavottes crêpes (feuillantines/pailletines) – available in French supermarkets or on amazon. Possible alternatives: rice crispies or crisp ice-cream wafers
- 13g/2 scant tablespoons toasted hazelnuts, roughly chopped or crushed

- Melt the butter and milk chocolate on a bain marie.
- Stir in the praliné hazelnut paste or Nutella.
- Finally stir in the chopped hazelnuts and crushed Gavottes crêpes or other crispy wafer-like biscuits. Don’t stir too much, so you keep the crispy pieces more intact.
Assembly
- some chopped toasted hazelnuts and a little gold leaf for decoration, optional
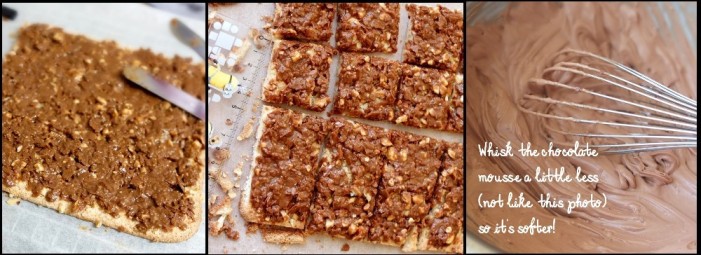
- Spread the crispy praliné/nutella layer in an even layer on the cooled dacquoise.
- Cut your square into 16 smaller equal squares (about 4cm/1.5inches squared each).
- Prepare a disposable piping bag with a medium nozzle (French size 10 – 1 cm diametre).
- Now whisk your chocolate mousse till it just holds (see the warnings and instructions above). Don’t overwhisk (it should be softer than in the photo).
- Pipe 4 balls of mousse on each square.
- Place a thin square of chocolate on top.
- Pipe one ball of mousse and then place in the fridge for 10 minutes or more for the mousse to firm up a little.
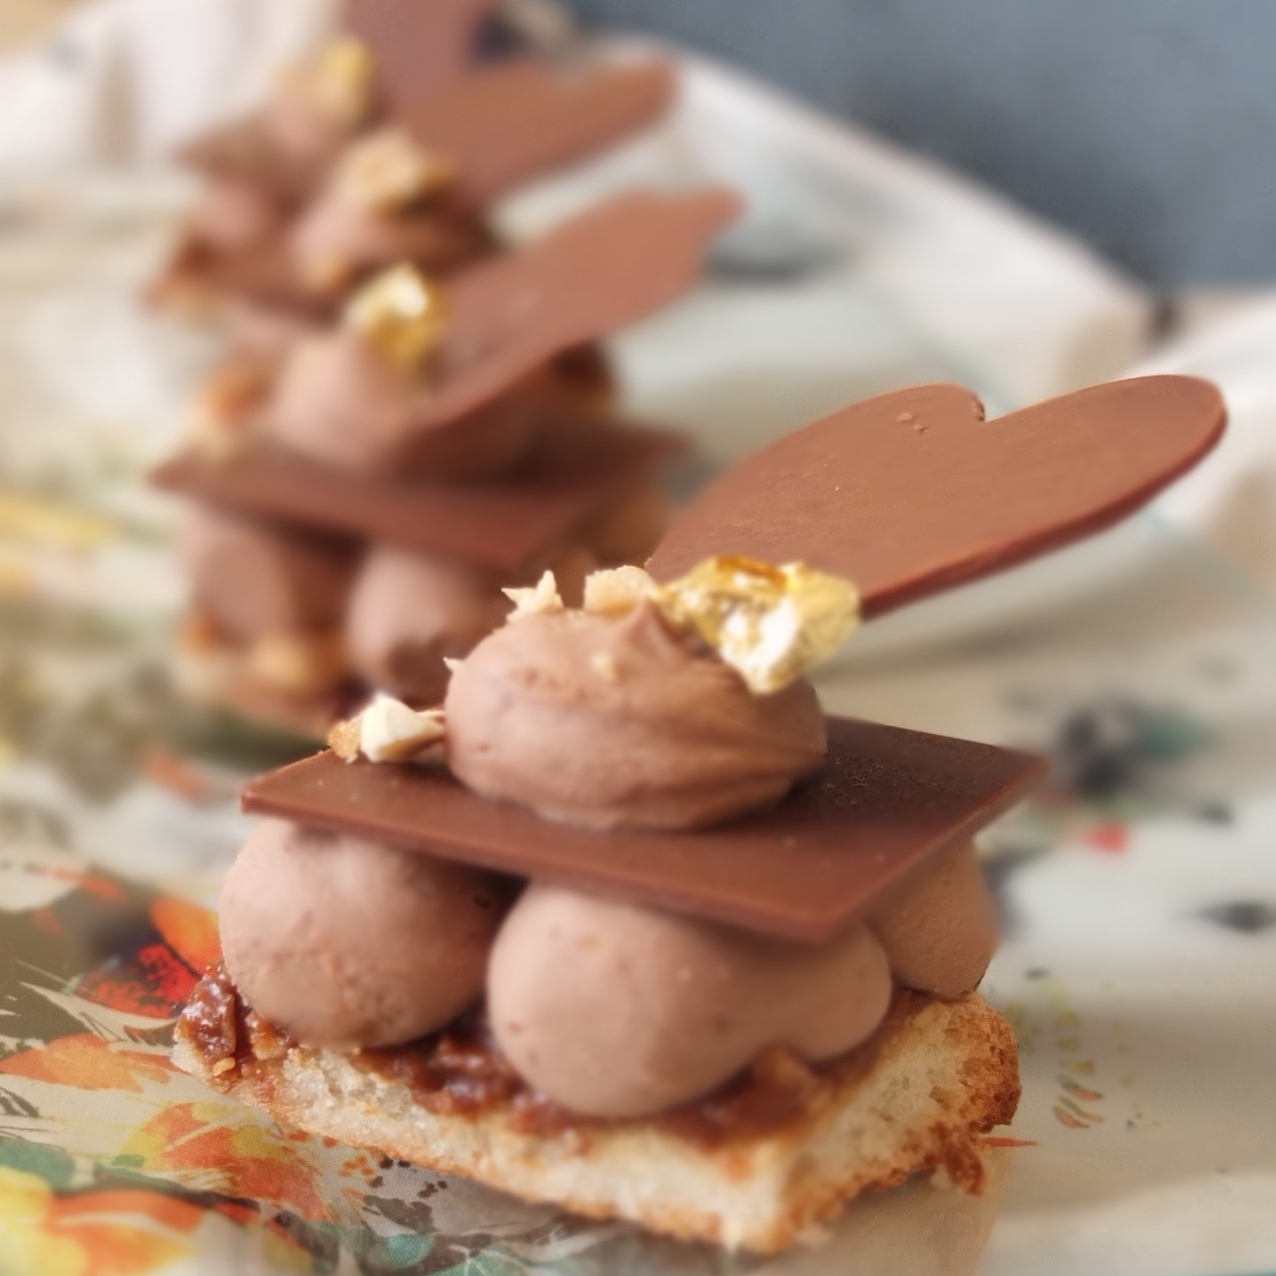
- Take the squares out of the fridge and place the chocolate shapes (flowers, hearts or semi-circles) at an angle in the ball of mousse.
- Sprinkle with chopped hazelnuts and a little gold leaf if using.


FERRERO ROCHER OPTION: I think this layer could work very well with crushed Ferrero Rochers. Replace the 50g Nutella and 30g Gavottes with about 7 crushed Ferrero Rochers!
Eating and storing
You can eat these little cakes immediately but it’s best if they chill in the refrigerator for an hour or more. They keep very well in an airtight container in the refrigerator up to 3 or 4 days.
All the versions I made were very yummy. So feel free to invent your own version and play around with the elements, shapes and sizes. For a gluten-free version replace the wafer-like biscuits in the praliné layer with some gluten-free cereal.
Dreamy chocolate hazelnut dacquoise mini cakes
Chocolate cakes aren’t usually my favourites but I’ll make an exception for these. I’m sharing them with Perfecting Patisserie@bakingqueen74 where there’s a Valentines theme this month so do visit to see some romantic cakes. And please help yourselves to some of these dreamy chocolate and hazelnut dacquoise mini cakes.
Have a dreamy chocolate hazelnut dacquoise mini cake!
Nice to see you again and have a dreamy Friday and weekend sweet reader, with or without chocolate. Happy baking and eating! 🙂 x

You knocked it out of the park this week! WOW, that Heavenly Cake looks so decadent, and deliciously rich! Actually so do the little mini dacquoise cakes. Miam, miam!
LikeLiked by 1 person
Thank you Deborah! Love your enthusiasm and very happy you enjoyed these decadent cakes! 🙂
LikeLiked by 1 person
I will take ALL of these delish mo
rsels and scoff the lot 😉
LikeLiked by 1 person
Thank you for your lovely and appropriate comment! 🙂 Sending you all of these virtual cakes right now… (sorry about the ‘virtual’) 🙂
LikeLike
hehhehe 😉
LikeLiked by 1 person
These look (and sound) decadently delicious! I also love those illustrations. Awesome job 😀
LikeLiked by 1 person
Thank you Justine! Yes, so yummy! Glad you like the cakes and drawings. 🙂
LikeLike
Hi!
Wonderful blog! I have nominated you for the Versatile Blogger Award. Here is the link.
https://cookingforthetimechallenged.wordpress.com/category/blog/
Congratulations!
LikeLiked by 1 person
Thanks so much Carol! I’m so happy you like the blog and I’m very honoured by your nomination. But umm… I retired from the award scene a while back so I could spend more time in the kitchen! Still thank you so much and I’m looking forward to checking out all the great blogs you nominated in your list. And many congratulations on your award! 🙂 x
LikeLiked by 1 person
I love your blog and recipes. How do you make those pictures with the handwriting? I didn’t realize one could retire from the award scene. Believe me, I understand. Keep blogging. You are a food artist 🎨
LikeLiked by 1 person
Aw thanks again. I first draw the recipe with a fine black roller pen on a square sheet of paper, colour in with coloured pencils then take a photo and trim it. I’m not a very hi-tech person! 😁 Thanks for understanding and for the sweet
encouragement. You’re very kind. I’m looking forward to seeing more of your lovely blog too.:) x
LikeLiked by 1 person
I can’t believe it is that simple! I love them and they are really helpful!✍🏻💜
LikeLiked by 1 person
Wow, these look amazing!!! Very impressive!
LikeLiked by 1 person
Aw thank you Rebecca! 🙂
LikeLike
Pingback: Week 48 and 49 of cakes, a matcha and vanilla angel cake recipe and pineapple tart taste test! | lili's cakes
I adore these little cakes! The large douceur chocolat looks amazing too but the small cakes cut from one large square cake are so effective. The chocolate mousse layer I bet would be my favourite! Your chocolate decorations are also very pretty, great touch. Thanks for joining in with Perfecting Patisserie!
LikeLiked by 1 person
Hi Lucy! Happy you like all the cakes and different elements, and thank you for your very sweet comments about them! Thanks also for hosting Perfecting Patisserie! 🙂
LikeLike
🔝 very delicious !
LikeLiked by 1 person
Aw thank you Mattia! 🙂
LikeLiked by 1 person
Oh my these look amazing!!! Happy for the 🙂 on my post and I will continue to check out other posts. I look forward to more wonderful sweets!!!
LikeLiked by 1 person
Thanks so much Kristy! That’s so lovely and I’m looking forward to seeing more of your great sweet bakes! 🙂
LikeLiked by 1 person
Pingback: Dreamy chocolate and hazelnut dacquoise mini cakes | homethoughtsfromabroad626