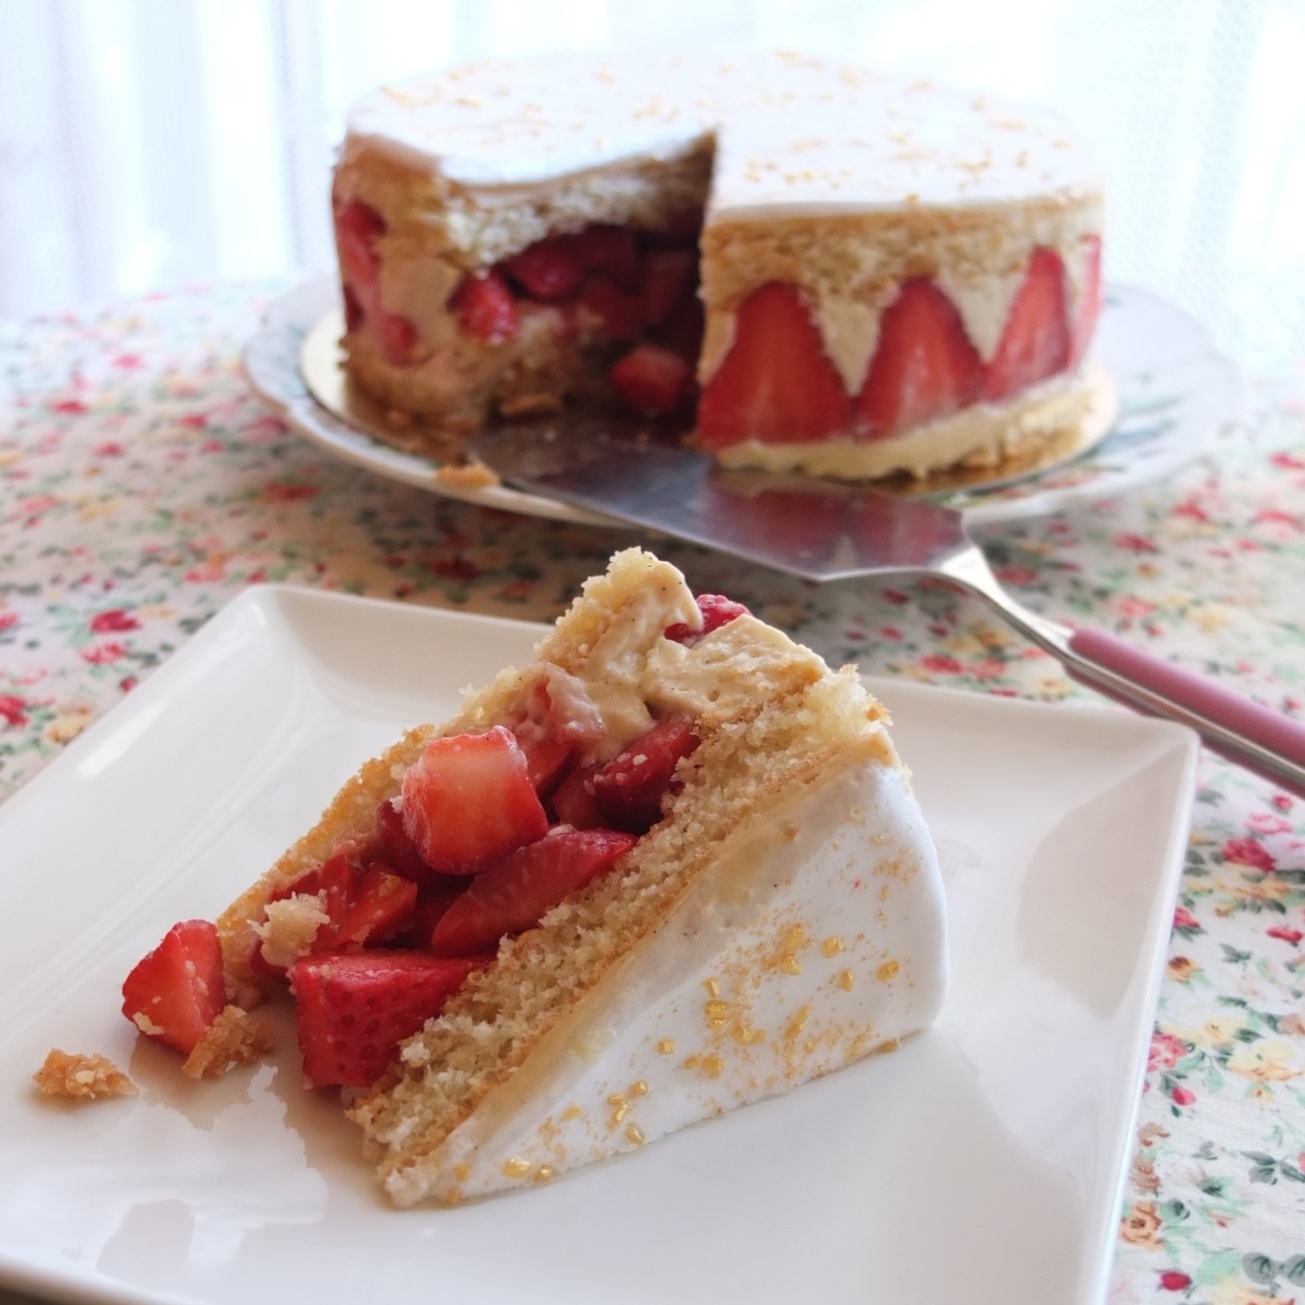
Pâtisserie can be healthier and delicious! There’s a trend towards superfoods and clean living but why not compromise and have desserts with both healthy and ‘decadent’ ingredients? We’ll whip up a genoise sponge with flour, ground almonds, cornflour and xylitol (a birch sugar substitute) then soak it with maple syrup and kirsch cherry liqueur. The gluten-free, sugar-free and dairy-free vanilla crème pâtissière is made with oat or almond milk and combined with natural greek-style yoghurt and gelatine for a deliciously light creamy filling. The Italian meringue topping requires sugar but it’s a lovely layer browned with a blowtorch or dusted with a little gold powder and decorative sprinkles. Then there’s the surprise strawberry treasure trove inside. Fraises is French for strawberries and they’re definitely the hero in this healthier Fraisier. Hip hip … ! 🙂
THE RECIPE
To construct this cake I used some techniques and the meringue topping taught on the Intermediate Cordon Bleu course in Paris – the Fraisier made there received many of your votes when asked which recipes you’d like to see on the blog. So here it is but with most of the elements adapted as a result of ‘healthier’ experiments. I also chose to bake the genoise as a single layer in a tray and not cut a round cake into slices, which is an option. You can increase the quantity of creamy filling to better ‘cement’ the strawberries and facilitate cutting but it’s so delicious with more strawberries. Try to find nice tasty ones. If they don’t have much flavour maybe pour a little maple syrup mixed with orange juice over the strawberries for the middle of the cake (not the sides) 20 minutes before using.
Healthier Fraisier (strawberry cake)
Equipment: cake ring (18cm/7inch diametre x 6cm/2.4inch high), baking tray (30cm x 40cm/16in x 12 in), baking paper, acetate strip and a large metal spatula. A digital weighing scale is recommended for accurate measurements. A sugar thermometre is useful for the genoise and Italian meringue.
Timings
Ideally make the genoise sponge and crème pat 1 or 2 hours before assembly so they can cool, or the day before. Genoise: 30 mins’ work then baking 10-15 mins; créme pâtissière – 15-20 mins’ work (optional extra 1 hour infusion). Syrup and assembly: around 30 – 50 mins (this depends on you). On our course we made a Fraisier within just over 2 hours.
Sugar-free genoise sponge

Grind the xylitol with a barmix or coffee grinder to the texture of caster/superfine sugar and not as fine as icing/powdered sugar. This will make the texture of your genoise sponge nicer. Use golden or white caster/superfine sugar if you prefer.
- 4 medium to large-sized eggs (about 230-240g)
- 120g/half a cup ground xylitol (birch sugar substitute) or caster/superfine sugar
- 80g/two-thirds of a cup good quality cake flour (French T45) or plain/all-purpose flour (cake flour’s best)
- 20g/2 tablespoons cornflour/cornstarch
- 40g/a third of a cup ground almonds
- a pinch of salt
- a knife-tip of vanilla powder or scraped seeds from a quarter of a vanilla pod (optional)
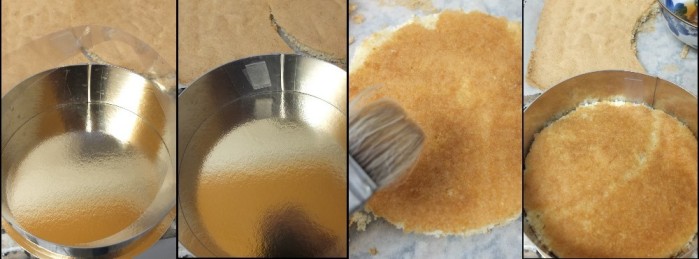
Method: please see the instructions on my sugar-free genoise recipe page. When your sponge is cool cut out two circles with a small sharp knife around your 18cm cake ring (freeze the remaining sponge to use in verrines or trifles another time).
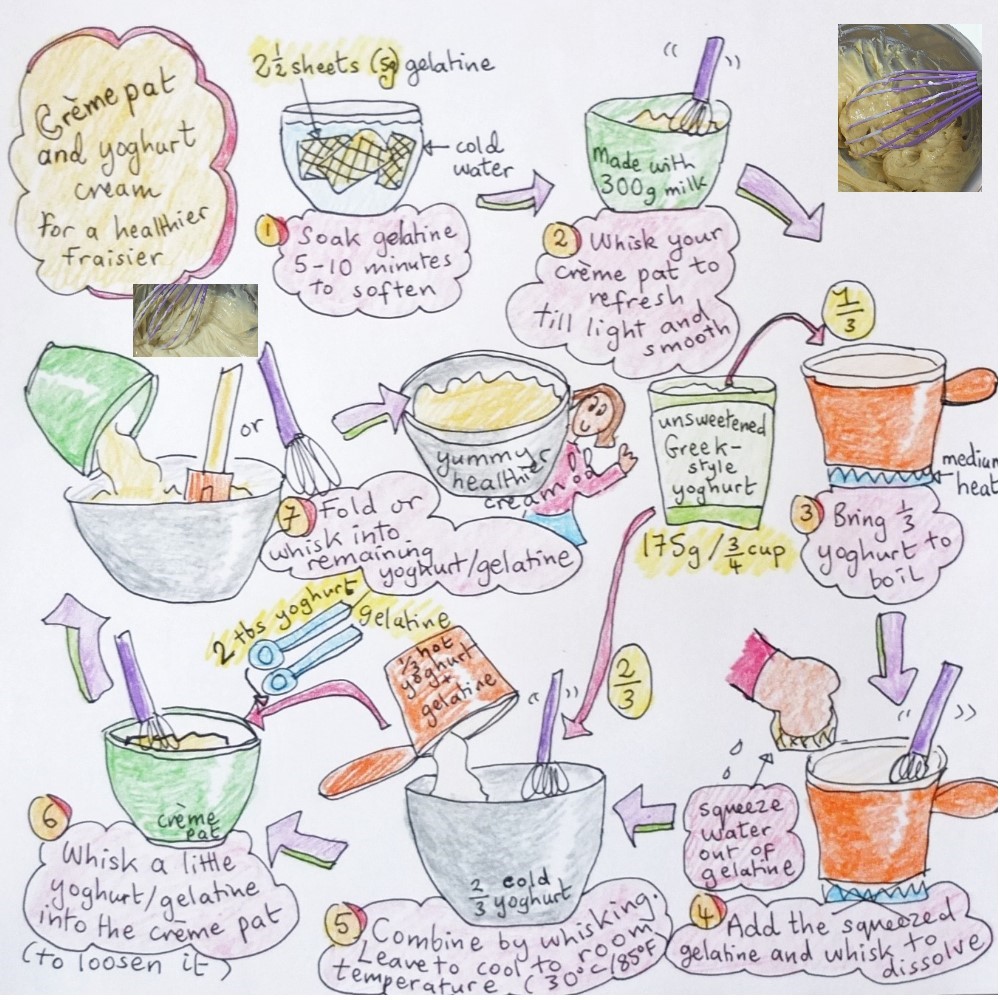
Crème pat and yoghurt cream

- 300g/1 and a quarter cups oatmilk or almond milk (or any kind of milk)
- 1 vanilla pod (split, with the seeds scraped out and also added)
- 3 egg yolks (around 57-60g in total) from medium to large free-range eggs
- 50g/a quarter cup finely ground xylitol (sugar substitute)
- 25g/2 and a half tablespoons cornflour
- a pinch of salt
Option: for more cream in your cake increase the quantities for the pastry cream and greek yoghurt/gelatine by about a fifth or quarter.
Method: please see the instructions on my healthy sugar-free, dairy-free and gluten-free crême patissière recipe page. Cool the pastry cream then add the greek yoghurt and gelatine (see below).
- 175g/three-quarters of a cup natural unsweetened Greek-style yoghurt
- Two and a half sheets (5g) gelatine
- Cover the gelatine sheets in cold water and soak for 5 to 10 minutes to soften.
- Meanwhile take the crème pâtissière out of the fridge and whisk to refresh until light and smooth.
- Put about a third of the Greek yoghurt in a small heavy-based saucepan and bring just to the boil.
- Squeeze the water out of the gelatine and add to the yoghurt. Whisk until it dissolves.
- Pour the yoghurt and gelatine mixture into a bowl with the remaining cold Greek yoghurt and whisk to combine. Let cool to room temperature or about 30°C/85°F.
- Whisk 2 tablespoons of the yoghurt into the pastry cream to loosen it.
- Fold this into the remaining pastry cream. If necessary whisk lightly to combine.

Place in the refrigerator 30 minutes or more to firm up a little.
Kirsch syrup

- 20g/1 tablespoon maple syrup or honey (or sugar)
- 40g/2 tablespoons and a teaspoon water
- 1 and a half tablespoons kirsch cherry liqueur, to taste (alternatively: Grand Marnier, rum or orange juice)
Bring the maple syrup and water just to the boil in a small saucepan. Immediately pour into a small bowl and let cool 15 minutes or more. Stir in the kirsch.
Assembling the Fraisier
When all the elements are ready start assembling.
- 500g/a little over 1lb strawberries, trimmed of their green stem and washed
- Italian meringue: 30g/ml egg white (1 small egg), 20ml water and 60g caster/superfine or granulated sugar Alternative to the meringue: a layer of marzipan/almond paste or cocoa powder sieved in a pattern
- Choose 10 to 12 nice strawberries about the same size to go around the sides. Cut them in half.
- Cut the remaining strawberries in smaller pieces for the middle of the cake.
- Place the cake ring on a cake board or serving plate. Cut out a strip of acetate to fit your ring. Stick a double-backed piece of sellotape near one edge then fit your acetate strip in the ring and stick the two sides together. The strip should fit snugly and not fall out.
- Place one of your sponge circles upside-down on some baking paper or your hand and brush evenly with half your kirsch syrup. Place in the cake ring with the soaked side facing up.
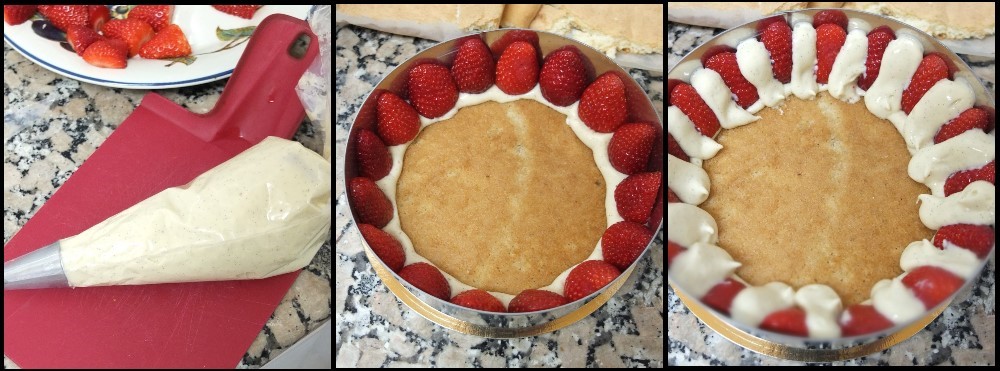
- Fit a disposable piping bag wtih a medium-sized plain nozzle, French size 10 (1 cm diametre). Fill the bag with the pastry cream/yoghurt. Pipe a circle of cream on the sponge around the edge.
- Place the strawberries gently on the circle of cream, so they’re touching each other with the cut side facing outwards.
- Pipe a line of cream between the strawberries.

- Pipe a line of cream on each strawberry (between the first lines). Use a small spatula knife or butter knife to press the cream very gently so it spreads evenly to the sides of the cake.
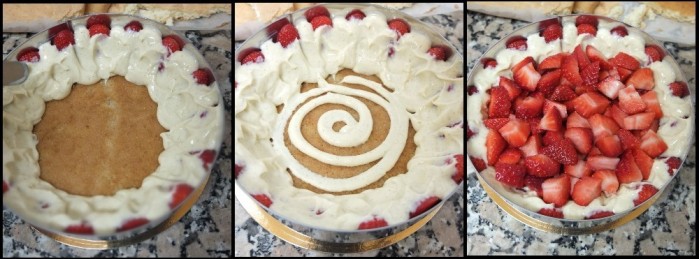
- Now pipe a thin cream swirl on the sponge base.
- Fill the middle of your cake with pieces of strawberry. Do not press down or overfill. Fill to 1 or 2 cm (about half an inch) from the top. (optional: if you made some extra cream or have enough, pipe a thin swirl over your strawberries now but you still need some for a thin layer on top).
- Brush the underside of your second sponge circle with the remaining kirsch syrup and place on top of your strawberries with the soaked side underneath. Position so the sponge is horizontal and about 2 mm below the top of the cake tin. Do not press down (this pushes the cream around the strawberries and ruins your pattern on the side). If the sponge circle is too high you can trim it to make it thinner. Or you can take out some strawberries.
- Pipe the remaining cream over the sponge and spread with a spatula knife from the middle to the sides to have an almost even layer.
- Take your long metal spatula across one last time at an angle to even out this cream layer.

- Place in the freezer 30 minutes or more till the top of your cake is firm.
- Prepare the Italian meringue topping.


Italian meringue – because of the small quantity whisk by hand or with a handmixer (see my Italian meringue page for more details and tips)
- Whisk your egg white to soft peak in a medium-sized bowl.
- In a heavy-based saucepan dissolve the sugar in the water over low-medium heat.
- Increase to medium-high heat and boil to soft-ball stage at 117°C/242°F (check on a sugar thermometre placed in the syrup). Meanwhile whisk your white to almost stiff peak.
- Immediately pour your syrup over the egg white in a steady stream while whisking at the same time until you have a smooth and shiny meringue.
- Continue to whisk until the meringue is cool and the bottom of the bowl is cold when you touch it with your fingers. You should have stiff shiny peaks.
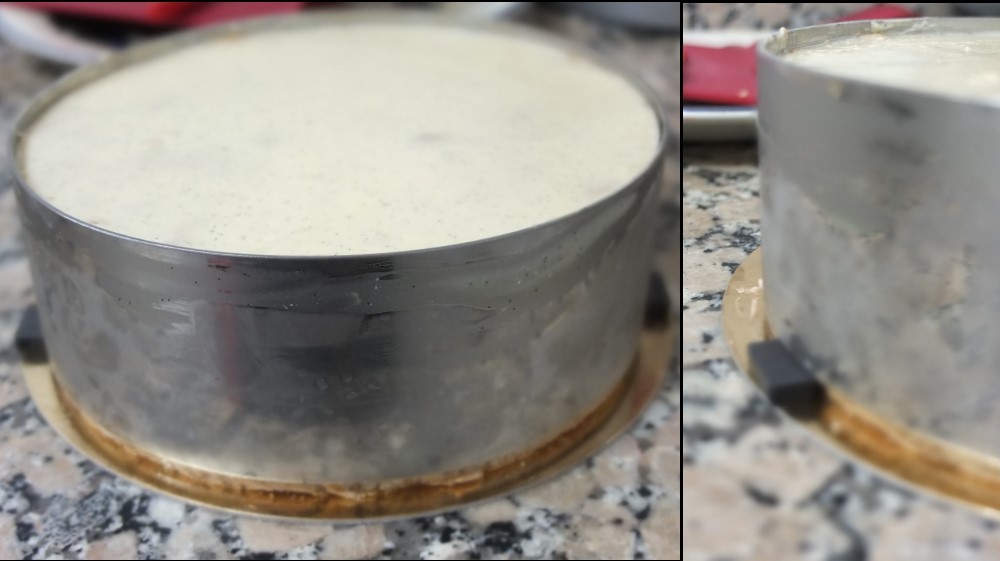
- Take your cake out of the freezer and raise up your cake tin by sliding it up and placing kitchen magnets or little pieces of card at the bottom of the tin – one on each side. They should be 4 to 5 mm high.

- Spoon the Italian meringue on top of your cake and spread from the middle outwards to make an almost even layer.
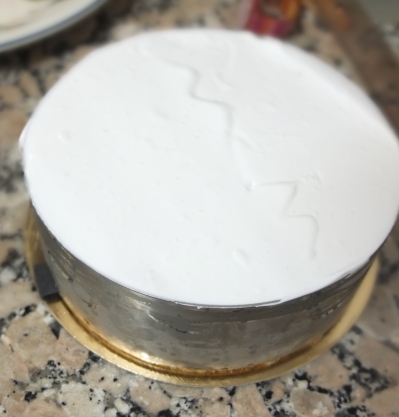
- Then take your long spatula once across at an angle to smooth the top evenly.
- Use a blowtorch to brown the top. If you don’t have one or it’s run out of gas (like mine!) then dust with gold powder and some sprinkles. You can also decorate with strawberries.
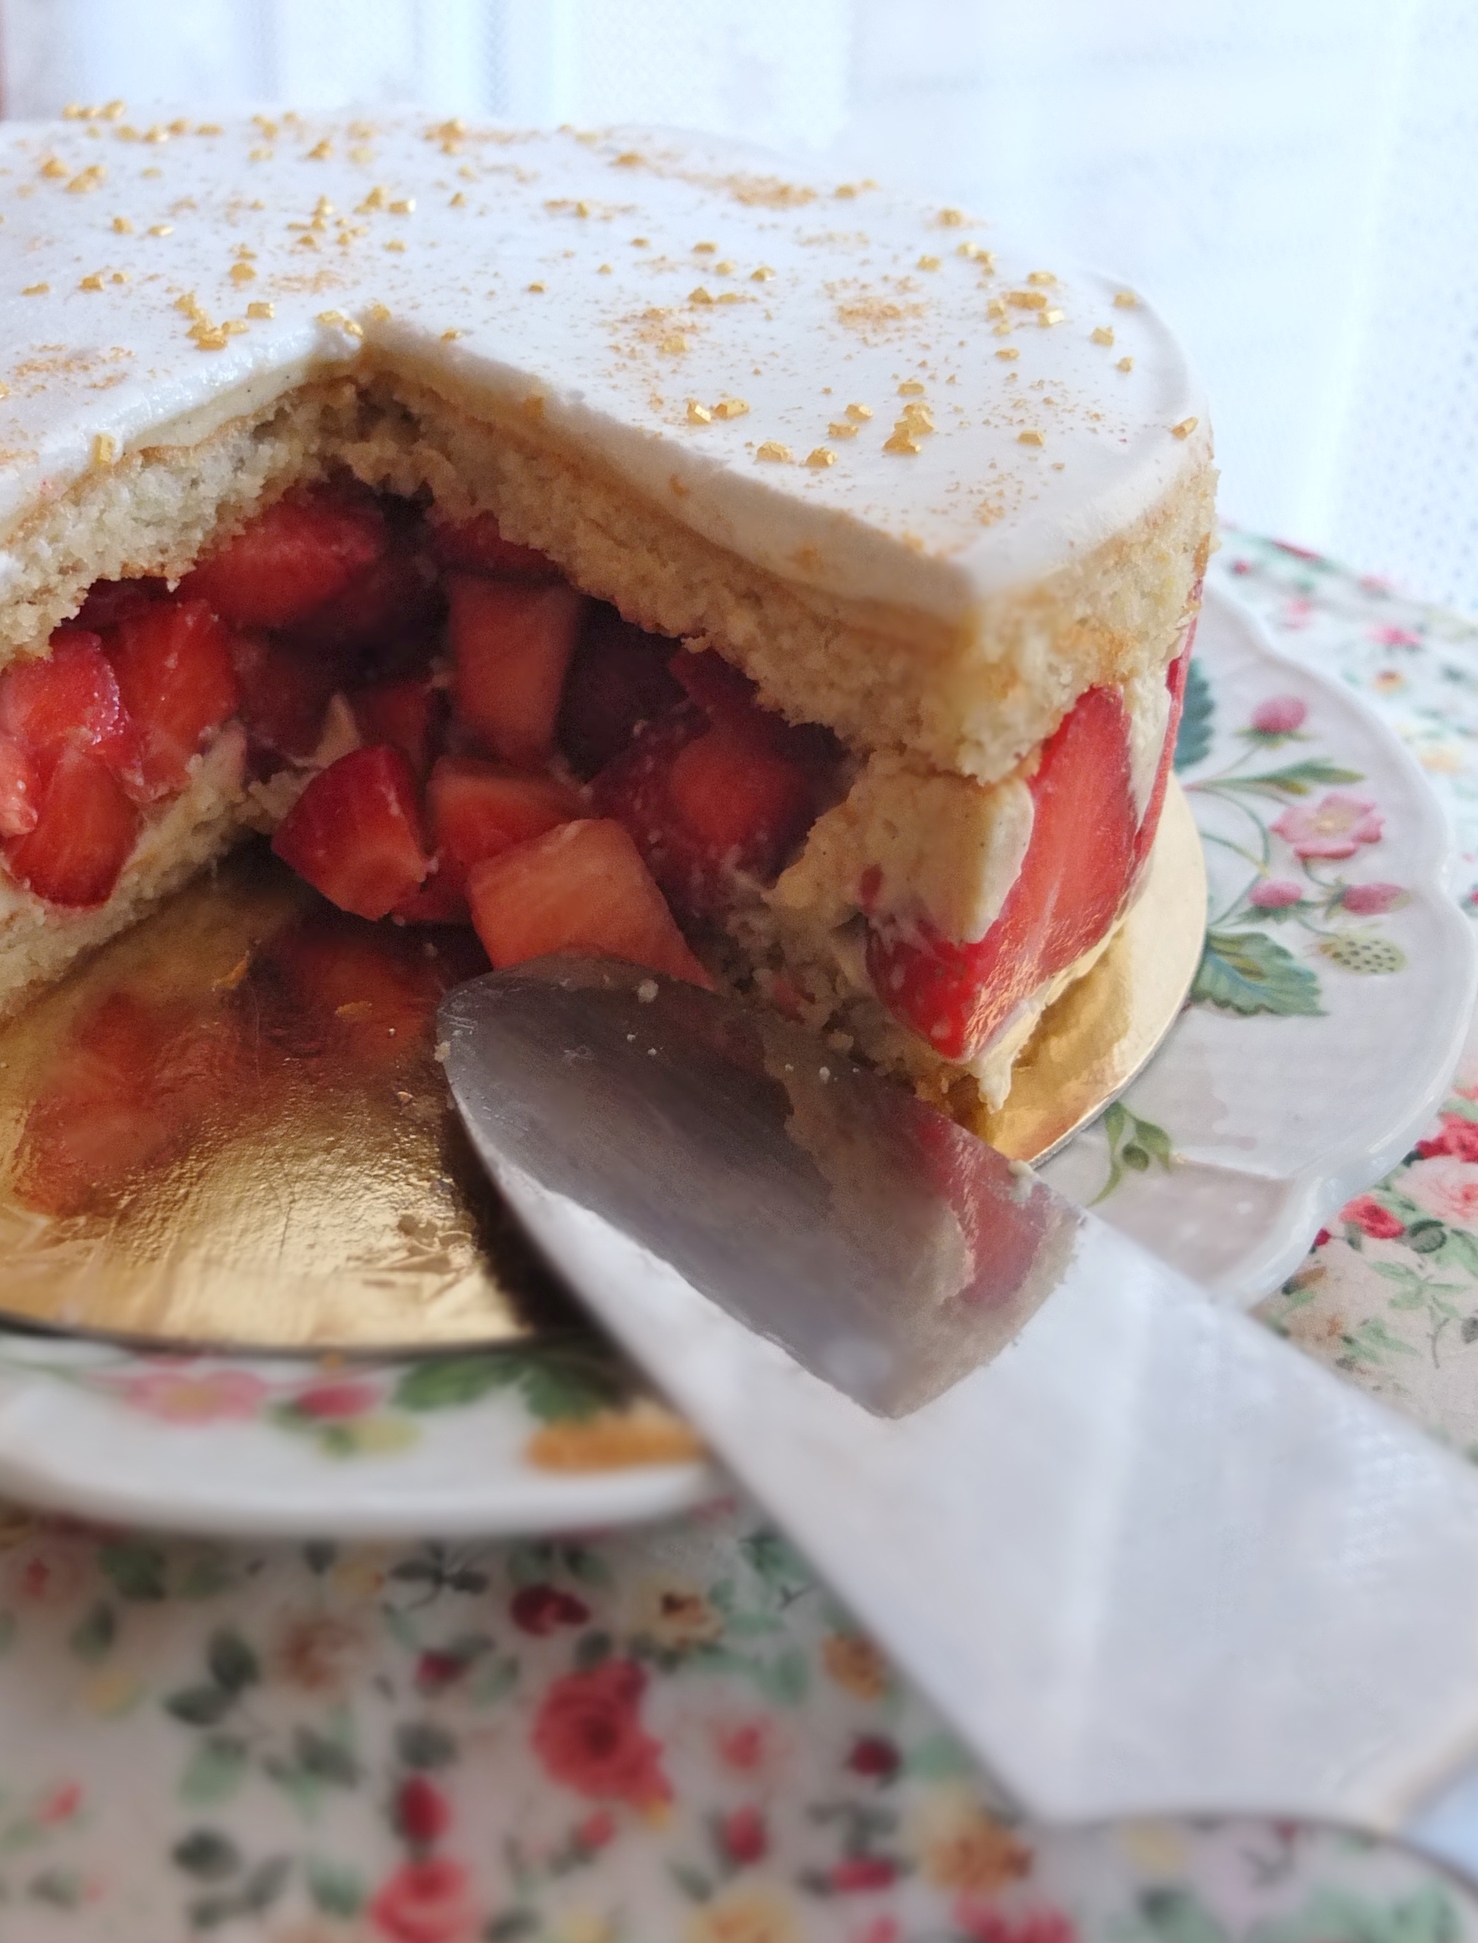
- Carefully lift up the cake ring to remove but leave the plastic acetate strip. Don’t worry if it looks like the pastry cream has covered some of the strawberries. This happened to me but when I took the strip off most of the overlapping pastry cream went with it and the cake looked much better!
- Store in the fridge a minimum 4 hours or overnight to set well. Then take off the acetate strip. Clean up the strawberries a little, wiping or scraping off excess cream. Serve.


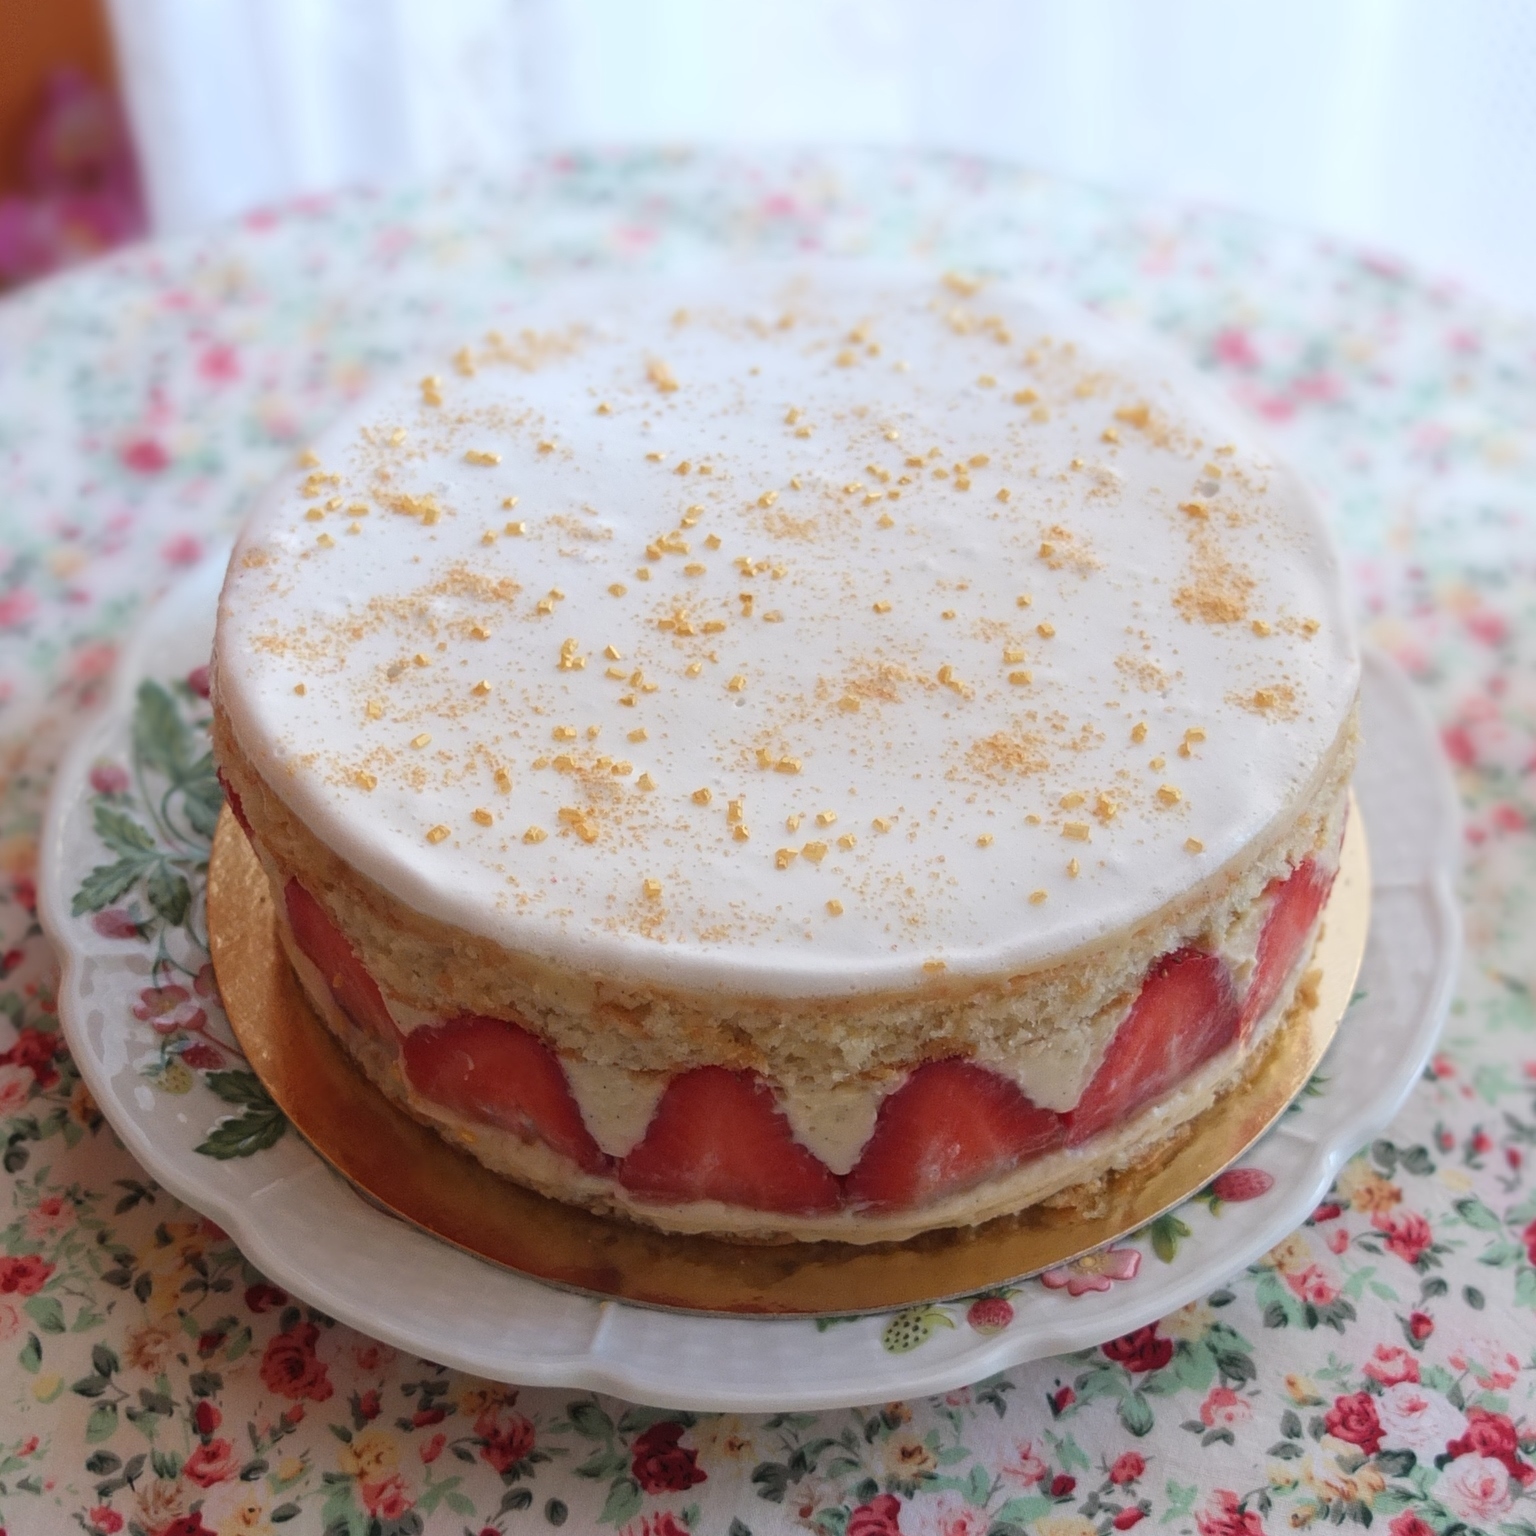
Healthier Fraisier (strawberry cake)
Well, there’s the recipe as some of you requested. You can adapt it to make a more classic Fraisier but this lighter healthier version is delicious with so many strawberries. Trust me, the traditional crème mousseline is a bit too buttery and none of us on the course really enjoyed it.
Don’t be put off by all the steps. Remember my recipes usually look long because of all the detail and suggestions. So if you’ve always wanted to make a Fraisier go for it! This wonderful cake’s really worth it and I’ll be making it again… and again. Plus most of it’s healthy and guilt-free! Woohoo! 🙂
Eating and storing
The cake’s texture is great the same day but it will have more flavour the next day. Try it and see! Store in the refrigerator in an airtight container and eat within 3 days. On Day 4 the Italian meringue starts deteriorating but the cake’s still delicious. Be very careful and precise when cutting and serving the cake to have nice slices.

Healthier Fraisier (strawberry cake)
Sharing
I’m sharing this cake with this month’s Perfecting Patisserie@bakingqueen74. It just about fits in with this month’s Valentine theme because strawberries are red and kind of heart-shaped?
Hope you’ve enjoyed this healthier Fraisier strawberry cake. Thanks for coming by sweet reader and I wish you a lovely fruitful or fruity week ahead! Happy baking and eating! 🙂 x

Just beautiful! 👍👍👍👍👍
LikeLiked by 1 person
Thank you Natascha! Been looking at your amazing cakes recently! 🙂
LikeLiked by 1 person
Thank you ❤❤❤❤
LikeLiked by 1 person
That looks so good
LikeLiked by 1 person
Thank you! 🙂
LikeLike
It’s just gorgeous to look at! I’ll take a slice for me and #1 Grandson who sitting on my lap saying “let’s get some!”
LikeLiked by 1 person
Thank you Deborah! Virtual slices being sent to you and Grandson no.1 of course – I always love and appreciate his comments on cakes and yours too. 🙂
LikeLiked by 1 person
Goodness gracious, Lili…this looks FABulous! If I were to make this for my Mr., I do believe I could get the kitchen makeover I’ve been craving. Outstanding!!
LikeLiked by 1 person
Thank you so much Nancy! So happy you like it and I hope your Mr gets you your kitchen makeover soon! 🙂
LikeLiked by 1 person
Lol…I’m not holding my breath!
LikeLiked by 1 person
🙂
LikeLike
Reblogged this on .
LikeLiked by 1 person
Thank you for the reblog! 🙂
LikeLiked by 1 person
Thank you for the yammy post.
🙂
LikeLiked by 1 person
holy cow, this looks beautiful!! I am craving something strawberry-y lately, however right now they are $8/box here in my area so I might have to wait a little longer. This looks fantastic, I’d love to make this. Maybe sooner than later 😀
LikeLiked by 1 person
🙂 Love your enthusiasm – thank you so much and very happy you like this cake. Wonderful if you make it! Sooner is always a good time for cakes! 🙂
LikeLiked by 1 person
Absolutely STUNNING.
LikeLiked by 1 person
Thanks so much Josette! 🙂
LikeLiked by 1 person
Ooh, this looks so delicious! Full of so many strawberries and without sugar in the cake, I think your healthy version of a fraisier is a great hit! I’d love to try making one one day (full fat version though I expect!). Thanks for sending this lovely recipe over to Perfecting Patisserie! The roundup and new linky is now live 🙂
LikeLiked by 1 person
Thank you Lucy! Glad you like the cake and don’t worry, it’s very easy to make it full-fat or however you prefer. Instead of adding yoghurt you could add whipped cream. And thanks for hosting Perfecting Patisserie again – will check out the roundup! 🙂
LikeLike
Pingback: Weeks 50 – 52 of cakes and a Guinness red velvet cake with maple frosting recipe! Is it good for you? :) | lili's cakes