So you have amazing cheese and red wine but you’re trying to cut down on other naughty snacks. Crackers are so addictive and buying a packet to eat slowly never quite works out. Yes, we’ve all tried willpower but apparently naughty salt’s to blame – according to scientific research it makes you keep eating and eating! Ahem. Anyway, there isn’t too much of it in these crackers and they’re perfect for fairly guilt-free munching, made with glutenfree flour (or plain all-purpose), butter (optionally vegan) and vegetable oil. They’re flavoured with a little sweet paprika. And salt – don’t forget the salt! They’re light, buttery and somehow don’t bring on that sleepy heaviness sometimes associated with cracker binges! Yay! I confess the whole first batch was eaten in one evening in the name of taste-testing (just making sure they were yummy – yes, very). You need a bowl, cutter or glass and baking tray. No fancy equipment (surprising I know). Yet these are amongst my favourite nibbles: ritz-style crackers aka posh petits biscuits salés apéro for a cheese and wine tasting, party or netflix snack (in between cakes like those from Fontainebleau that I’ll show you later). They’re a yummy addictive treat to go crackers for, they really take the biscuit! Okay, no more corny puns… no more cracking cheesy jokes. Tee hee. 🙂

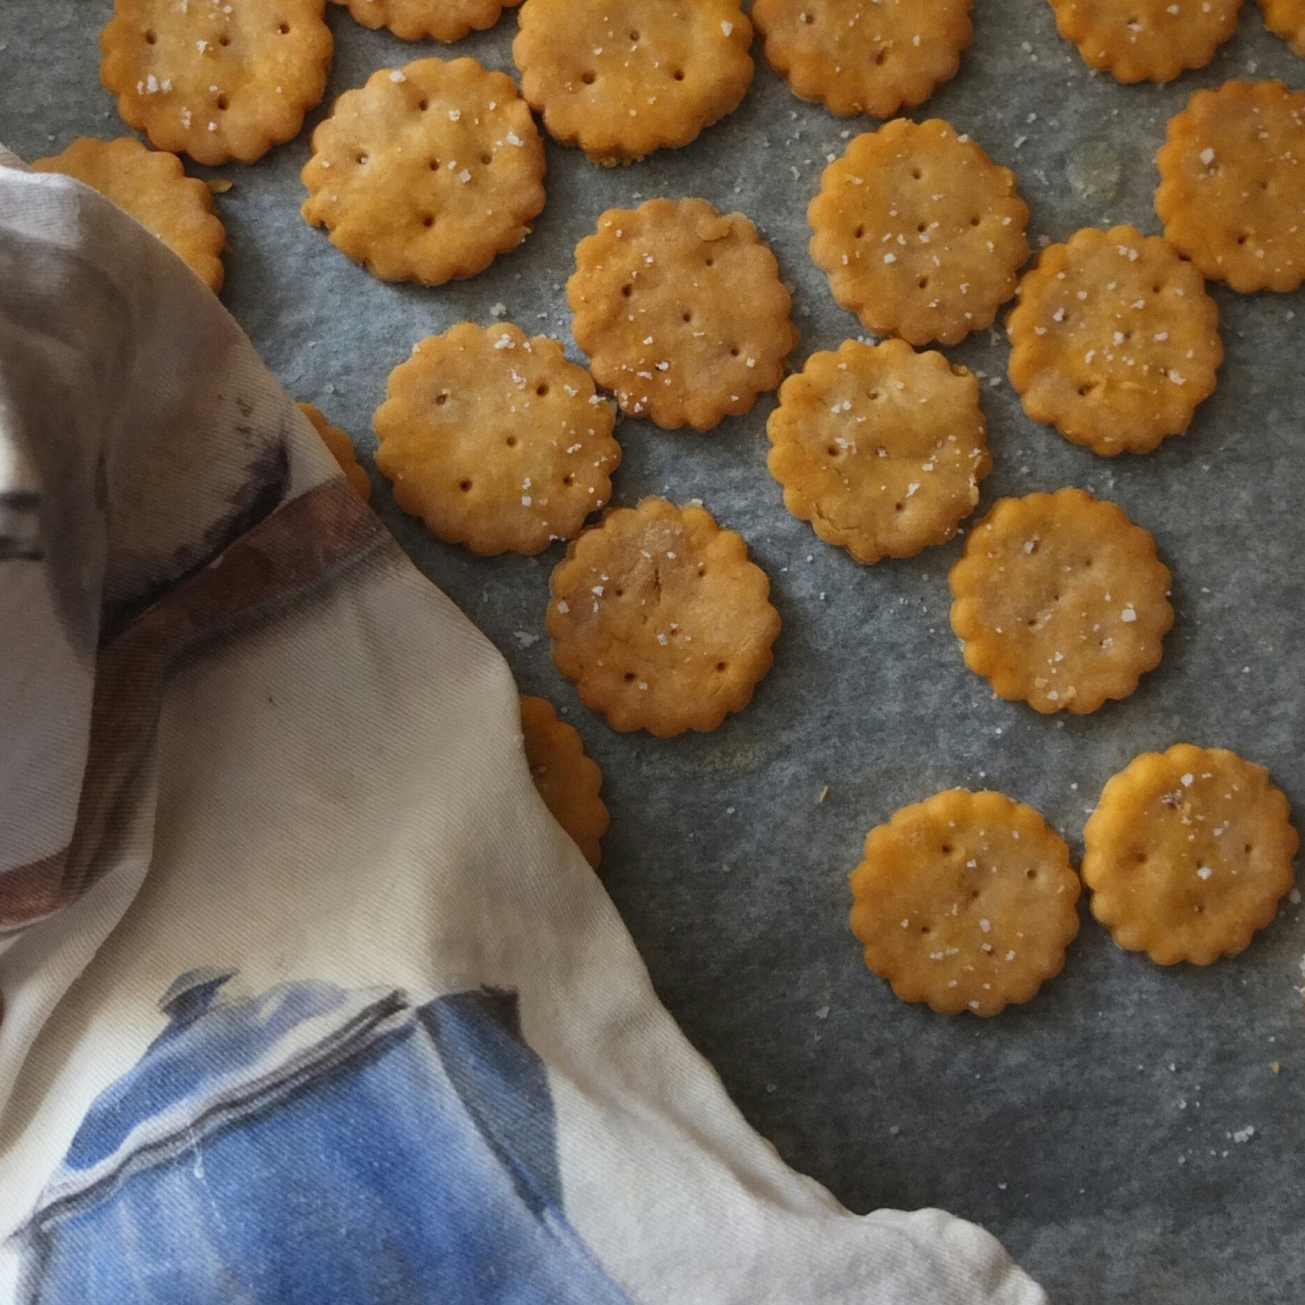
Homemade ritz-style crackers
Glutenfree flours – why and which?
I’m not celiac but might be sensitive to gluten. Refined flour in bread and pasties seems to make me sleepy even on climbing trips. Spelt flour’s better but still a bit heavy so I tried glutenfree options and (‘eureka!!’) felt lighter and healthier! But which kind gives the best results?
My own blends were ‘passable’ (pretty so-so) but it’s not practical to store a variety of 5 or 6 flours in humid barcelona where their shelf life is 2 to 4 weeks. So I tried shop-bought ready-blended; the one in the local supermarket produced pale and stodgy results like plaster of paris so after reading online reviews I bought Doves Farm plain and self-raising gf flours. Perfect! I prefer the self-raising – the xantham gum and raising agents seem to promote a nice texture so I’m also using it for pastry where baking powder’s called for. The blend is: rice, potato, tapioca, maize and buckwheat flours. And it works for all kinds of sponges and biscuits, like these crackers!
The experiments
Paprika
You can use a teaspoon of standard sweet paprika for yummy slightly orange crackers!

Homemade ritz-style crackers
Spicy sweet paprika (like the Spanish La Vera brand) will blow your tastebuds with wonderful flavour but a half teaspoon is enough. Adapt quantities to your tastebuds and type of paprika. My next batch will be with my new smoked medium spicy paprika! Yes, I now have an impressive paprika collection! 🙂 All suggestions for baking with paprika are welcomed.

Vegan de la Vera homemade ritz-style crackers, glutenfree
The vegan version
The La Vera crackers were also vegan. My vegan olive oil butter’s soft so I creamed it then stirred in the flour (no grating or rubbing in). The crackers were nice but not as light or buttery – you could find firm vegan butter and try the rubbing in method.
Flakiness
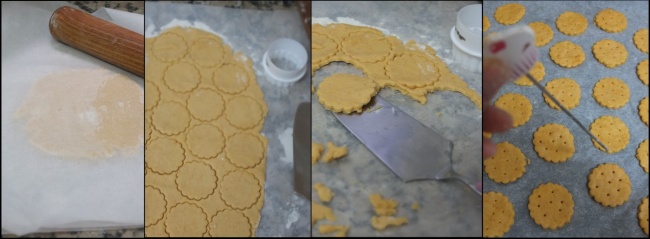
For slightly flaky lighter biscuits I eventually replaced some flour with cornflour and made sure they didn’t overbake and dry out too much. If they’re 2 to 3 mm they can puff a little more. Thinner ones like the ones on the left in the photo are crisper especially if baked till browner.
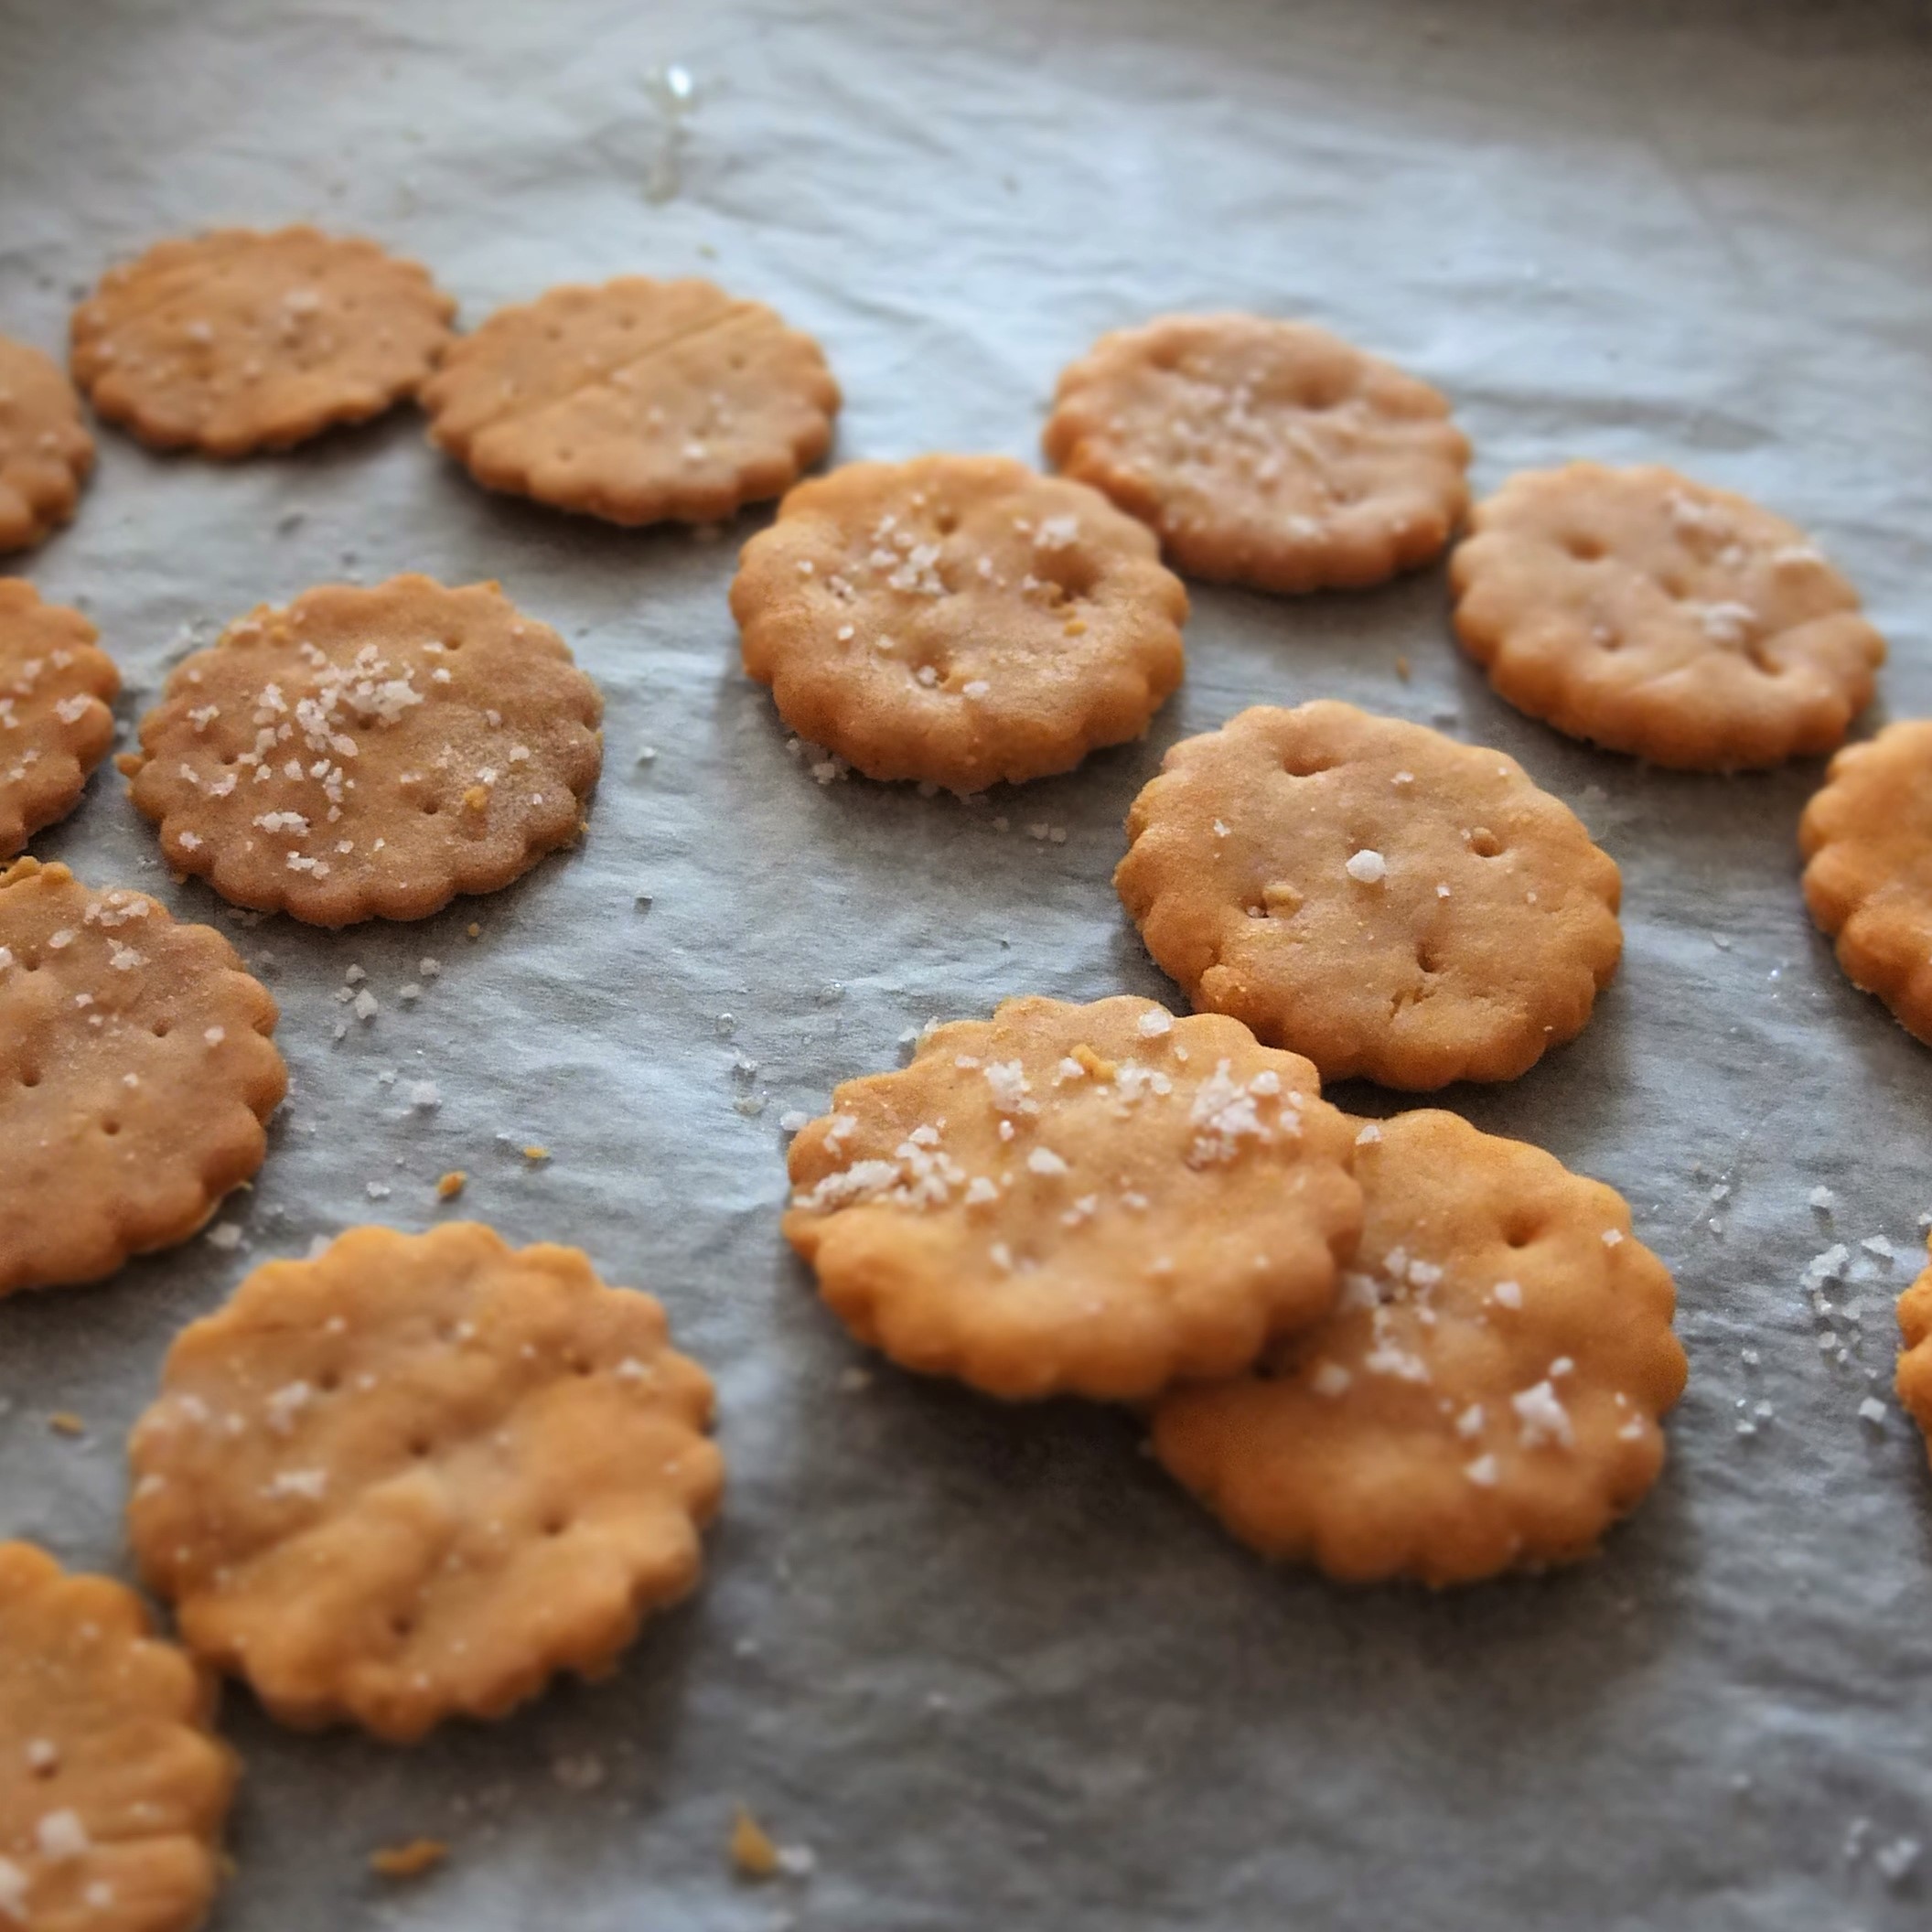
Homemade ritz-style crackers
Adapting
Apparently glutenfree flours soak in more liquid so with standard all-purpose flour you may need less water. With another brand of gf flour or your own blend you could also need more or less water than stated. So please be flexible. The good news is I varied the amounts of water each time and the crackers were always yummy. The important thing is not adding too much flour. My best crackers came from a softer dough that was a slight struggle to roll out and move to the baking tray (it’ll be easier in winter when the butter stays firmer in my kitchen).
THE RECIPE
I adapted the Ritz-style gluten free crackers found on the gluten free on a shoestring website. In a cool kitchen you can use their method of grating butter into the flour. Or mix everything in a food processor but quickly, leaving very little lumps of butter which seem to promote flakiness. I like the ‘rubbing in’ method (see the little video). Work the pastry lightly to avoid hard biscuits.
Timing
Make the dough: 10-15 mins work; resting about 2 hours in the fridge; Roll out and cut: 10-15 mins work; resting 1 hour in the fridge (optional). Bake: 9-12 mins.
Preparation
- Place the mineral water in the fridge to chill
- Line 2 large baking trays (30cmx40cm/12inx16in) with greaseproof baking paper
- Find a fluted cutter (or glass), diametre 4.4cm/1 and 3/4in
Ingredients
Dry ingredients
- 210g/1 and 3/4 cups gluten-free flour (I use Doves Farm self-raising gf) or plain all-purpose flour
- 35g/4 tablespoons cornflour (cornstarch) like Maizena
- 1 and 1/2 tsp (6g) gluten-free baking powder
- 1/2 to 3/4 to 1 tsp (2-3g) smoked sweet paprika (options: not smoked or spicy)
- 1/2 tsp (3g) fine sea salt
- 1/4 tsp (2g) xantham gum, optional
- 1/4 teaspoon (1g) Stevia – or 1 tsp sugar
Fats and liquids
- 84g/1/3 cup (3/4 stick) cold unsalted butter, cut into small cubes
- 21g/4 and 1/2 tsp vegetable oil – I used 11g virgin olive oil (2 and 1/4 tsp) and 10g avocado oil (2 and 1/4 tsp)
- 60ml/g to 90ml/g (1/4 cup + 1 or 2 tsp) cold mineral water. 68g worked well with my flour and humid Barcelona atmosphere.
Method
- Whisk the dry ingredients together in a medium-sized bowl.
- Rub in the butter with the tips of your fingers until the mixture is the texture of fine breadcrumbs.
- Stir in the vegetable oil(s) with a rubber spatula until just combined. Don’t overwork.
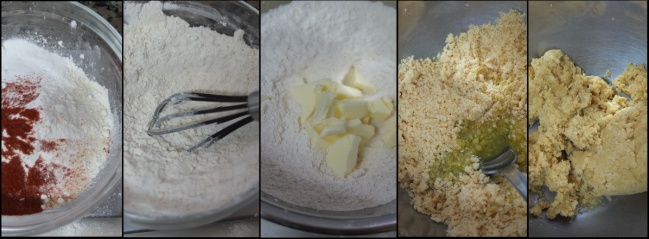
- Stir in 1/4 cup cold water. The mixture will look pasty and glooey.
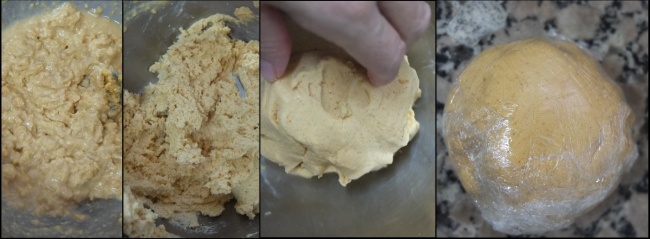
- Stir a little more until the mixture comes together in a soft ball of dough. Knead lightly. Add more water if needed. Don’t overwork. Resist adding more flour – you don’t want a very dry dough!
- Wrap the ball of dough tightly in reusable plastic bag.
- Chill dough 2 hours or more in fridge until firm.
- 2 HOURS OR MORE LATER. Cut dough in half, place one half back in reusable plastic bag and return to fridge.
- Leave other half at room temperature until a firm consistency that can be rolled out between 2 sheets of lightly floured baking paper.
- If the pastry is sticky peel off the paper on top, sprinkle a little flour on the pastry then put the paper back on. Turn over and repeat on the other side.
- Roll the pastry thinner again. If necessary repeat step 9 regularly so the dough doesn’t stick to the paper.
- Roll until the pastry is 2.5mm to 3mm thick. Rolling thinner gives you crispier crackers.
- Use the cutter or glass to cut out as many crackers as possible. With a cake server or spatula carefully lift the crackers off the counter and place on the baking tray, with a little space between (they don’t really expand).
- Shape leftover pastry in a ball and roll out to make more crackers. Repeat till used up.
- Make 6 or 7 holes in each cracker with a skewer or cake tester.
- Optionally chill in fridge 30 mins to 1 hour before baking.
- Repeat steps 9 to 15 to fill up 2nd baking tray.
- When almost ready to bake preheat oven to 170°C/340°F (fan) or 190°C/375°F (static oven).
- Bake 9 – 12 minutes (depending on the thickness of your crackers and the dough). They should just start to be light golden. When almost ready melt the butter in a small saucepan.
- As soon as the crackers are out brush with melted butter and sprinkle with fine sea salt or fleur de sel. Leave on the tray to continue crisping.


Ritz-style crackers
Get the cheese and wine. Test a few crackers. Try not to eat them all. 🙂
Storing
They keep in a sealed jar or airtight tupperware up to a week or two (if hidden in some remote location).
Fontainebleau cakes and boulders
Still here in Paris with mum, gaining inspiration from the Michalak all-chocolate and autumn fruit baking courses I went on and all the wonderful cakes we’re ‘testing’ from French pâtisseries. We’re drinking detox herbal tea too. Ahem.
We just came back from a 2-day trip at Fontainebleau, 40 minutes from Paris on the train. We could easily have stayed longer. The famous castle and royal grounds are beautiful.

This is perhaps the best (and only) surreal photo I’ve ever taken!

Then there’s the amazing Fontainebleau forest where you can cycle and boulder on small rocks. We cycled over 30 kilometres in 4 hours, getting lost then back on track thanks to our detailed map and the names of forest ‘streets’ and ‘junctions’ stuck on trees! My legs still ache a little but it was great fun.
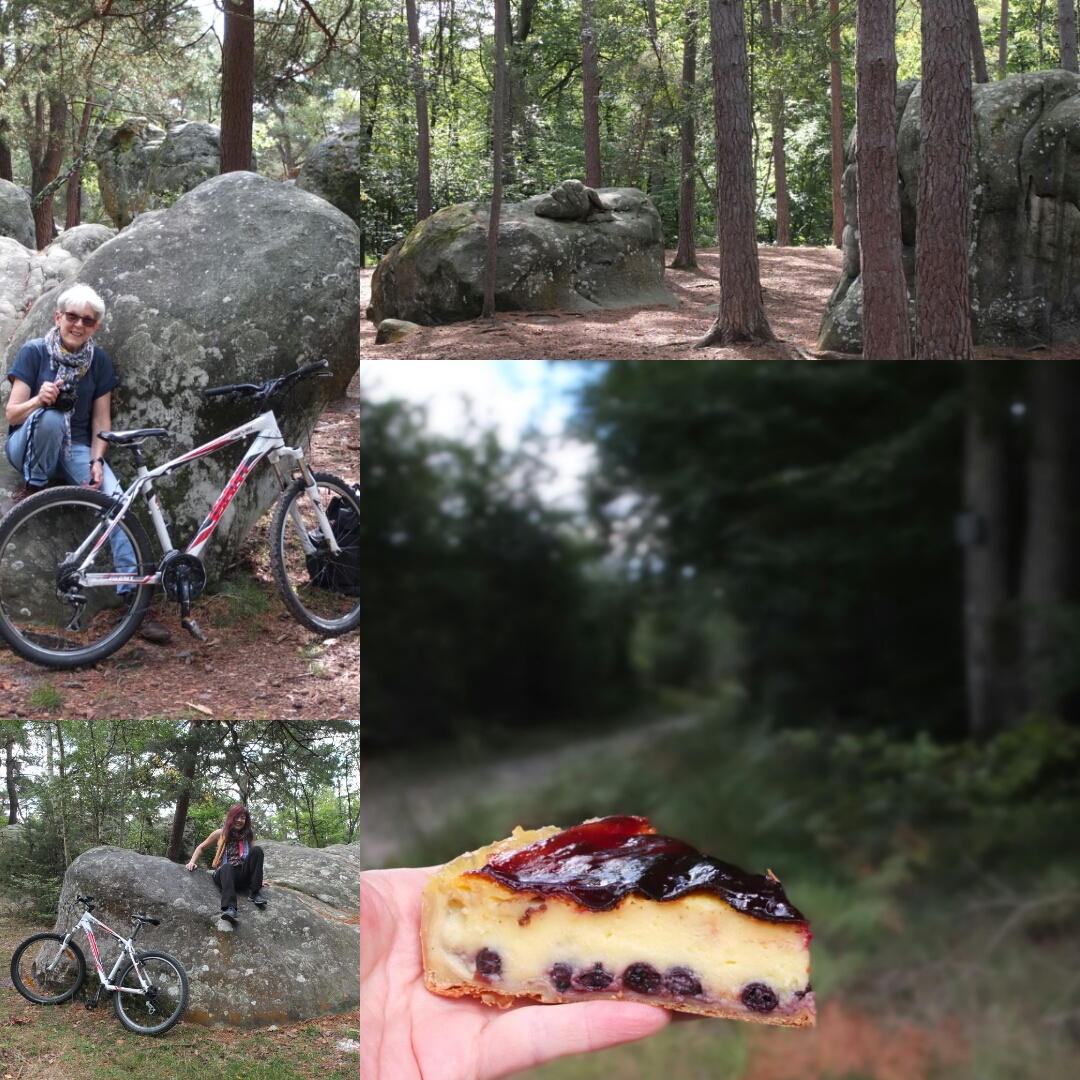
Notice my beloved slice of flan de cassis (blackcurrant flan) that kept me going. Flans are delicious and creamy yet solid enough to take on trips! 🙂 Found all over France, they originated in Paris. One day I’m going to make it. This one’s from Frederic Cassel, one of our favourite pâtisseries and a major reason for our stay in Fontainebleau. Call us crazy but look!
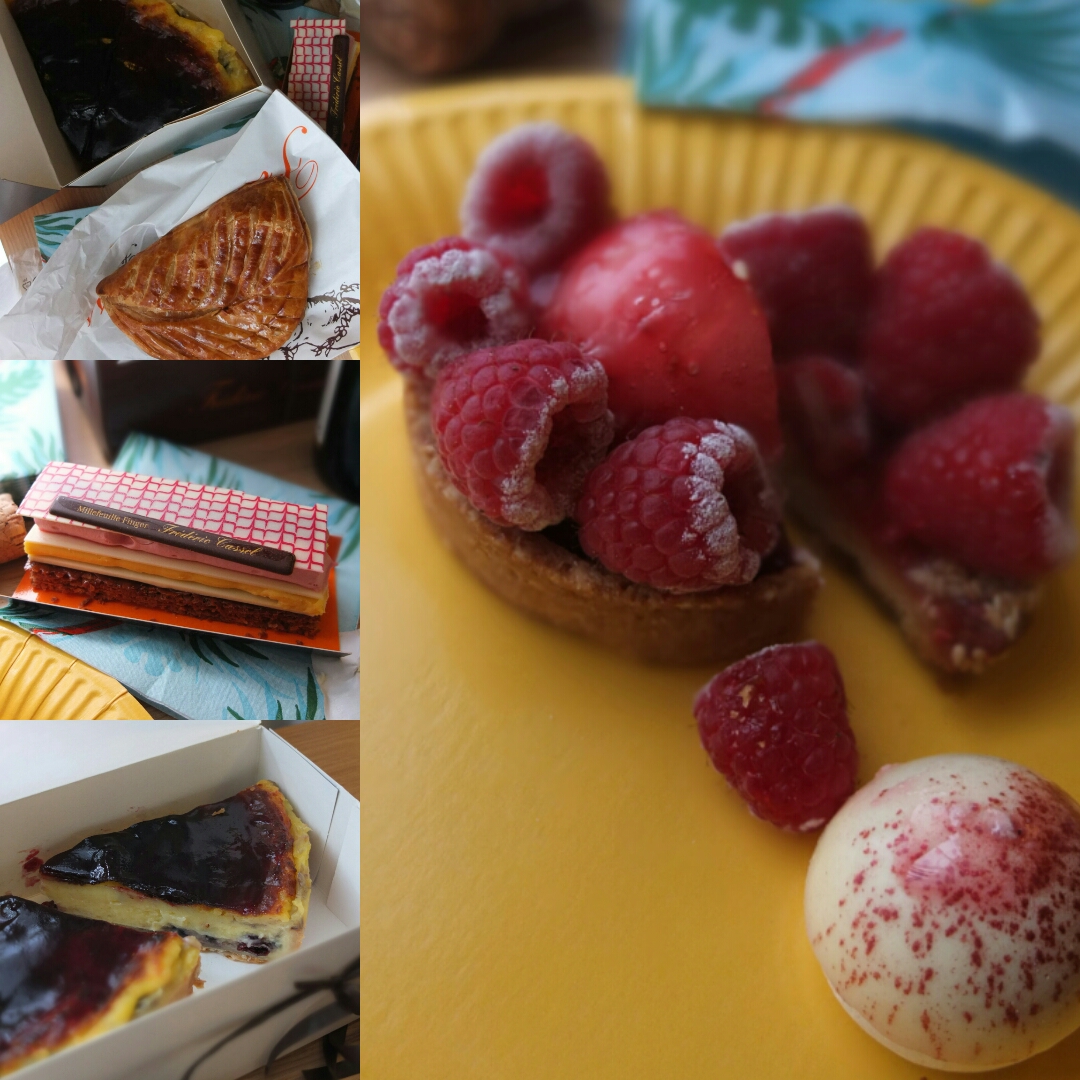
Yum yum. The light raspberry tarts are on sablé shortbread with sesame seeds. The millefeuille finger and white chocolate balls are absolutely delicious with cream and raspberry filling. And the simple chausson aux pommes (apple turnover) remains a firm favourite. Some reviewers online suggest Cassel’s creations are expensive but at around 5 euros they’re fine when you see top pâtissiers charging 6 or 7 euros a cake in Paris. Plus Cassel’s delicious treats are totally worth it. And no we’re not related. 🙂
Which cake would you eat or make? And while we dream of cakes can I offer you some simple glutenfree ritz-style crackers or petits biscuits salés apéro? Delicious with cheese: comté, gruyère, cheddar… I’ll rustle up a batch when I get home to go with my new stock of French cheese!

Ritz-style crackers
Or eat them solo…

Have a homemade ritz-style cracker!
Well must go … pâtisseries to visit, cakes to eat. Lol. Farewell for now dear reader and have a cracking week with lots of happy baking and eating! 🙂 Lili x
P.S. More Paris cake news and photos coming soon(ish)!! A bientôt les amis!

The recipe looks good.
Thank you for sharing recipe…
Also, please visit for more such delicious and fingerlicking recipes at sabkimaggi.com follow us as more yummylicious recipes are on its way.
LikeLiked by 1 person
Thank you for visiting and happy you like the recipe. Will check out your site too! 🙂
LikeLike
Loved your yummy recipe……will taste it 🙂
LikeLiked by 1 person
Thank you! That’s great! 🙂
LikeLiked by 1 person
Looks fantastic and so yummy!
LikeLiked by 1 person
Thank you! 🙂
LikeLiked by 1 person
This is looking so good…Awesome share !!
LikeLiked by 1 person
Thank you! 😍 Happy you like them! 🙂
LikeLiked by 1 person
Those crackers are really tempting !
LikeLiked by 1 person
Nice to know, thank you! 🙂
LikeLiked by 1 person
I’d love a fresh batch of those crackers right about now 😀
LikeLiked by 1 person
😄Me too! Thanks for your lovely cheerful visit and hope you get to munch on some crackers soon! 🙂
LikeLiked by 1 person
I’m in love with your blog I just want to try everything 🤤
LikeLiked by 1 person
Oh I’m so happy you feel like making everything. Makes my day! Thank you for your lovely words! 🙂
LikeLiked by 1 person