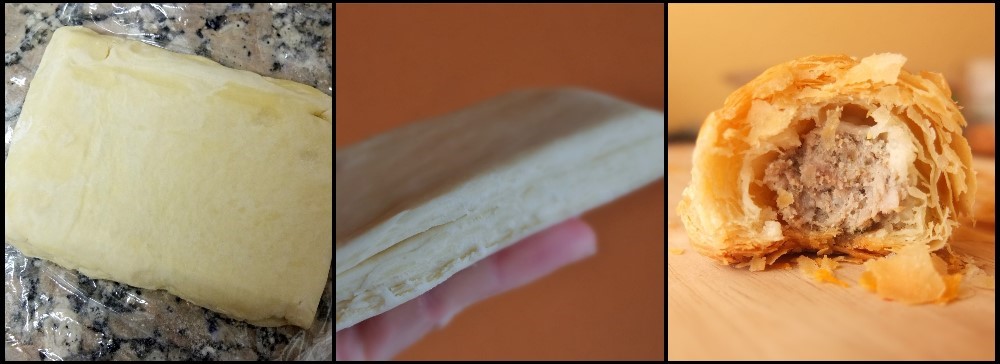
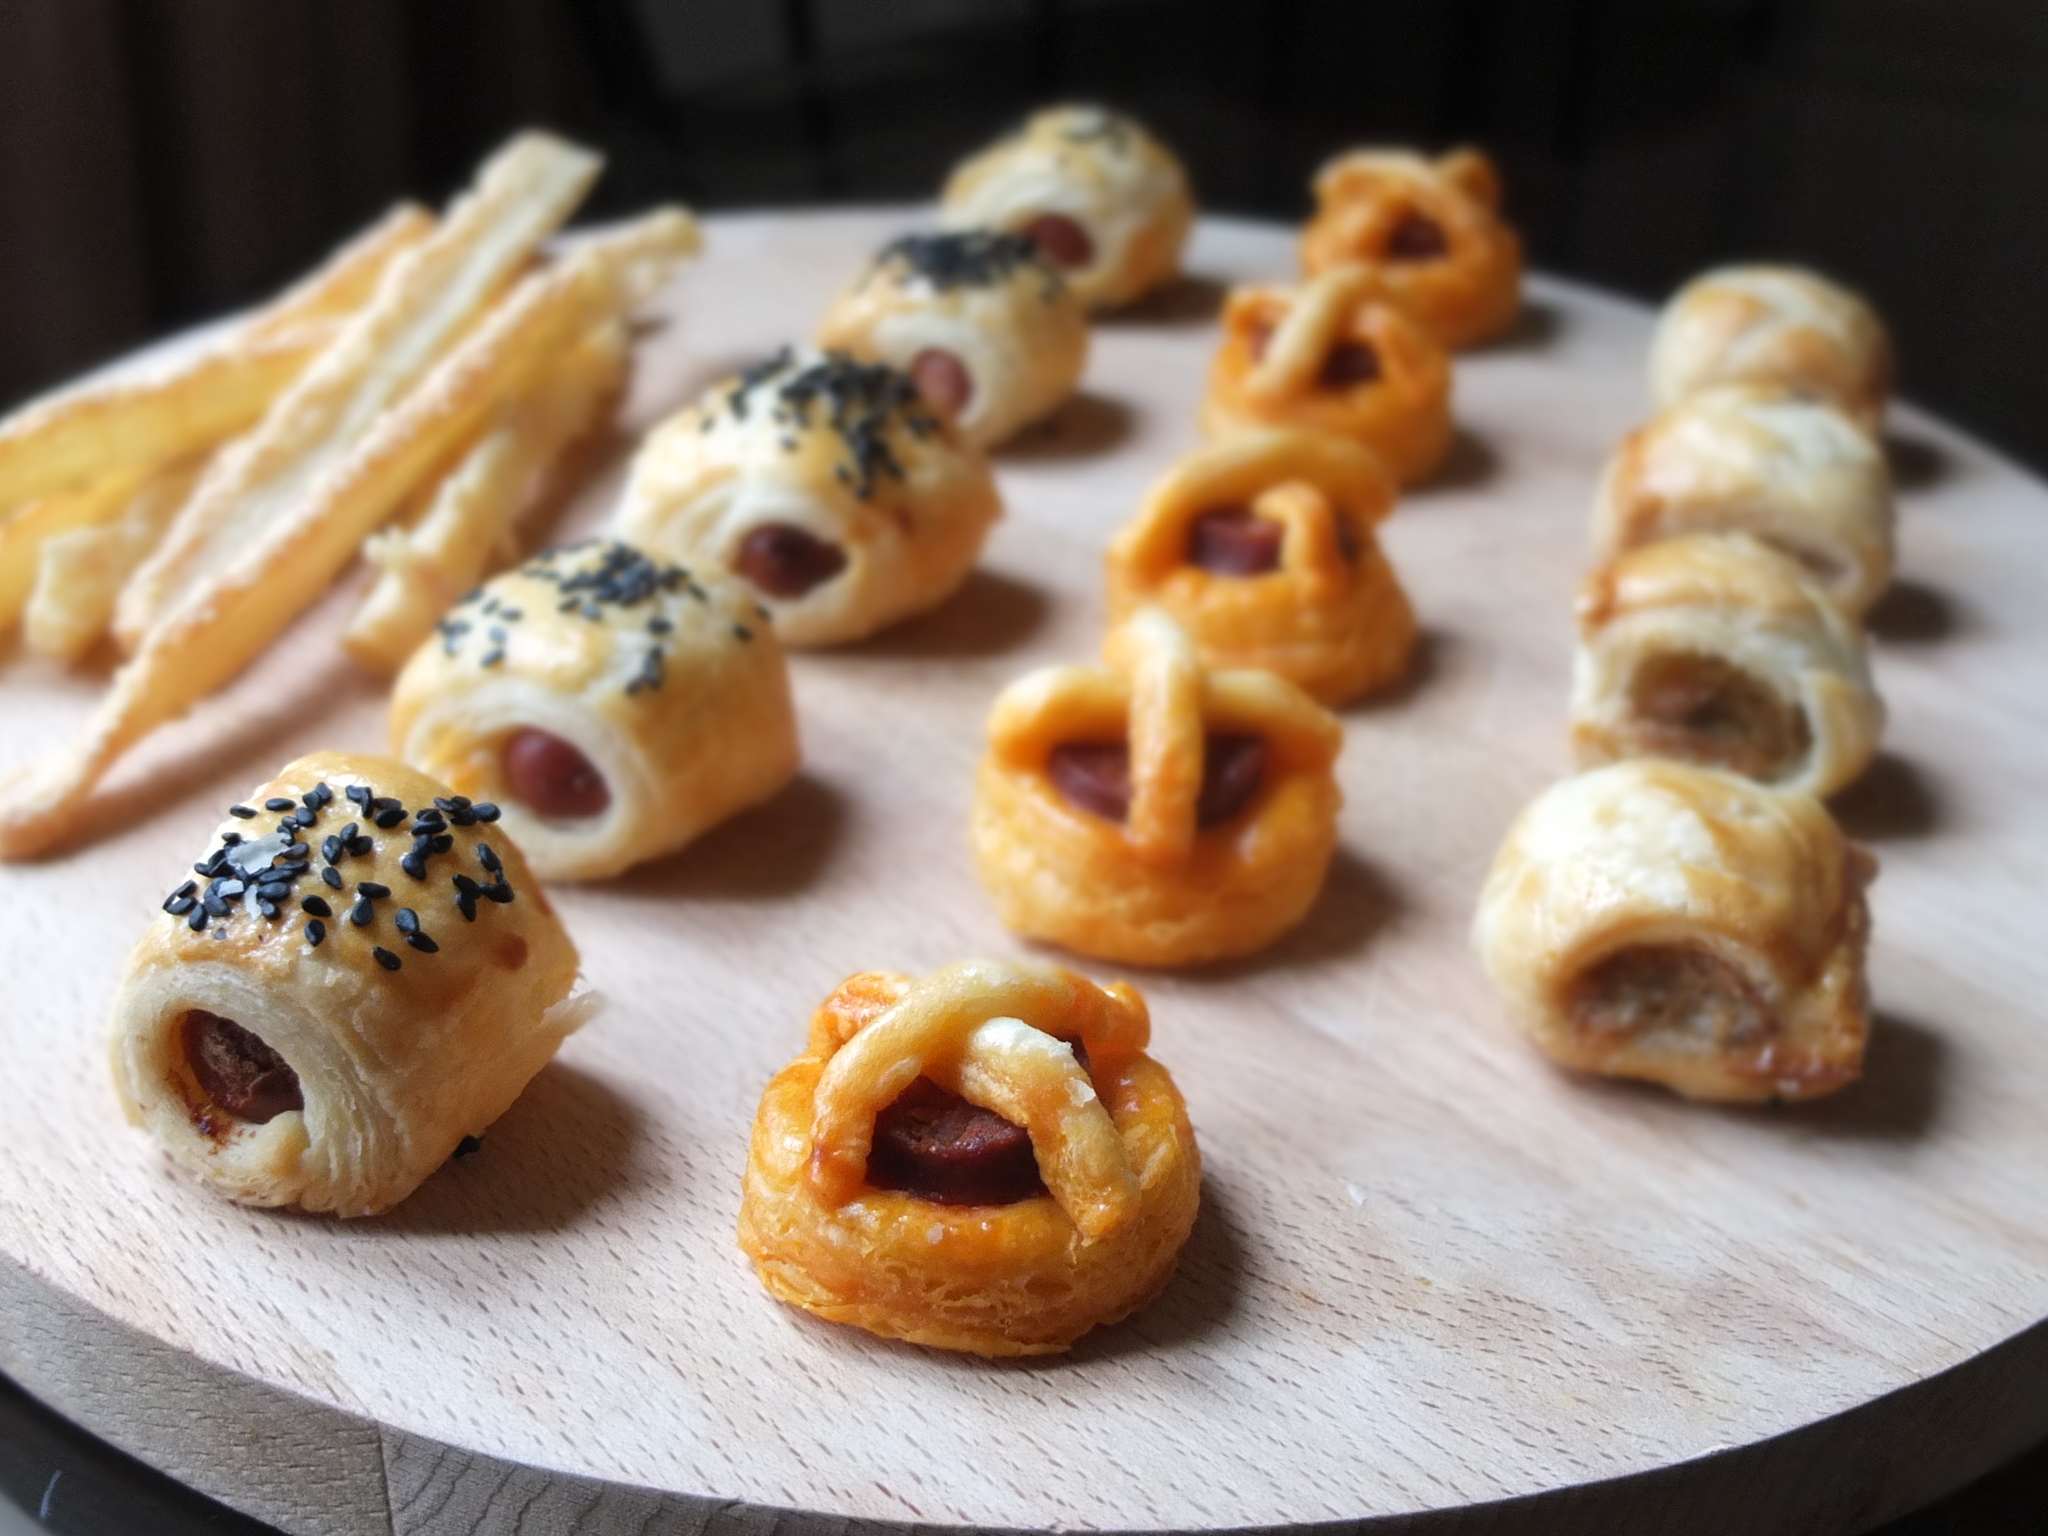
Inverted puff pastry is lovely even when not perfect. It’s quite forgiving and has wonderful flaky layers that are light and not greasy or dripping butter as sometimes happens with standard puff pastry. Inverted puff pastry is being increasingly recommended by pâtissiers like Hermé and Mercotte, the French blogger and Meilleur Pâtissier presenter. And now I’ve discovered how good it is, there’s no going back! Oh, it doesn’t take that long and is so much better than the shop-bought stuff. Recently I’ve also been making it with fine white spelt flour – it puffs just a little less but is so tasty! And with the quantities below you’ll have enough puff pastry to bake three or four different desserts or savoury snacks that tend to be very fast and easy to prepare, like fruit tarts and sausage rolls. Go on, give it a go! 🙂

But what is inverted puff pastry?
For standard puff pastry the butter is wrapped inside a détrempe (layer of flour, water and a little butter) then rolled out and folded various times to create layers. With inverted puff pastry the butter (mixed with some flour) is the outer layer and the détrempe is folded inside. Which brings us to one main disadvantage.
The heat
All puff pastry can be tricky to make in a hot kitchen as butter can start melting and oozing through the layers as you work. This is obviously more of a risk if your outer layer is butter and apparently inverted puff pastry is not ideally suited for hot climates. But I shall still try to make it this summer in Barcelona. The pastry could be more workable in heat by cooling a marble work surface with ice (then drying it well) and chilling the pastry well in the fridge or freezer between turns.
Quite fast and easy – options
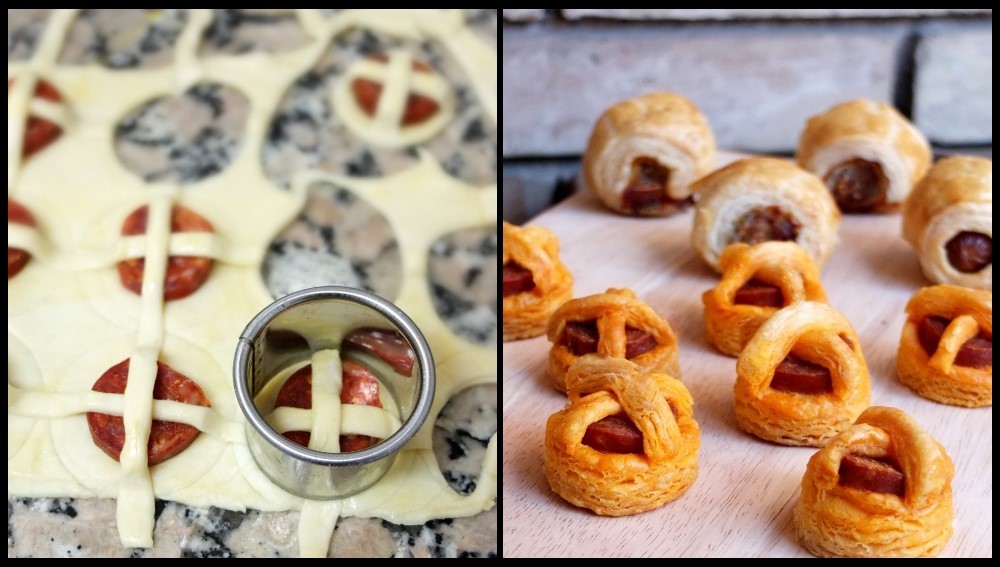
I was first introduced to inverted puff pastry on our Cordon Bleu course when it took around two hours to make and bake four kinds of savoury petits fours by taking shortcuts. The resulting pastry was still wonderful, delicious and flaky.
Savoury petits fours made with inverted puff pastry at le Cordon Bleu
You’ll always spend the same amount of time actually making the pastry but you can choose to have longer or shorter resting times between turns and before baking. The ideal is to rest your pastry overnight after the two double turns. But you can make it all on the same day and even in a few hours by quickly firming your pastry between turns in the fridge then freezer. My first inverted pastry home experiment took only a few hours, with imperfect rolling, turns and butter streaks, but the pastry still puffed up beautifully! 
So do give this pastry a try!
THE RECIPE
I used the Cordon bleu recipe as a base then adapted it after some trial and error in the kitchen and consulting various baking books. I’ve reduced the salt and replaced a little of the water with vinegar which prevents the pastry changing colour over time. The small quantity does not affect the flavour. I’ve also adapted the method so the salt is diluted in the water/combined liquids before adding to the flour. But I’m using the Cordon bleu way of having two layers exactly the same size as it’s worked for me so far and the layers of butter and détrempe seem more evenly arranged when folded (Hermé uses the ‘envelope’ method). Don’t worry if your uncooked layers don’t look very defined as google images show similar layers and the pastry still bakes beautifully.

Inverted puff pastry
Equipment: a rolling pin, pastry brush, plastic film, ruler and space in the fridge (and maybe the freezer) to rest the pastry.
Timings
DAY ONE: make the butter and détrempe layers and do the first two double turns – about 30 minutes work and a total of 45-60 minutes resting between rolling and layers. If not resting the pastry overnight after the two double turns then just rest it 30-60 mins before doing the last simple turn. If you’re in a hurry, speed up resting times by cooling the pastry between turns, first 10 minutes or more in the fridge (to relax) then 5 minutes maximum in the freezer (too long and the pastry becomes inflexible and cracks).
DAY TWO: make the last simple turn – 10 minutes work. Then ideally rest the pastry at least 2 hours before using but earlier is possible.
TIPS
- flour your work surface very lightly and evenly (lumps of flour will change the texture of your dough). Brush away excess flour from the surface and pastry.

- It is better to flour lightly and often (so don’t flour a lot in one go). Flour very lightly then move the pastry around, lifting a little with your fingers under the sides to relax it. Do this often to prevent sticking. If you prefer you can roll the pastry between two sheets of baking paper.
- If your pastry becomes sticky, chill before you continue.
- if your pastry has overchilled and is difficult to roll, let it warm a little at room temperature to become flexible. But don’t let it warm too long or your butter becomes sticky.
- Roll out your rectangles as evenly as possible in size and height.
- Clean your work surface and rolling pin between turns with a scraper to make sure you have a smooth working surface.

Ingredients
Makes around 800-830 grammes of puff pastry
Butter layer
- 250g/8.8oz butter (good quality unsalted butter like le Président), cold
- 125g/1 cup plain/all-purpose flour (I use cake flour/T45 quality)
Détrempe layer
- 250g/2 cups plain/all-purpose flour (or replace using fine white spelt flour)
- 10g/2 teaspoons salt (the salt is quite nice for apple turnovers and millefeuille but you can reduce the quantity to make it less salty, with 5g/1 tsp or 7.5g/1 and 1/2 tsps)
- 145ml/g water
- 1 teaspoon/5ml or g white wine vinegar
- 90g/3.2oz unsalted butter
MAKE THE RECTANGULAR LAYERS
Preparation:
- melt the 90g of butter for the détrempe in a small saucepan, then take off the heat and allow to cool till tepid (it mustn’t be hot).
- line a tray with baking paper (approximately 30cm x 40cm/12in x 15in). You can use your large oven tray.
Butter layer
- Cut the cold butter into small pieces and rub into the flour until there’s a texture almost like bread crumbs.
- There will be bigger lumps of butter so tip the mixture out onto a clean surface and ‘fraiser’ (rub the dough bit by bit with the palm of your hand on the surface to incorporate the butter into the flour until the dough comes together). Don’t overwork. Just rubbing each bit with your palm once to three times should be enough. Here’s a youtube link showing a French baker rubbing butter into flour from 1:00 and doing some ‘fraisage‘ from 2:05: http://www.youtube.com/watch?v=iSBTyS6deUE
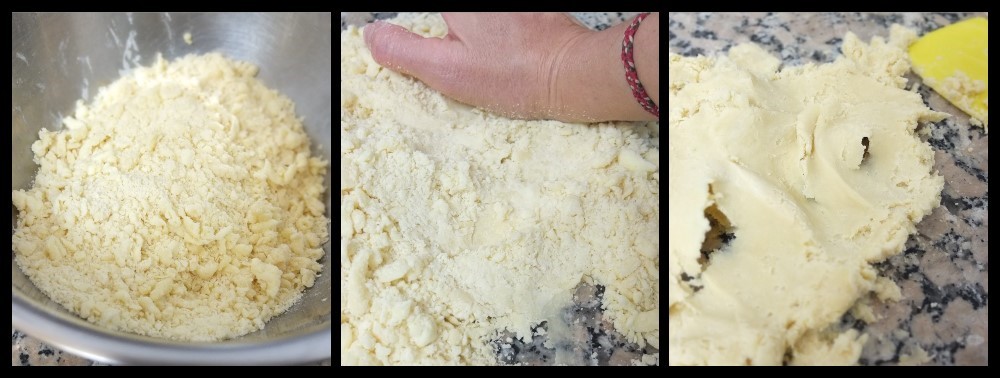
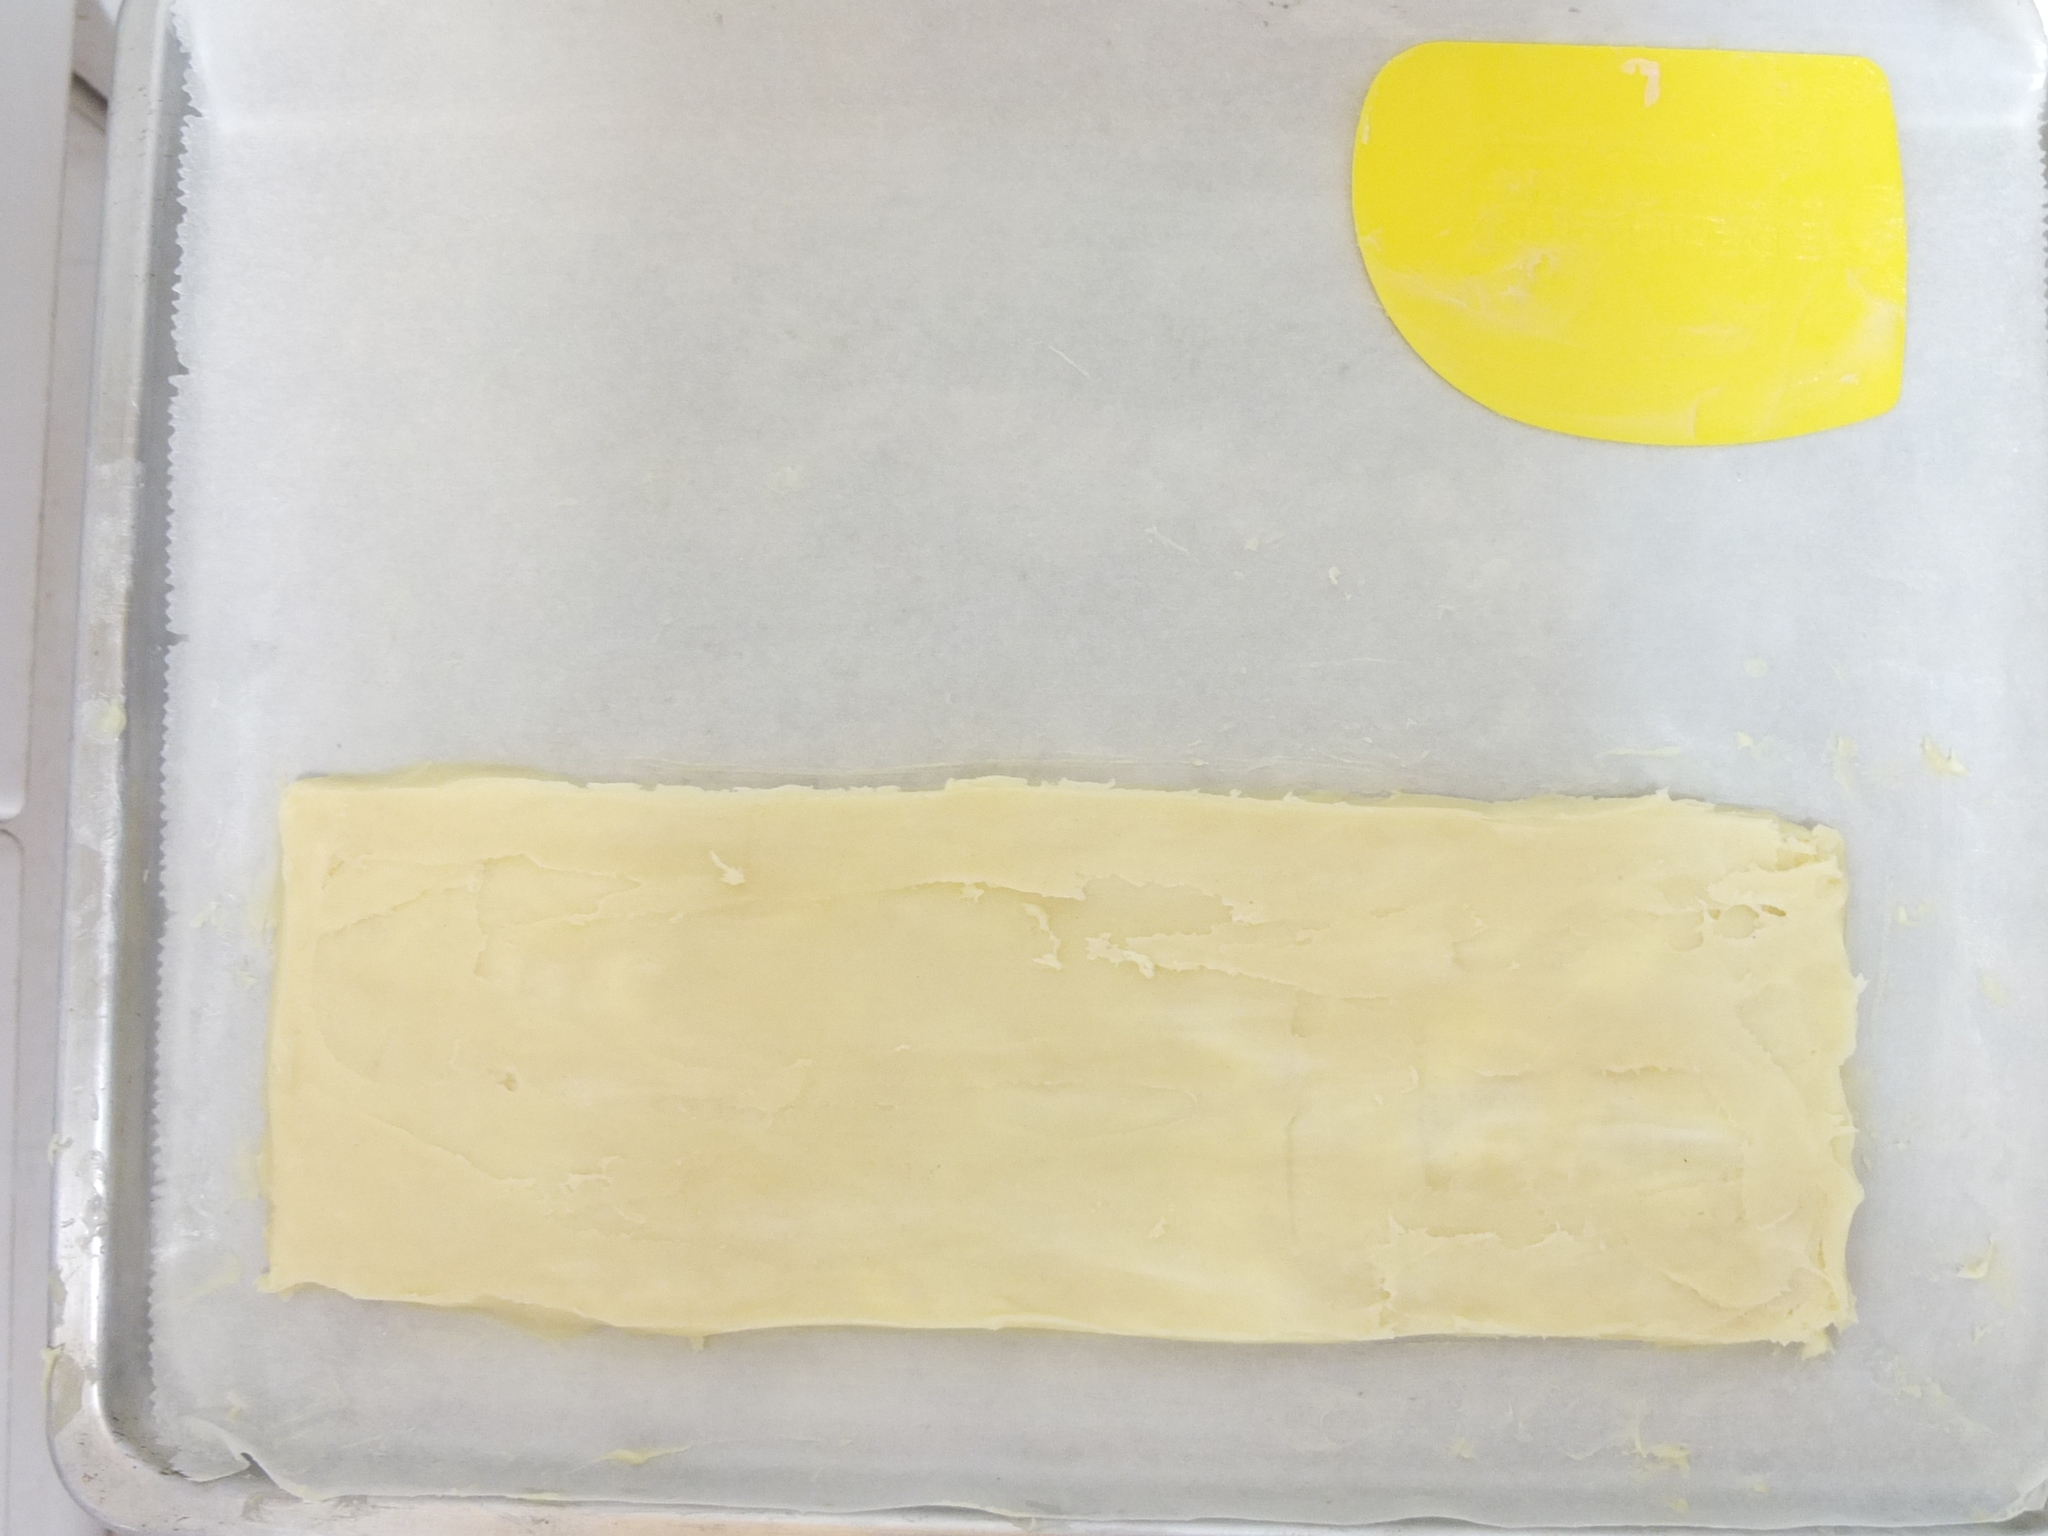
- With your finger tips, spread the butter layer to make a rectangle on one side of your prepared baking tray. You can also use a scraper to help even your layer out. My rectangle is usually around 11.5cm wide x 34cm long (4.5in x 13in) and 8mm-1cm high (around 1/3 inch) though I’m thinking of making it wider and shorter in future. Make your rectangle as even and straight-sided as possible.


Détrempe layer
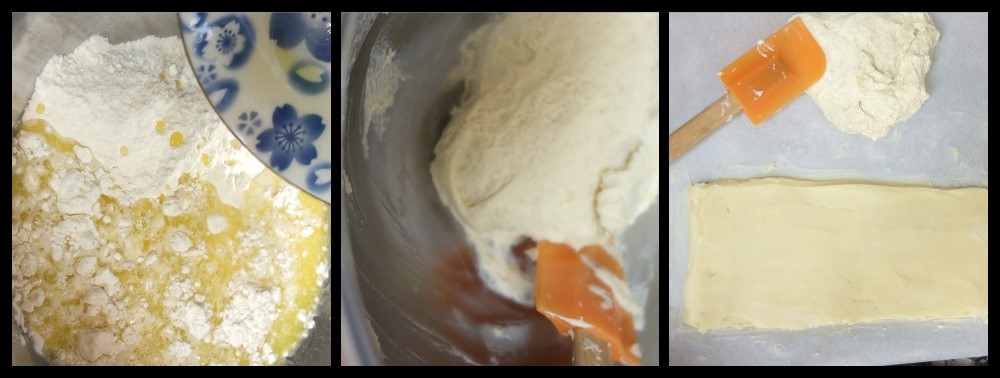
- Weigh your flour in a big bowl.
- Mix the salt and water together in a small bowl then add the melted butter and whisk so the salt dissolves. Whisk in the vinegar.
- Stir the liquid mixture into the flour with a rubber spatula or plastic spoon.
- Stir a minute or so until the mixture has a bit of a ‘spring’ to it (bite). Don’t overwork.
- Spoon onto the baking tray next to the butter layer.

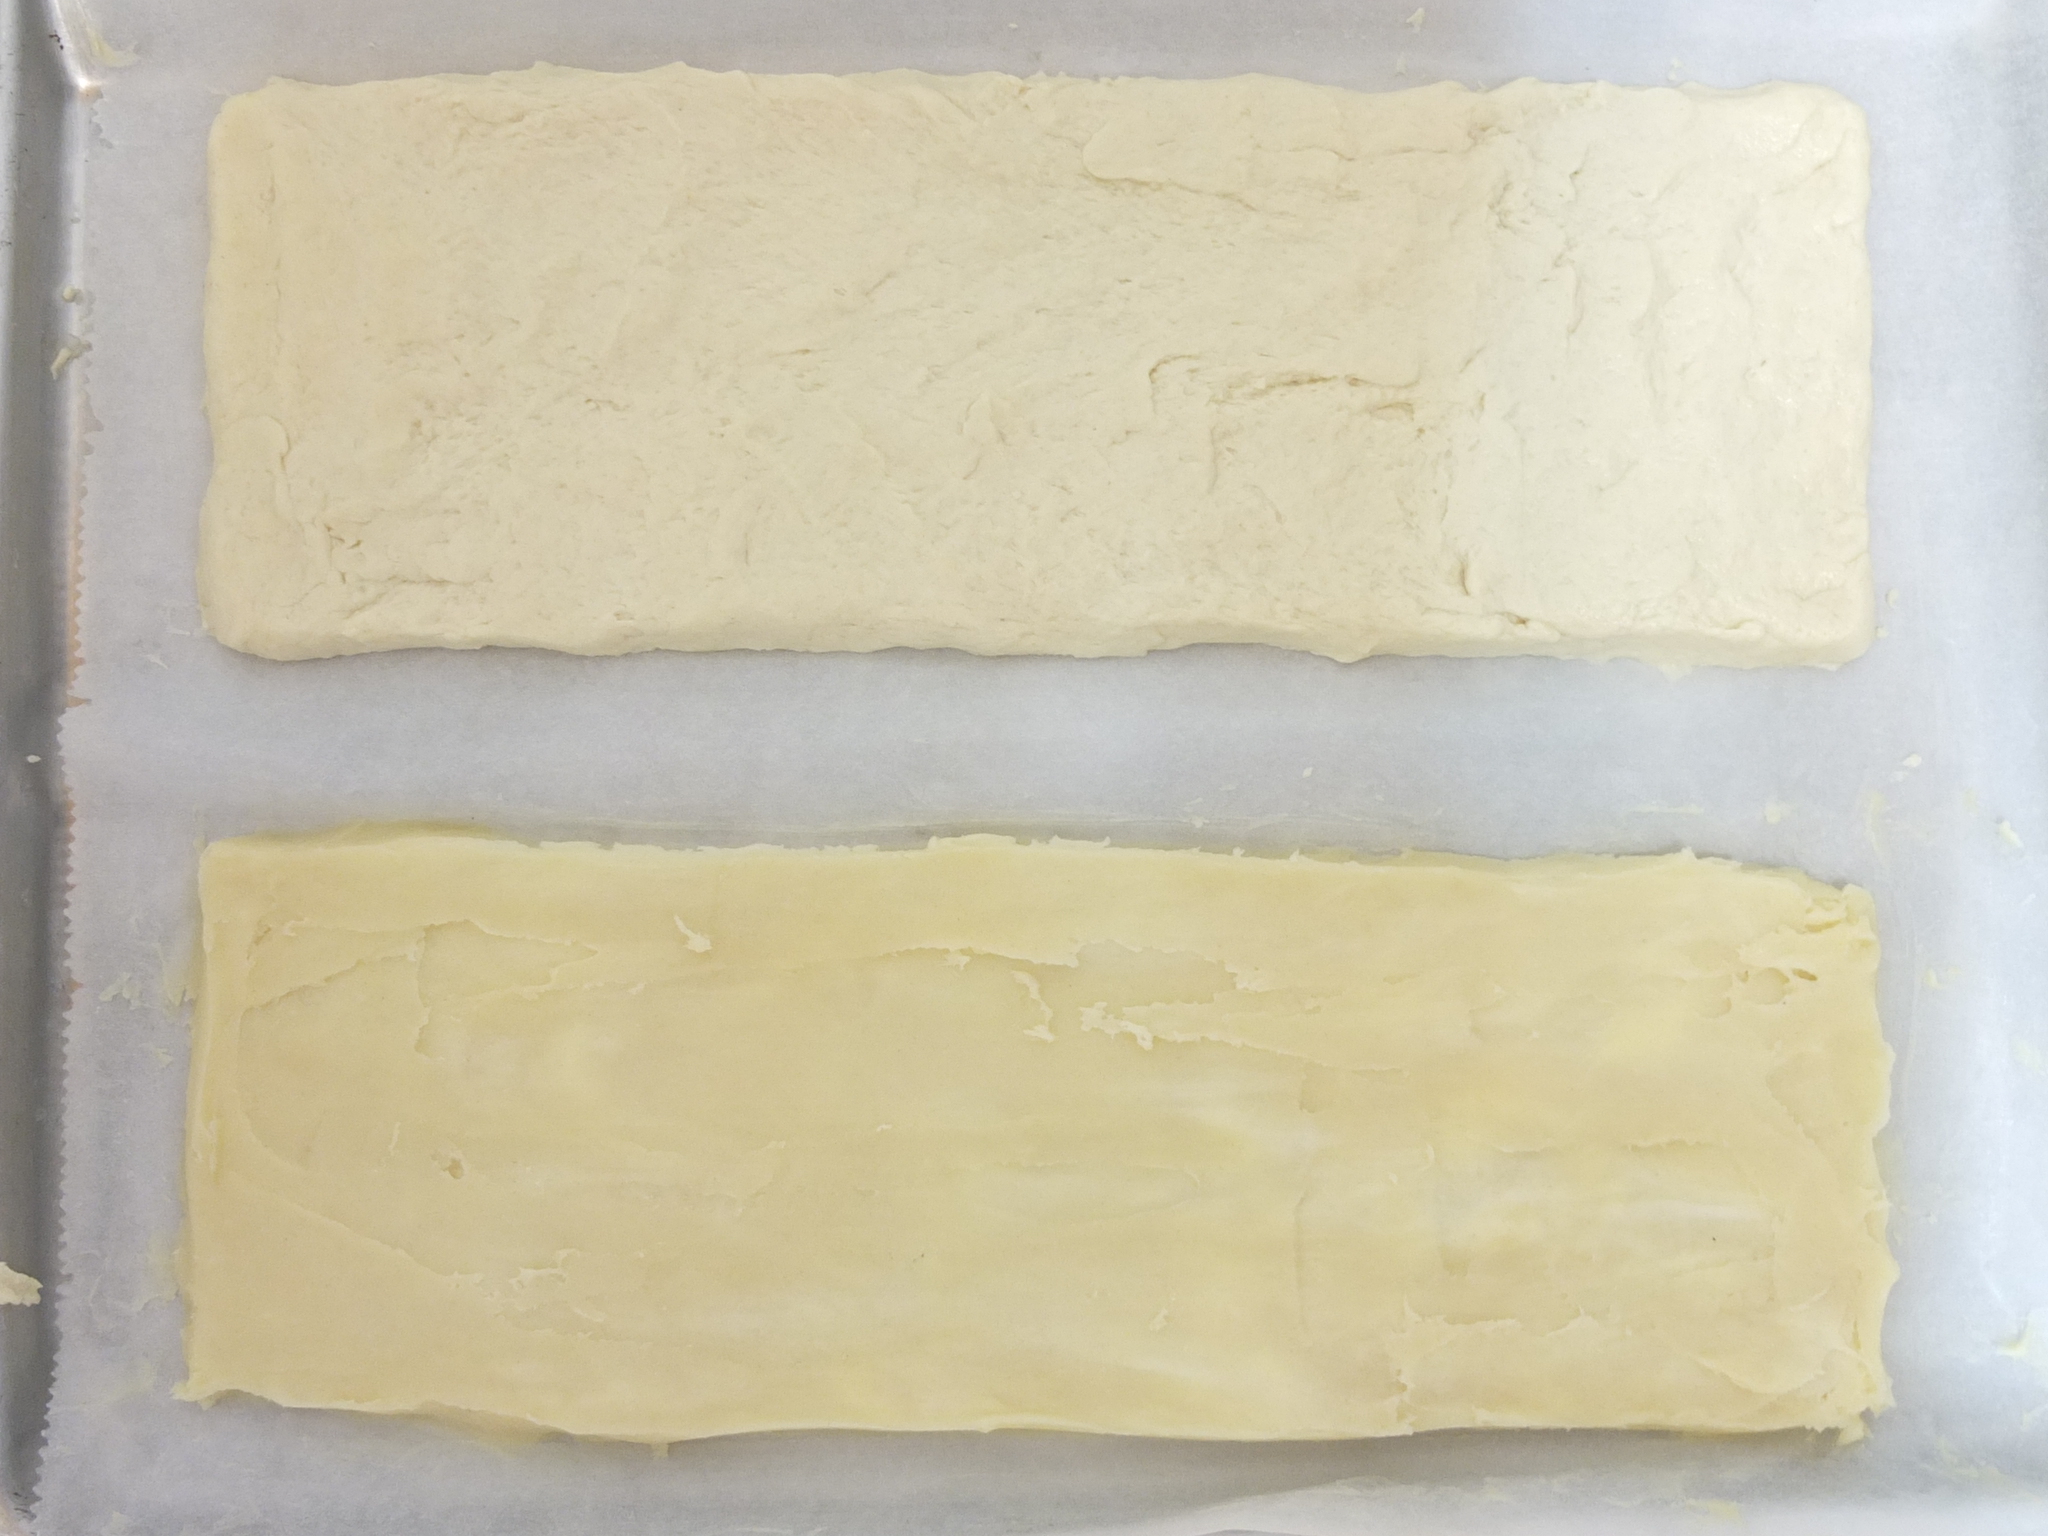
- Spread a rectangle out with your fingertips and scraper. The rectangle should be exactly the same size in length and width as your butter layer but will usually be a little higher. Use a ruler so you can be as precise as possible.
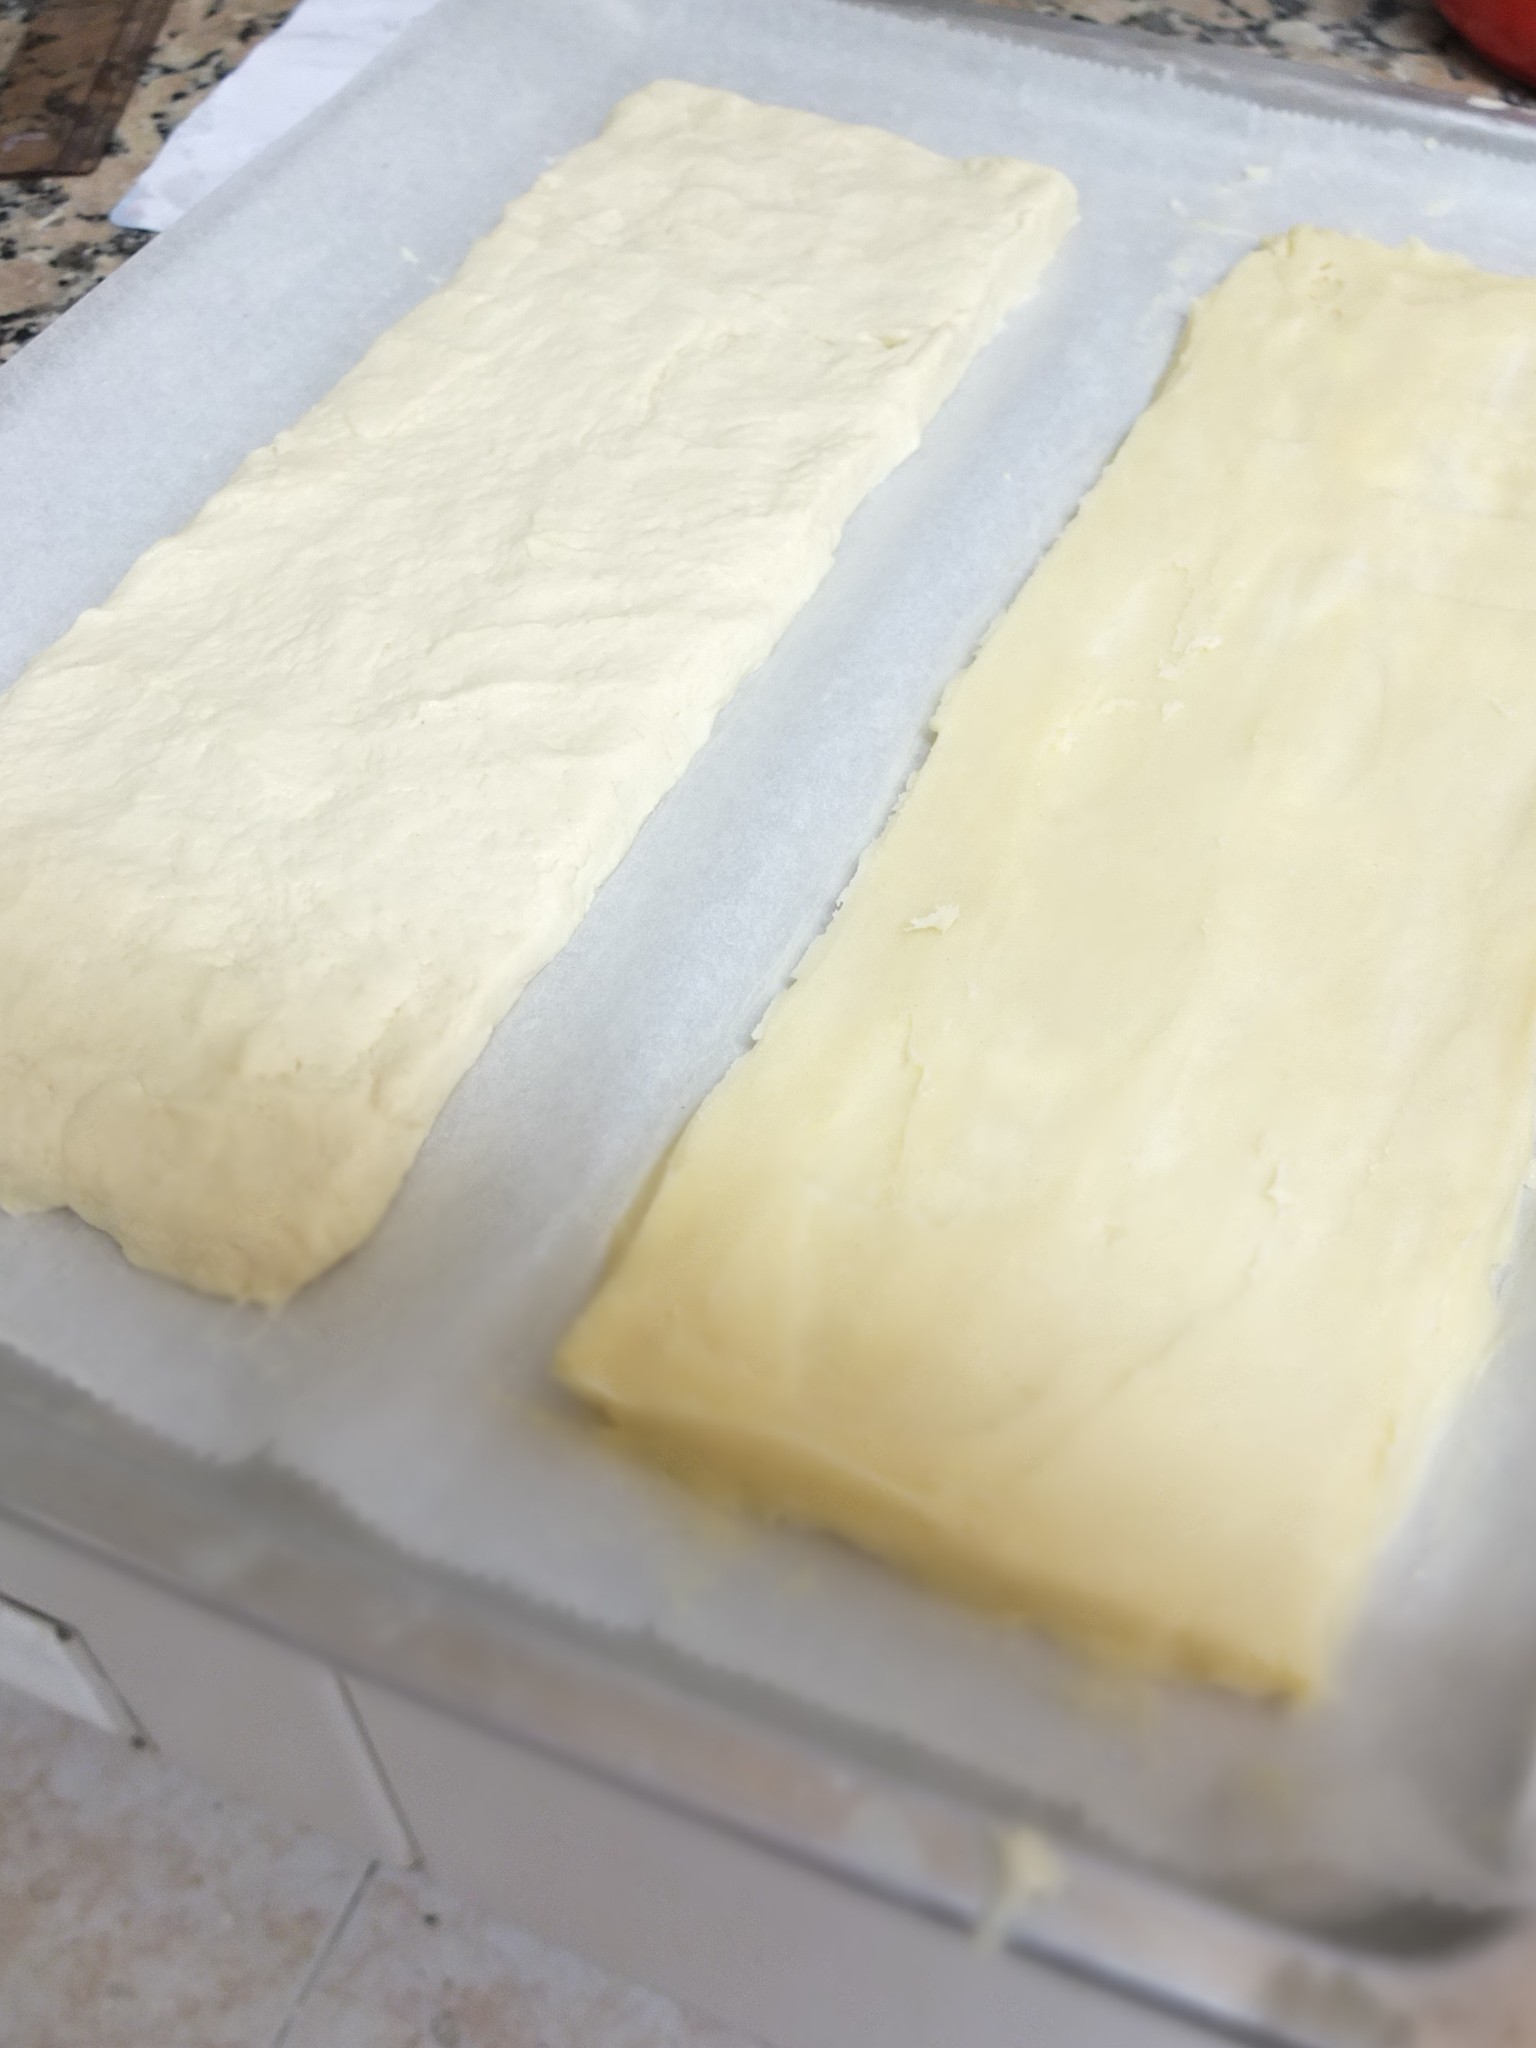
REST BOTH LAYERS IN THE FRIDGE FOR 30 MINS
Warning – danger!
Before you start the next stage both layers should be the same consistency so they roll out together and one doesn’t start spreading while the other stays hard. After the 30 minutes I usually find the détrempe is softer so I cut the paper between the two layers and place the détrempe alone in the freezer for 3-4 minutes. You want both layers to be not sticky and quite firm but not stiff and inflexible or they’ll crack when you fold them.
Here’s a disaster photo from one of my early attempts when I decided it didn’t matter if my détrempe was a bit soft and the butter quite hard. Oops. I won’t do that again!! Hopefully… 🙂 If it looks like this is going to happen to you, separate your layers before it’s too late and get them both to the right consistency!
An inverted puff pastry disaster (soft détrempe and hard butter) – RIP, though actually it could still work as a rough puff pastry.
DO THE TURNS
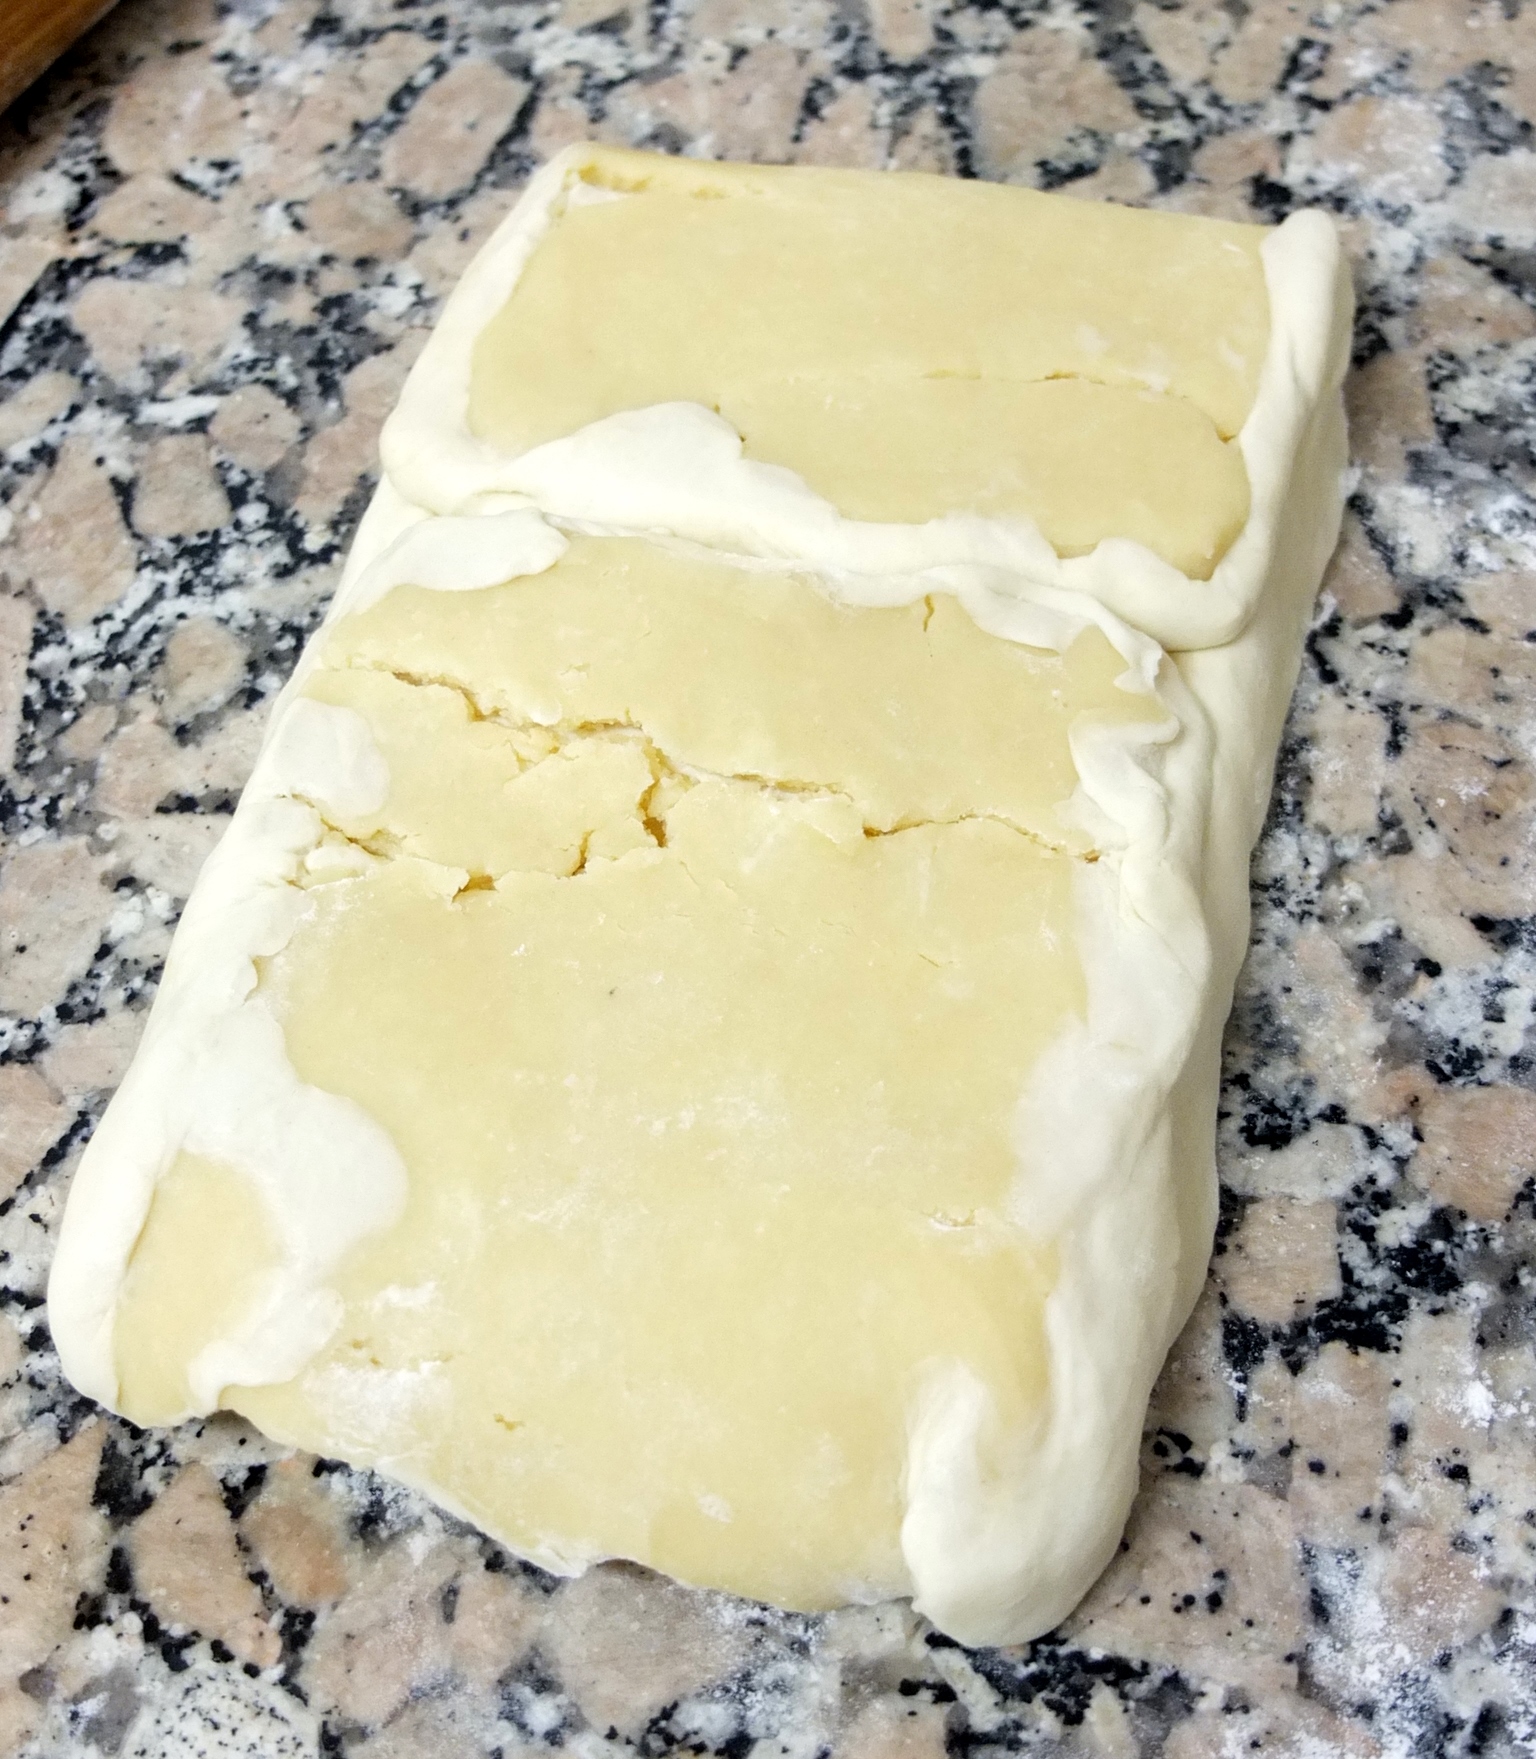
Okay, so you’ve got layers at the right consistency and you lightly flour your surface. Place the détrempe layer on top of the butter layer and press down lightly with the rolling pin along the whole the surface to seal the two layers. Roll out in one direction to make a long thin rectangle about 3-5mm (1/10 to 1/5 inch) high. Keep lightly flouring regularly and moving the pastry slightly off the surface with your fingers. My rectangle was about 66cm x 16cm (26in x 6in) – 1 and a quarter the length of my rolling pin – but this varies each time. If the pastry gets soft and sticky you can stop rolling and let it stay a bit smaller and thicker.

1st double turn
Perfectionist alert: if your détrempe has overlapped past the butter, you can trim some off with a small sharp knife before doing the folds. This helps create better layers.
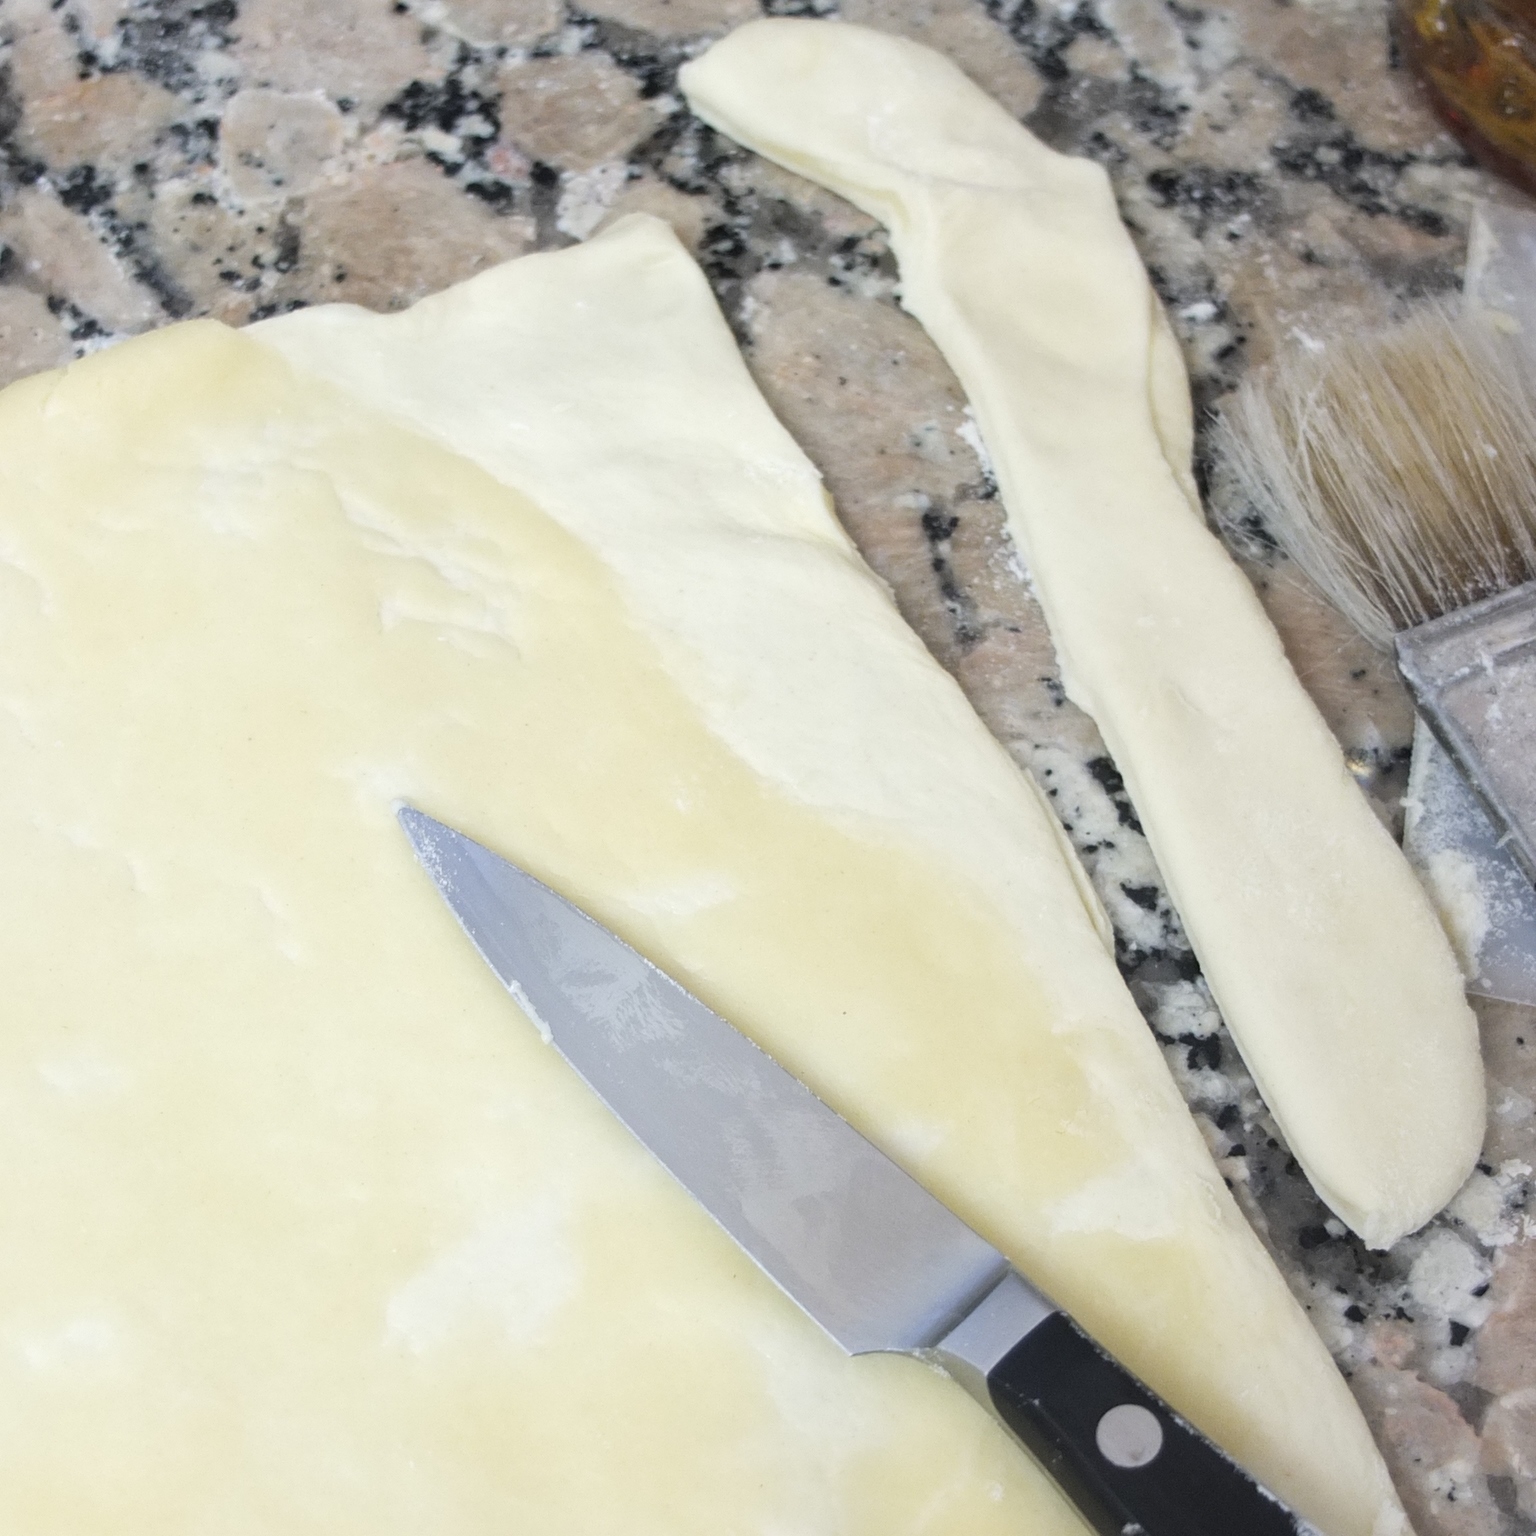
Cutting off overlapping détrempe – inverted puff pastry
Now fold and do the turn according to the instructions on the photos.
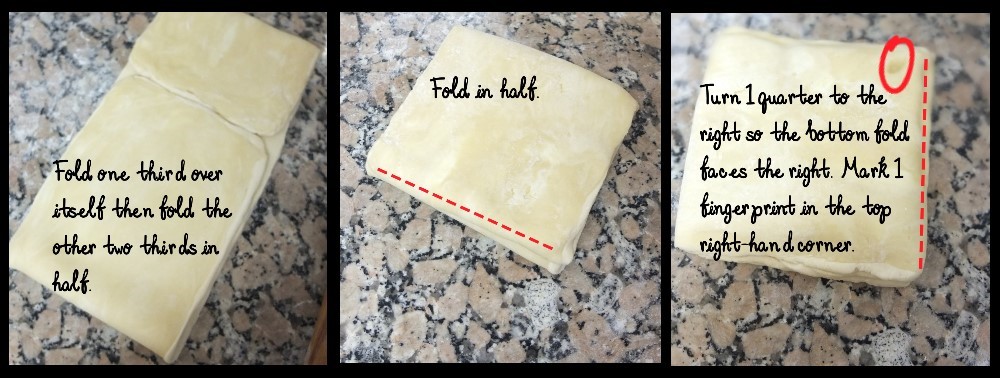 If your pastry is still firm after folding do the 2nd double turn. If it’s getting soft and sticky, chill in the refrigerator for 15 – 30 mins covered in plastic film before doing the 2nd turn.
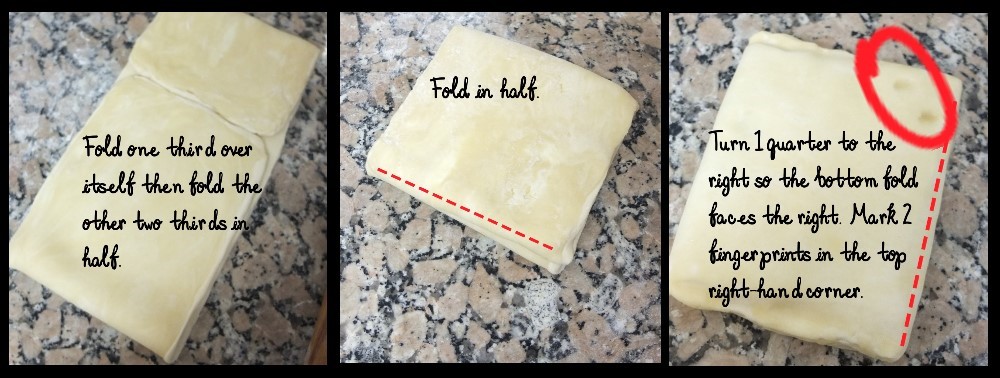
2nd double turn – make sure your pastry is in position with the fingerprint in the top right-hand corner (as in the last photo). Then roll out the pastry to a long thin rectangle again, in one direction, rolling from the bottom to the top (where the fingerprint was). It’s the same process as for the first double turn, but marking with two fingerprints to show you’ve done two double turns.
REST IN THE FRIDGE IDEALLY OVERNIGHT OR FOR AT LEAST 2 HOURS (See the Timings section above for shortcuts)
Once your pastry is rested (firm but relaxed) do the last turn.
Third ‘simple’ turn

After the third simple turn roll out your pastry a little (chill 15-30 minutes first if it’s soft) to make a thick rectangle/square. Cut it into four pieces (around 200-210g each) to use for different things.
 Wrap all the pieces well in plastic film so there’s no air between the film and pastry. Freeze the pieces you don’t want to bake with now and use within 1 month. Place the pastry you’re using soon in the refrigerator to rest ideally at least 2 hours and a maximum of 48 hours.
Pour yourself a drink and celebrate!
Yay!!! You have some inverted puff pastry to play with. And soon you’ll be chuffed and puffed with pastry pride. Plus it’s so much fun seeing this pastry rise. 🙂