
Want to see an everyday chocolate bar upgraded to a homemade pâtisserie creation? Maybe you have a little chocolate craving and adore salted caramel? This is the recipe for you!!! Le Snickers chocolate bar is based on a French pastry chef’s recipe and consists of a shortbread base and salted caramel centre studded with salted peanuts, all coated in milk chocolate. Et voilà, a posh homemade Snickers (aka Marathon) bar with shortbread instead of nougat. Also a chance for you to experience how fast and easy making a dry caramel is but more importantly they’re so yummy! 🙂

les Snickers bars
The origins
The original recipe, found in the Fou de pâtisserie magazine #10, is by chef Laurent Favre Mot, who is from Marseille but moved to Paris in March 2015. He’s said to be talented, innovative and covered in tattoos. Some of his cakes include a skull and apparently visiting his pâtisserie is like a breath of fresh air. Anyway, his recipe is brief (mix, heat, coat, etc.) presuming a lot of prior knowledge so I’ve added some explanations to help us all along. I also adapted some of the method and quantities, and reduced the sugar intake by using xylitol in the shortbread and spelt flour. Though you do need real sugar for the caramel.

le homemade Snickers
RECIPE – makes 16 thinner bars, which I prefer (approx 9cm x 2.5cm each) or 10 thick bars (approx 9cm x 4.5cm each)
Timings: shortbread – 10 mins to make and 20 minutes baking in the oven; caramel – 15 mins then 1 hour cooling; assembly – 20 to 30 mins (with 1 hour cooling before coating in chocolate) 45 mins to 1 hour’s work.
Shortbread
Preparation: Preheat the oven to 180°C/350°F (static, non-convection oven) or 160°C/320°F (fan-assisted).
- 50g/a quarter of a cup xylitol or sugar
- 150g/1 and a scant quarter cup plain/all-purpose flour or fine white spelt flour
- 100g/a scant half a cup unsalted butter
 Rub the butter into the sugar and flour till the mixture is like breadcrumbs. Fraiser on a smooth surface with the palm of your hand (see my making pastry page). Make a ball then roll out between two sheets of greaseproof paper to a height of 5 or 6mm/less than a quarter of an inch. Your rectangle can be about 18x20cm (7x8inches). Make sure it’s an even height all around then place on a baking tray lined with greaseproof paper and bake 20 to 25 minutes.
 Trim the edges to make a neat rectangle with straight sides then use a ruler to mark out 16 even pieces (approx. 9cm by 2.5cm) – not like in the photo where I was experimenting with sizes!
Caramel (find extra notes on my dry caramel page)
- 115g/half a cup liquid 35% whipping cream
- 90g/a half cup less 1 scant tablespoon granulated sugar
- a quarter teaspoon fleur de sel or sea salt
- 56g/a quarter of a cup unsalted butter
- 1 sheet gelatine (you could make it a little more gelatinous using 1 and a half sheets)
1. Heat the cream in a saucepan till just before simmering and reserve for later use.

Clockwise order
2. Make the dry caramel by placing the sugar in a small heavy-based saucepan over low-medium heat. Don’t stir it. Never. You can shake it around a little but not so much it goes high up the sides. After 10 minutes or so the sugar will have gradually dissolved. If it starts going dark or smelling like it might burn, just lower the heat or take it off and swirl until the sugar has dissolved.
3. Place the 2 sheets of gelatine on a small high plate and cover them with a little water so they soften.
4. Now slowly stir the warm cream into the caramel, in a steady stream. It will bubble up so do this gradually. 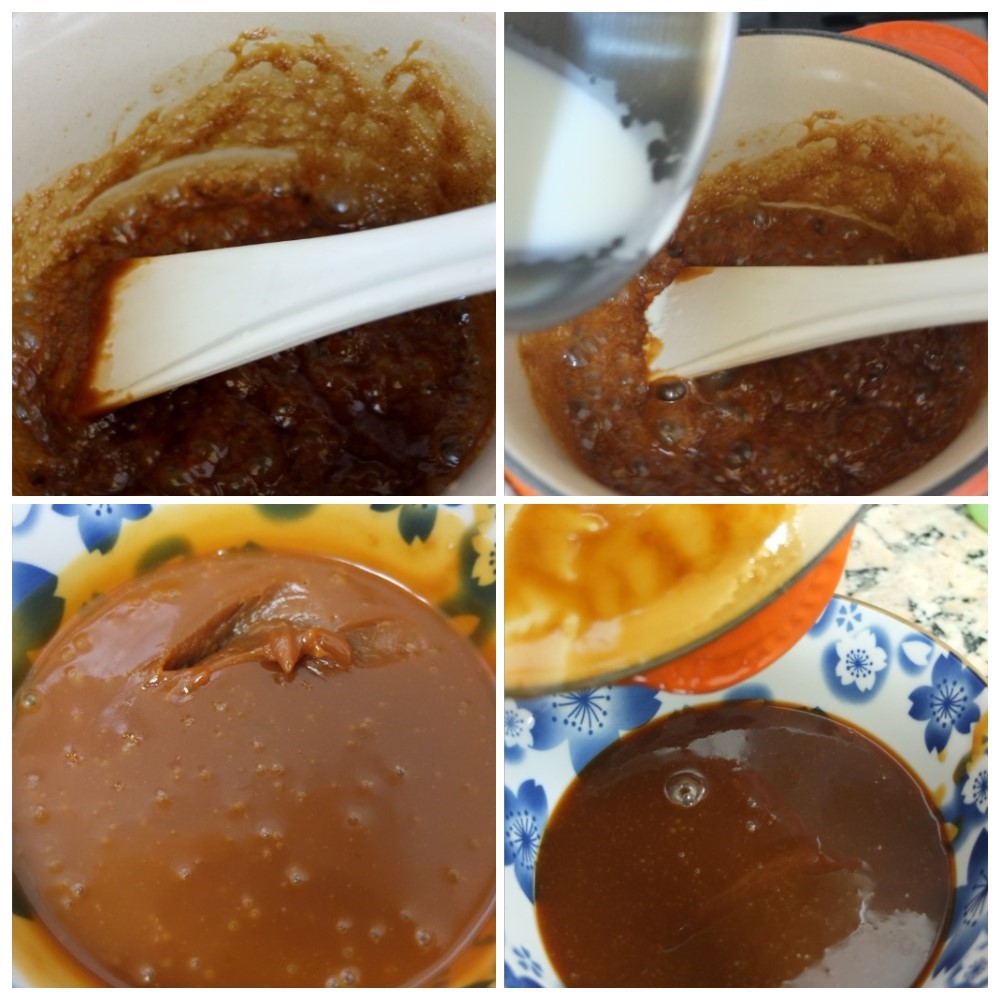 5. When it’s all combined stir in the remaining ingredients. Pour into a small clean bowl and store about 1 hour in the fridge till it’s cool and thick.
Assembly
- around 75 to 100g/2 and a half to 3 and a half ounces salted peanuts (to taste)
- around 300-400g/10 and a half to 14 ounces milk chocolate
 Place your biscuits on a wire rack, spaced apart. Pipe the caramel onto each biscuit (with a medium no.8 nozzle and piping bag). Then press in some peanuts. You could also press in raisins or other dried fruits. Place in the freezer for 1 hour or in the fridge till firm enough to be coated with chocolate.
When the biscuits are ready, melt your chocolate over a bain marie. Then you can temper the chocolate (optional) if you’d like your chocolate to stay shiny. though your stomach really won’t notice. Instructions are on my tempering chocolate page. 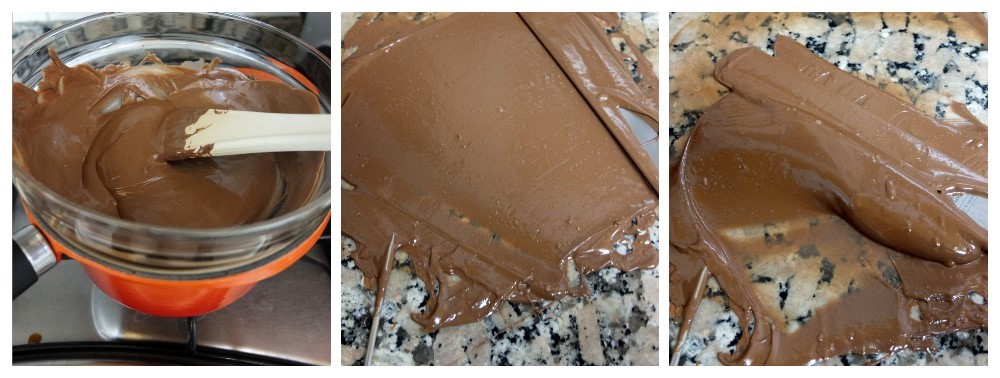 When the chocolate is ready spread a thin layer under each biscuit with a butter knife and place gently back on the wire rack. Then pour some over each biscuit and spread with a butter knife or spatula. The less you touch it with your knife or manipulate it the shinier it will be, so try to be fast.

Place in the fridge to set for an hour or so. Then eat!
Le verdict
It’s a delicious chocolate bar. Hard to resist so as I was photographing I was kind of simultaneously testing (eating) them. They’re actually a bit like a Twix with added peanuts so we could call it a Snix, snickers/twix hybrid. Then again, le snickers sounds upmarket so lets just go with that! 🙂

Homemade Snickers pâtisserie bars
Hope you enjoy these little pâtisserie chocolate bars and feel inspired to rustle some up too! You can play around with the ingredients, coating them with dark chocolate if you prefer.
Le partying
So these little chocolate bars are off to the lovely and sociable Fiesta Friday hosted by Angie@thenovicegardener and her co-hosts Loretta@Safari of the Mind and Jess@Cooking Is My Sport. And also to Recipe of the Week hosted by Emily@aMummyToo.  They’re also going to the August Perfecting Patisserie challenge hosted by Lucy@BakingQueen74, Tasty Tuesdays hosted by Vicky@HonestMum and Fabulous Foodie Fridays hosted by Lucy@BakePlaySmile and Lauren@CreateBakeMake,
 Hope you’ll all visit and mingle. And help yourself to a little le Snickers chocolate bar!

Have a homemade Snickers bar! 🙂
Le goodbye
It’s farewell again sweet reader! I’ll just wish you a Happy Milk Chocolate Day and Happy Cake Week! Yes, I did invent that last one. Hee hee. Snicker snicker… See you soon! 🙂 x
P.S. Follow me on instagram, facebook or pinterest, if you like! 🙂

oh my GOD.
Snicker bars are my FAVORITE candy bar. And this version really doesn’t look that hard to make- thank you for this Lili, I will definitely be trying this out 🙂
LikeLiked by 1 person
Thank you so much Jess! It’s so nice and exciting to know that you’ll be making these – you’re right, they’re not too hard to make so you should have fun. Let me know how it goes and what you think of these pseudo-Snickers bars! 🙂 And thank you for hosting Fiesta Friday this week! 🙂 x
LikeLike
Awesome! I’ve bookmarked it because this is definitely something I have to try one day 😮 Looks so good! Happy FF!
LikeLiked by 1 person
Thank you Sarah! So pleased and excited you’ll be making them and when you do please let me know your thoughts on these nouveaux Snickers! 🙂 Happy FF and weekend to you too! 🙂 x
LikeLike
These sound wonderful–I would be tempted to eat the whole batch! 🙂
LikeLiked by 1 person
Thank you Nancy! And yes, I know what you mean. In fact I need to make a whole new batch asap! 🙂
LikeLike
I love these! I made homemade snickers once ages ago… but I like your version better! That caramel looks amazing! 🙂 Happy FF!!
LikeLiked by 1 person
Thank you Dini! So pleased you like these Snickers bars. Happy FF to you too! 🙂
LikeLike
This is such a great recipe!!! I can’t wait to try it!!! Thanks for linking up with our Fabulous Foodie Fridays party xxx
LikeLiked by 1 person
Thanks so much Lucy!! So pleased you’re going to make these – let me know how it goes! 🙂 And thank you for hosting Fab Foodie Frid – looking forward to mingling with the other blogs 🙂 xx
LikeLike
Wow, what an impressive looking treat! Thank you very much for linking up with us for Fabulous Foodie Fridays, I hope you’ve had a great weekend 🙂
LikeLiked by 1 person
Thank you Lauren! Glad you like them! It’s my first time at Fab Foodie Fridays and I forgot to link up to you, but I’ve done that now… oops. Thanks for hosting the party and looking forward to mingling! 🙂 x
LikeLike
Wow these are amazing, I gotta try these!
LikeLiked by 1 person
Thank you Michelle! And that’s brilliant – please do! Let me know how it goes too… 🙂
LikeLiked by 1 person
This version of snickers sounds so much yummier than the original! That caramel looks amazing….
Gorgeous photos too and the step by step instructions are super handy for baking newbies like me!
LikeLiked by 1 person
Thank you! And yes I recommend the caramel and this version! 🙂 I’m really glad the instructions and photos are clear for you … hope you’ll try out the recipe so you can taste-test these Snickers! 🙂
LikeLike
Wow, these look amazing. Your certainly giving the original Snicker a run for it’s money with these beauties! Very clever. It’s being pinned!
Angela x
LikeLiked by 1 person
Thank you so much Angela! Yes, I was so impressed with the original recipe that I tweeted the French chef directly to thank him! lol. Hope you enjoy making and eating them. Was browsing your interesting blog earlier and going back to visit soon! Lili x
LikeLike
Just wow…
LikeLiked by 1 person
Thank you! 🙂
LikeLike