Easter has come and gone and I’ve only just finished making these chocolate hens and eggs! My timing leaves much to be desired. 😉 No worries, I learnt a lot about chocolate work this time (from my mistakes and all) so wanted to record the tips and links so we’ll be super prepared for future Easters or next time there’s an attractive cheap plastic chocolate mould beckoning to us and whispering seductively ‘Go on buy me, we’ll make pretty chocolate shapes together!’ This is easier than you’d think! You just need to organise your space, bowls of chocolate and moulds, making sure everything is dry. Water is chocolate’s arch enemy – one drop and you’re in clumpy lumpy city crying over your chocolate and making it even lumpier. But there will be no crying here if simple tips are followed and a trusty infrared thermometre is at the ready. Curious? Read on below. And yes a really shiny shell would be perfect but I’m just relieved my shapes came out of the moulds. No need for absolute perfection – that can come with more practice. Oh and the decorative centre with candied orange, pistachios, pecans, roasted white sesame seeds and optional freeze-dried raspberries is surprisingly easy! It looks attractive, decadently healthy and tastes so good with the naturally pink, tangy and fruity ruby chocolate swirled with a little white chocolate. You can use dark or milk chocolate of course. I confess I’m using a lot of ruby chocolate this Spring because in a fit of enthusiasm I ordered 5 kg online. Ahem. There’s still enough to make more chocolate hens and eggs. I’m so tempted! You? 🙂

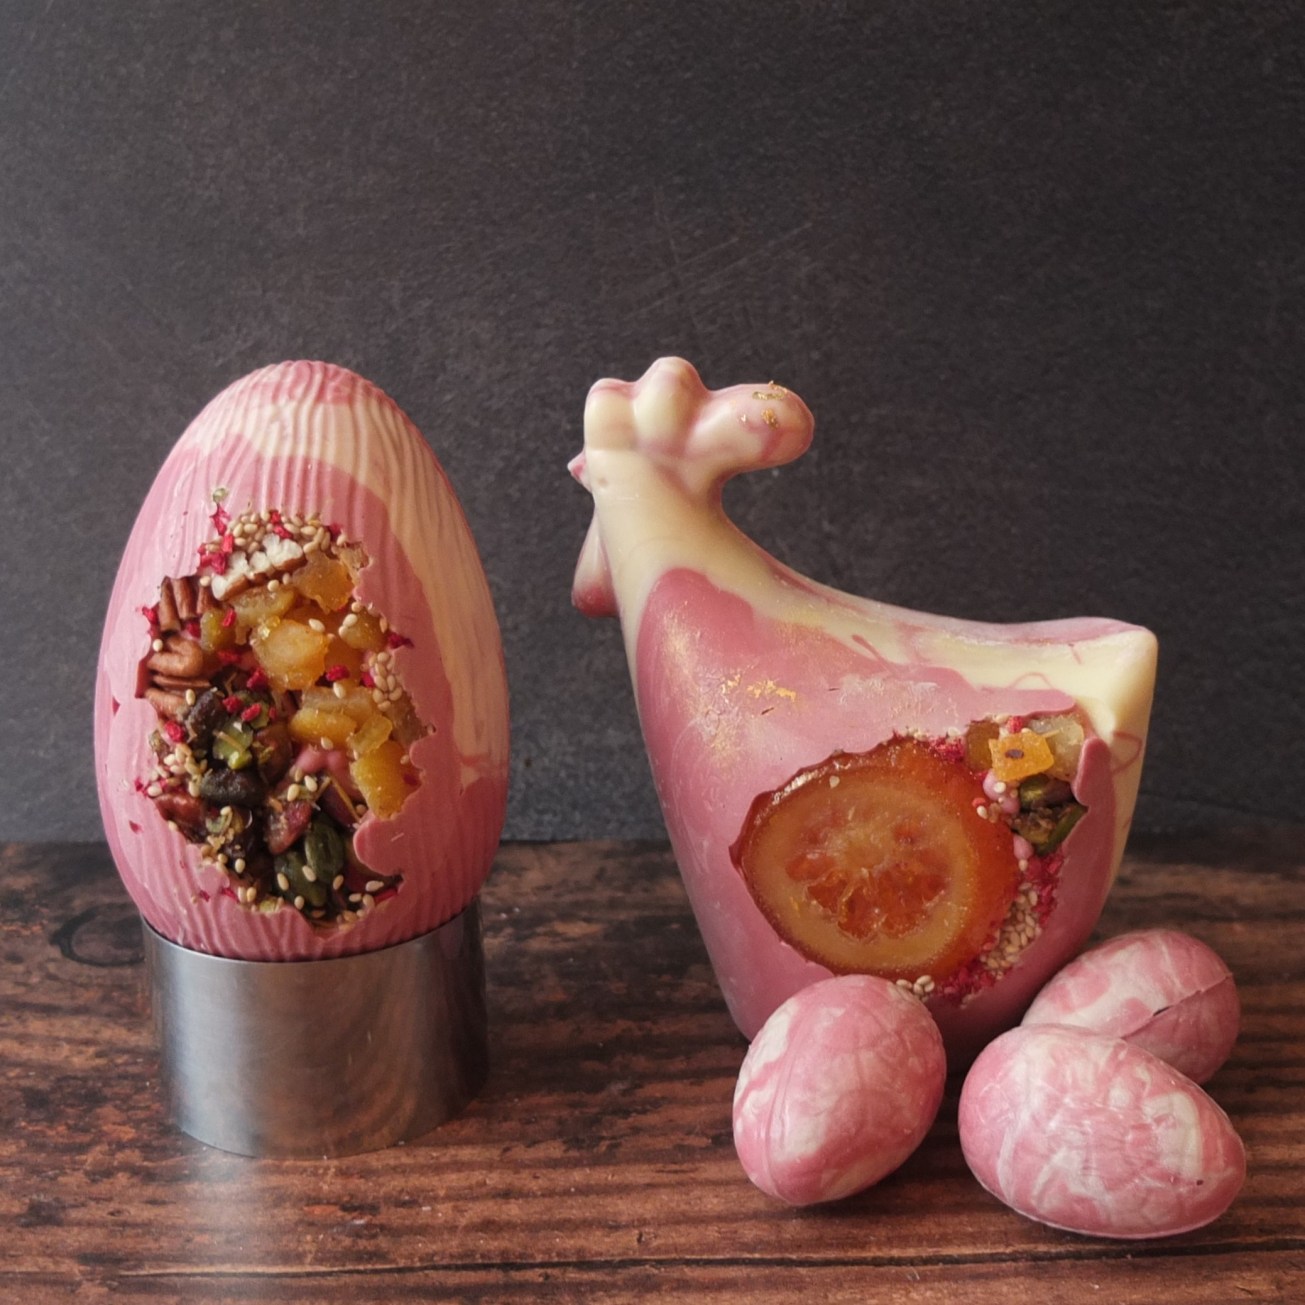
A couple of white-crested ruby hens.

And of course you can fill them with mini eggs or chocolate bars before sealing the halves together.

Ruby chocolate hens and eggs
TIPS
- It’s quite straightforward as a process, easier and faster using just one kind of chocolate and doing eggs (hens can break a little more easily).
- Also they say the thinner the first layer the shinier the chocolate but if it’s not ultra shiny don’t worry too much. If it comes out of the mould that already shows some good tempering.
- I find dark chocolate is easier to temper and shinier (less milk or sugar interfering probably).
- As usual make sure everything is dry and clean (utensils, bowls, hands,etc) and clean the worktop and utensils between operations.
- Use a good rubber spatula to stir the chocolate well and scrape the sides of the bowl to get all the chocolate together at the bottom of the bowl and at the same temperature throughout.
THE OPERATION
It really is easier to temper and work with a large quantity of chocolate. I’d recommend 500g ruby chocolate and 200g white chocolate. If you do 300g ruby and 100g white you’ll need to use the pastry brush more for coating layers but then you can use almost all the chocolate. You’ll see for yourself how much chocolate you need for your moulds.
- Arrange your moulds over rings or low glasses and carefully arrange the dried fruit and nut inserts in the middle. Prepare wire racks over trays (lined optionally with baking paper).

- Temper the chocolate (traditional methods in my basics section here and here – I did it with mycryo cocoa butter (see instructions here, but add the mycryo at 35 degrees celsius and work at 29 to 30 degrees).
 The white chocolate will temper more quickly so every now and then warm it 5-10 seconds on the bain marie and stir vigorously to bring the temperature up 1-2 degrees.
- When both the white, milk or ruby chocolate are at 29ºCelsius/84ºFahrenheit to 30ºCelsius/86ºFahrenheit quickly do the egg or hen halves with no inserts. For dark chocolate: 31ºCelsius/88ºFahrenheit to 32ºCelsius/90ºFahrenheit.

- Then drizzle or pipe a little tempered chocolate to cover the fruit and nut inserts. Let the inserts set about 30 minutes.

- 1st layer. After 30 mins bring the chocolate in your bowls carefully back up to the correct temperature. Do this carefully putting on a bain marie 5-10 seconds then take of heat, stir vigorously and repeat until desired temperature is achieved. Apparently using a hairdryer is a nice safer way to reheat the chocolate. Line the rest of the egg or hen with the 1st layer. Use a pastry brush for more intricate details like the hen’s head or if your chocolate is a bit thick.Turn upside-down and place on wire rack to set a little 20 minutes then scrape to get smooth flat edges with a butter or spatula knife. Allow to set another 30 minutes or more.
- 2nd layer. Bring chocolate carefully back up to desired temperature (29ºCelsius/84ºFahrenheit to 30ºCelsius/86ºFahrenheit) or for dark chocolate: 31ºCelsius/88ºFahrenheit to 32ºCelsius/90ºFahrenheit). Do 2nd layer of chocolate. I combined my two chocolates at the end when using smaller quantities but the effect is better if kept separate. Again use a pastry brush for more intricate details like the hen’s head or if your chocolate is a bit thick. Turn upside-down and place on wire rack to set 20 minutes then scrape to get smooth edges with a butter or spatula knife.

- Allow to set another 8 hours or more in a cool room (or apparently 20 minutes in the fridge).
STICKING THE HALVES TOGETHER – so easy!
- Carefully unmould the eggs or hens (upside down, stretching the plastic a bit, scraping edges with knife if necessary).
- Place metal tray on a bain marie, on top of a medium-large saucepan of low-simmering water.
- Place egg or hen upside-down on the tray and rotate slightly 2 or 3 seconds to melt the edge then place on metal ring or glass.
- Fill with mini eggs or chocolates.
- Melt edges of the other half on the tray then place on the filled half and keep in position a few seconds. It should already be stuck but don’t move it. Leave a while on the ring to set completely.
- Store in airtight tupperware.
- You can brush with edible gold powder if you like or add edible gold paper.
- Give to surprised and delighted family and friends. 🙂 Especially surprised if Easter is actually over. Lol.

My friends loved finding the little treats inside and discovering how yummy ruby chocolate is. If you make small eggs too it’s quite relaxing and easy to get that crisp shiny thin shell.

HAPPY BELATED EASTER!
Hope you’ve been having or had a lovely Easter! Here are some eggs or a hen to nibble on…


Ruby chocolate hen
Farewell and have a lovely week and weekend! With lots of happy baking, no-baking and eating! Chocolatey nom nom. 🙂 Lili x

These are truly works of art!
LikeLiked by 1 person
Aw thanks Sandhya! 😍 That’s really sweet. I confess the moulds helped a lot. 😉👍
LikeLiked by 1 person
That is such a cool idea! Great work Lili!
LikeLiked by 1 person
Thank you so much Ursula! 😍 Have enjoyed working quite easily with nice plastic moulds … and eating the fruit and nuts plus chocolate. 😄
LikeLiked by 1 person
Hello Lili! These Easter jewels are really lovely. I love the decorative centre, it is beautiful, original and healthy! Have a great week.
Marianne
LikeLiked by 1 person
Hi Marianne! Thank you so much – the centre is my favourite part so very happy you like it too. 🙂 Hope you’re having a really lovely weekend! Lili x
LikeLiked by 1 person
Thank you, Lili 🙂
LikeLiked by 1 person