
She’d had serious doubts but unexpectedly fell in love at first bite. Swooning at the cloudlike gluten-free genoise sponge made with cornflour and flavoured with vanilla, merging as one with the chocolate icing and delightful dessicated coconut, she instantly realised why Australians and New Zealanders adore this cake. Heavenly. ‘Why couldn’t I have spent my childhood in Australia and had a Lamingtons in my school packed lunch every day?’ she sighed. Yes, that’s me in the poetic third person and that’s how good these little treasures are! Make them now, thank me later! Or thank Marcellina of Marcellina in cucina, whose recipe was perfect for the Lamingtons Daring Kitchen challenge. No need to adapt, unless you want your icing a little less sweet and fancy using a vanilla pod instead of extract or handling chopsticks! Yup, chopsticks! 🙂 If you’d like some history behind Lamingtons please do visit Marcellina. I really like her story about Lord Lamington’s maid who accidentally dropped sponge cake into some melted chocolate. Apparently Lord Lamington (governor of Queensland from 1896-1901) didn’t like wasting stuff so suggested a coating of desiccated coconut to avoid messy fingers. That’s one smart Lord!
Lamingtons are now an integral part of Australian and New Zealand culture, delightful little squares of light yumminess and so practical! These cakes also adore travelling. I see a future for them in my lunch box, climbing outings, airport trips and picnics. And at home for teatime accompanied by a cup of Paradise tea, with the Queen or other occasional visitor. ‘Lamingtons anyone?’ Everyone in the Daring Kitchen Lamingtons challenge has been so delighted with their grand discovery of this cake. And my mum and brother love them! I’ll never tire of saying to everyone: doooooo try this cake! Or doooooo try making this cake! 🙂
Recipe (from Marcellina ‘s Lamington’s challenge recipe) quantities and process slightly adapted. Make over TWO DAYS so your sponge is rested and firmer for assembly on Day 2.
Preparation
- Use a swiss roll baking tin about 4.5 cm/1 and three quarters inch high and 21cm x 30cm (8in x 12in). Line with greaseproof baking paper and if your tin isn’t very deep leave the paper a little higher than the tin.
- Preheat the oven to 180°C (static, non-convection oven) or 160°C (fan-assisted oven)
Ingredients
- 4 large eggs (230-240g)
- 180g/4/5 of a cup caster/superfine sugar
- good pinch of salt
- 4/5 teaspoon pure vanilla extract or seeds scraped from 1 small vanilla pod (or 4/5 large one)
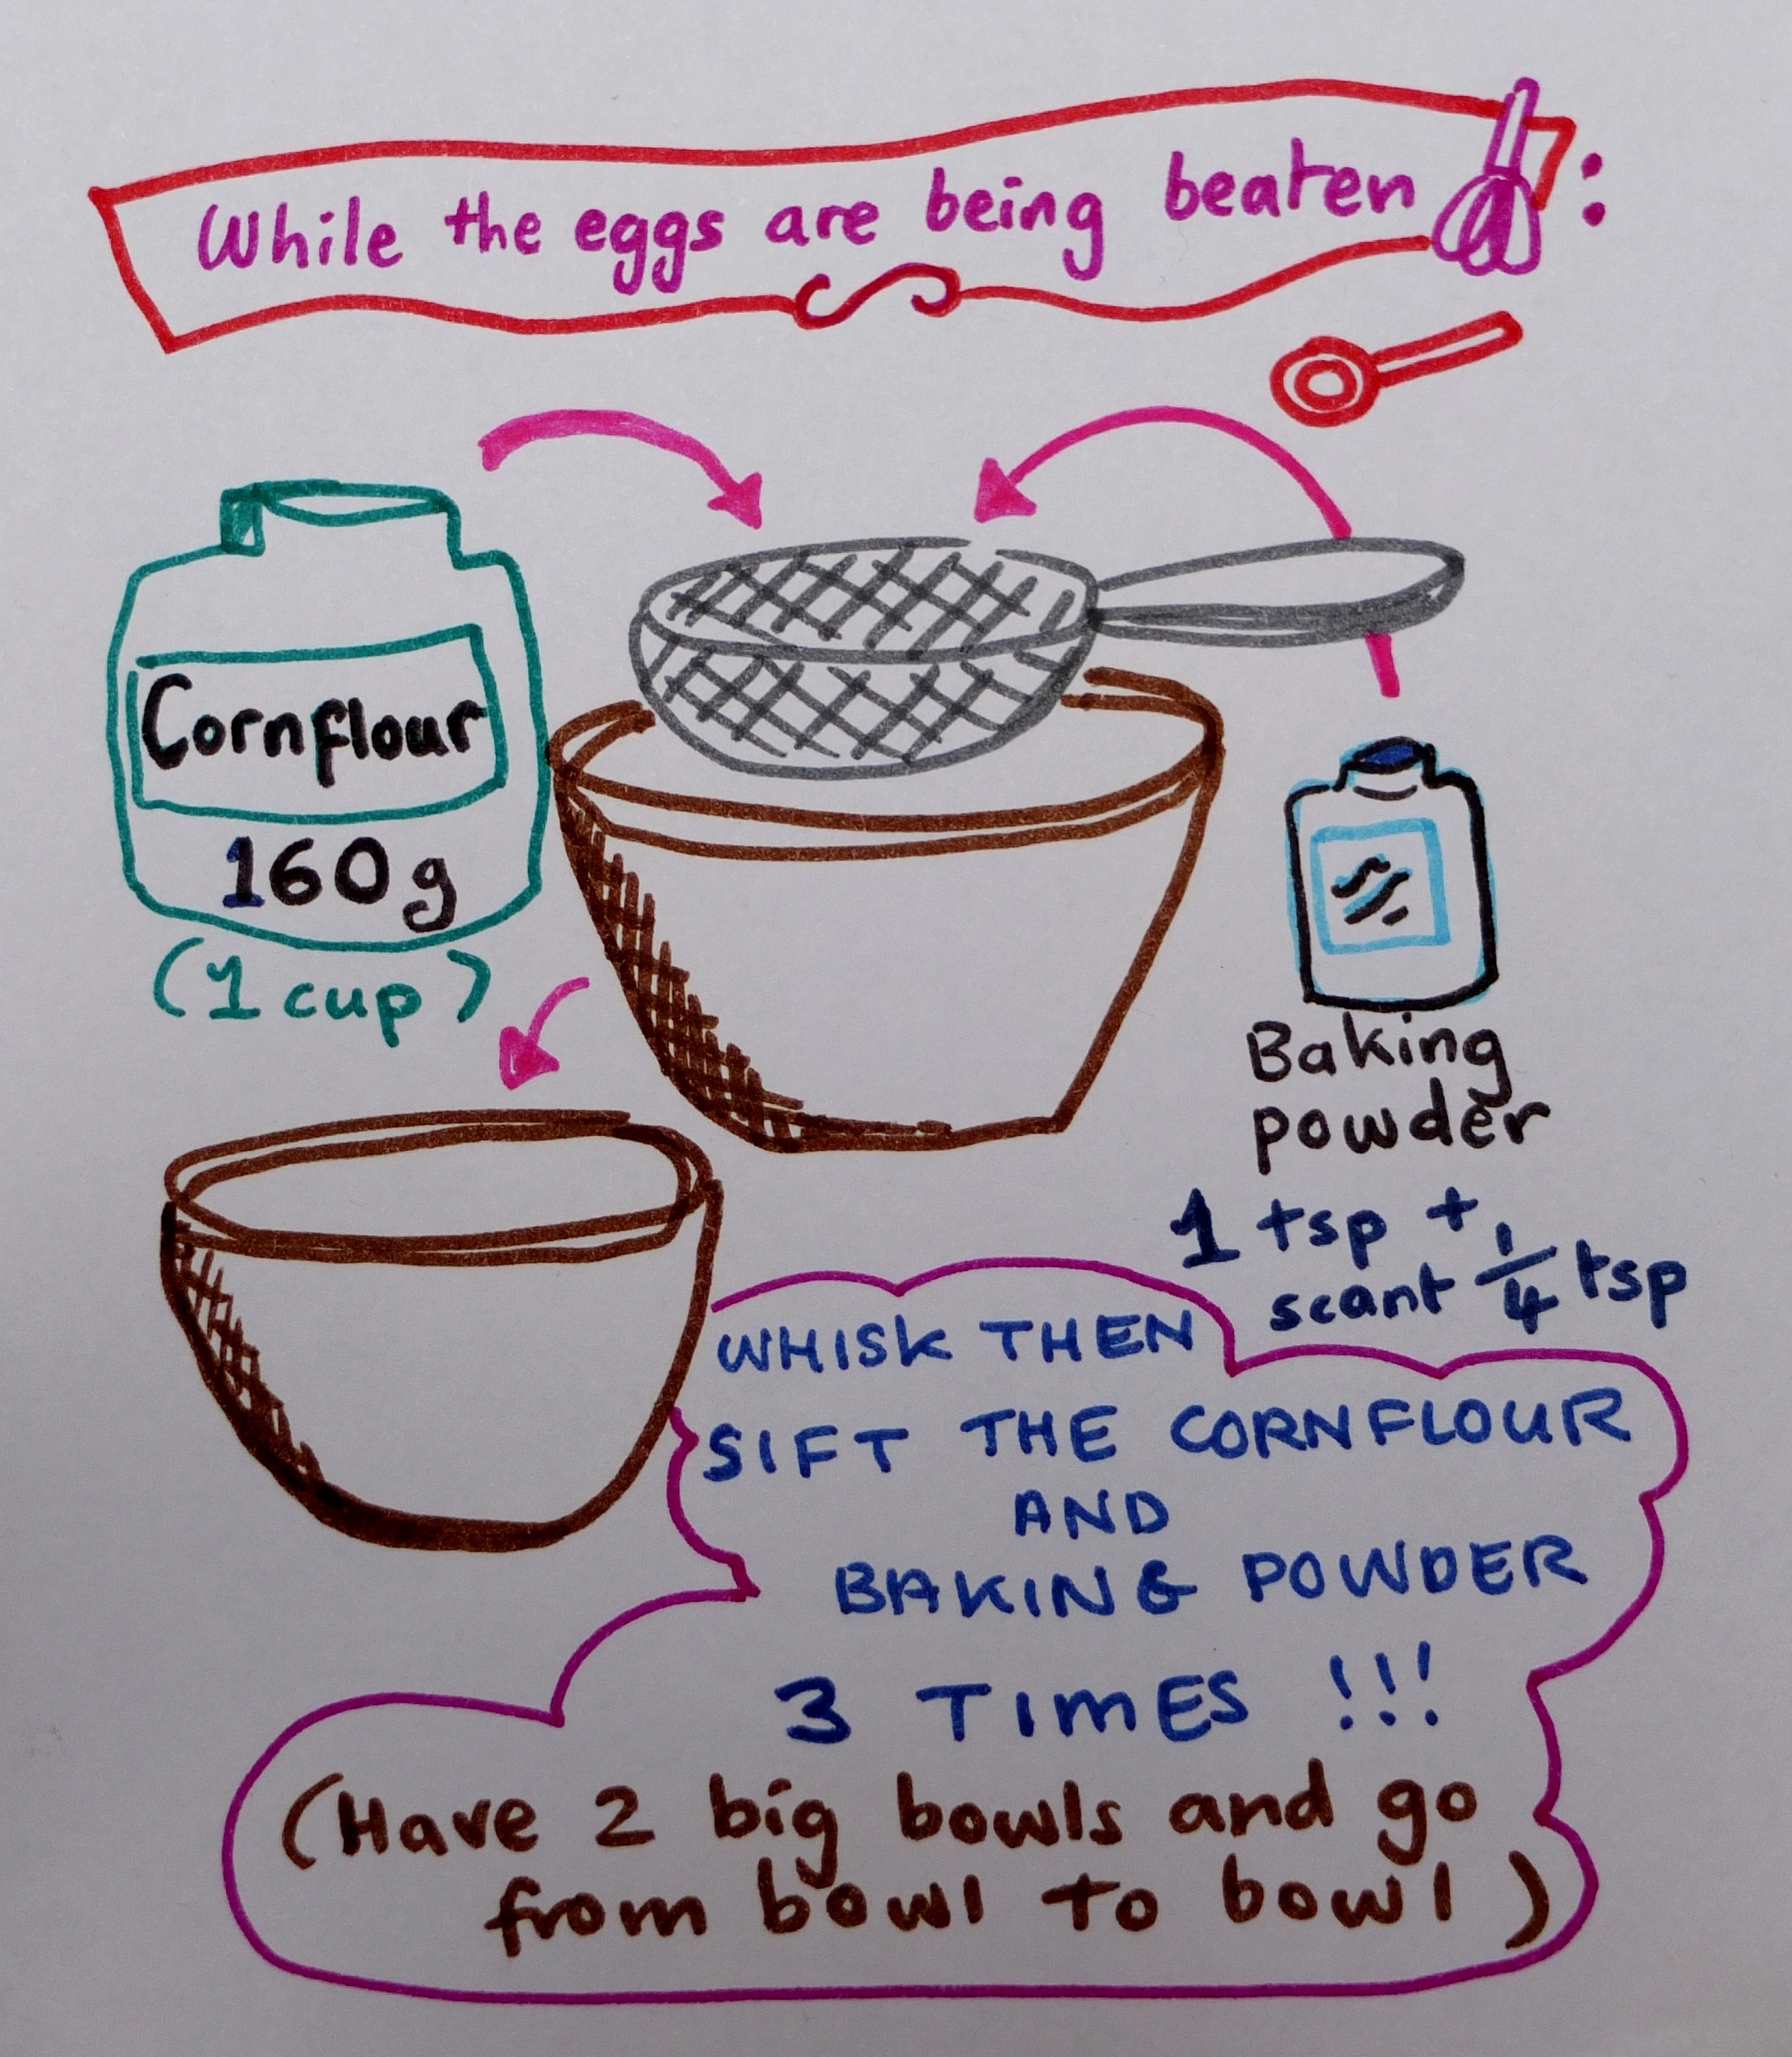
- 160g/1 cup cornflour/cornstarch
- 1 and a quarter teaspoon (scant) baking powder
- Chocolate icing
- 400g/3 and a quarter cups icing/powdered sugar (for a less sweet version try starting with 300g first and adding as required, to taste)
- 40g/one third of a cup cocoa powder
- 15g/1 tablespoon melted butter (melt gently on low heat)
- 120 to 180g/half to three quarters of a cup full-fat milk
- 250g/2 and three quarter cups unsweetened fine dessicated coconut
- some finely chopped pistachios, other nuts or sprinkles (optional alternative)
Method
DAY ONE – sponge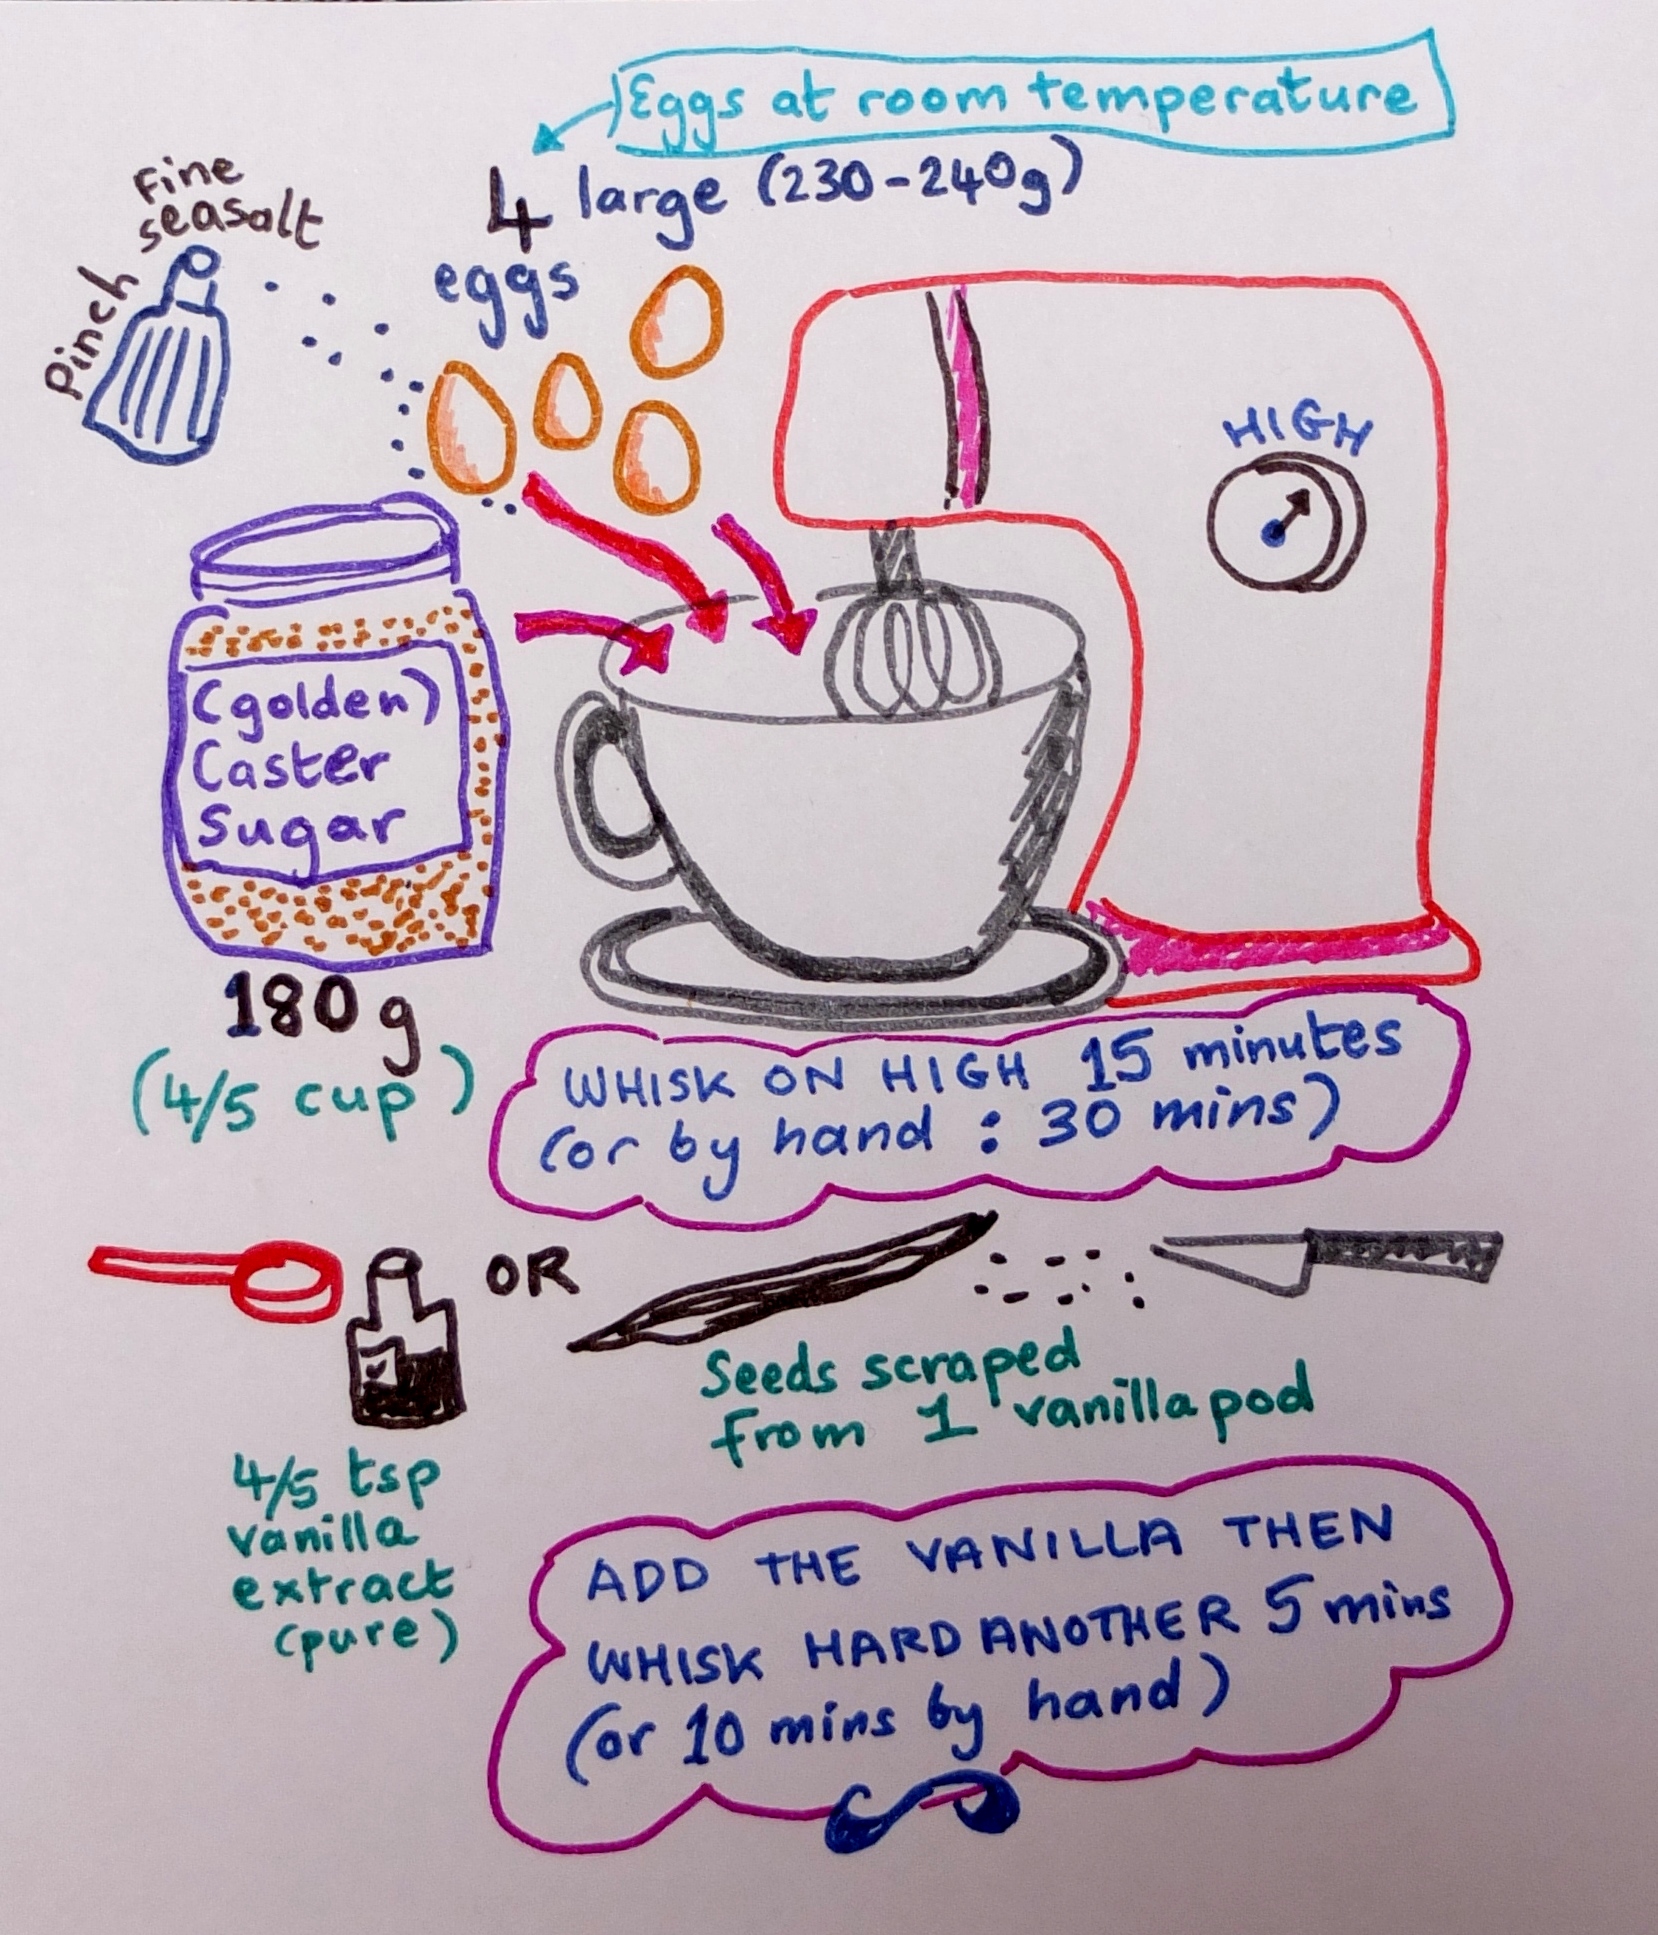
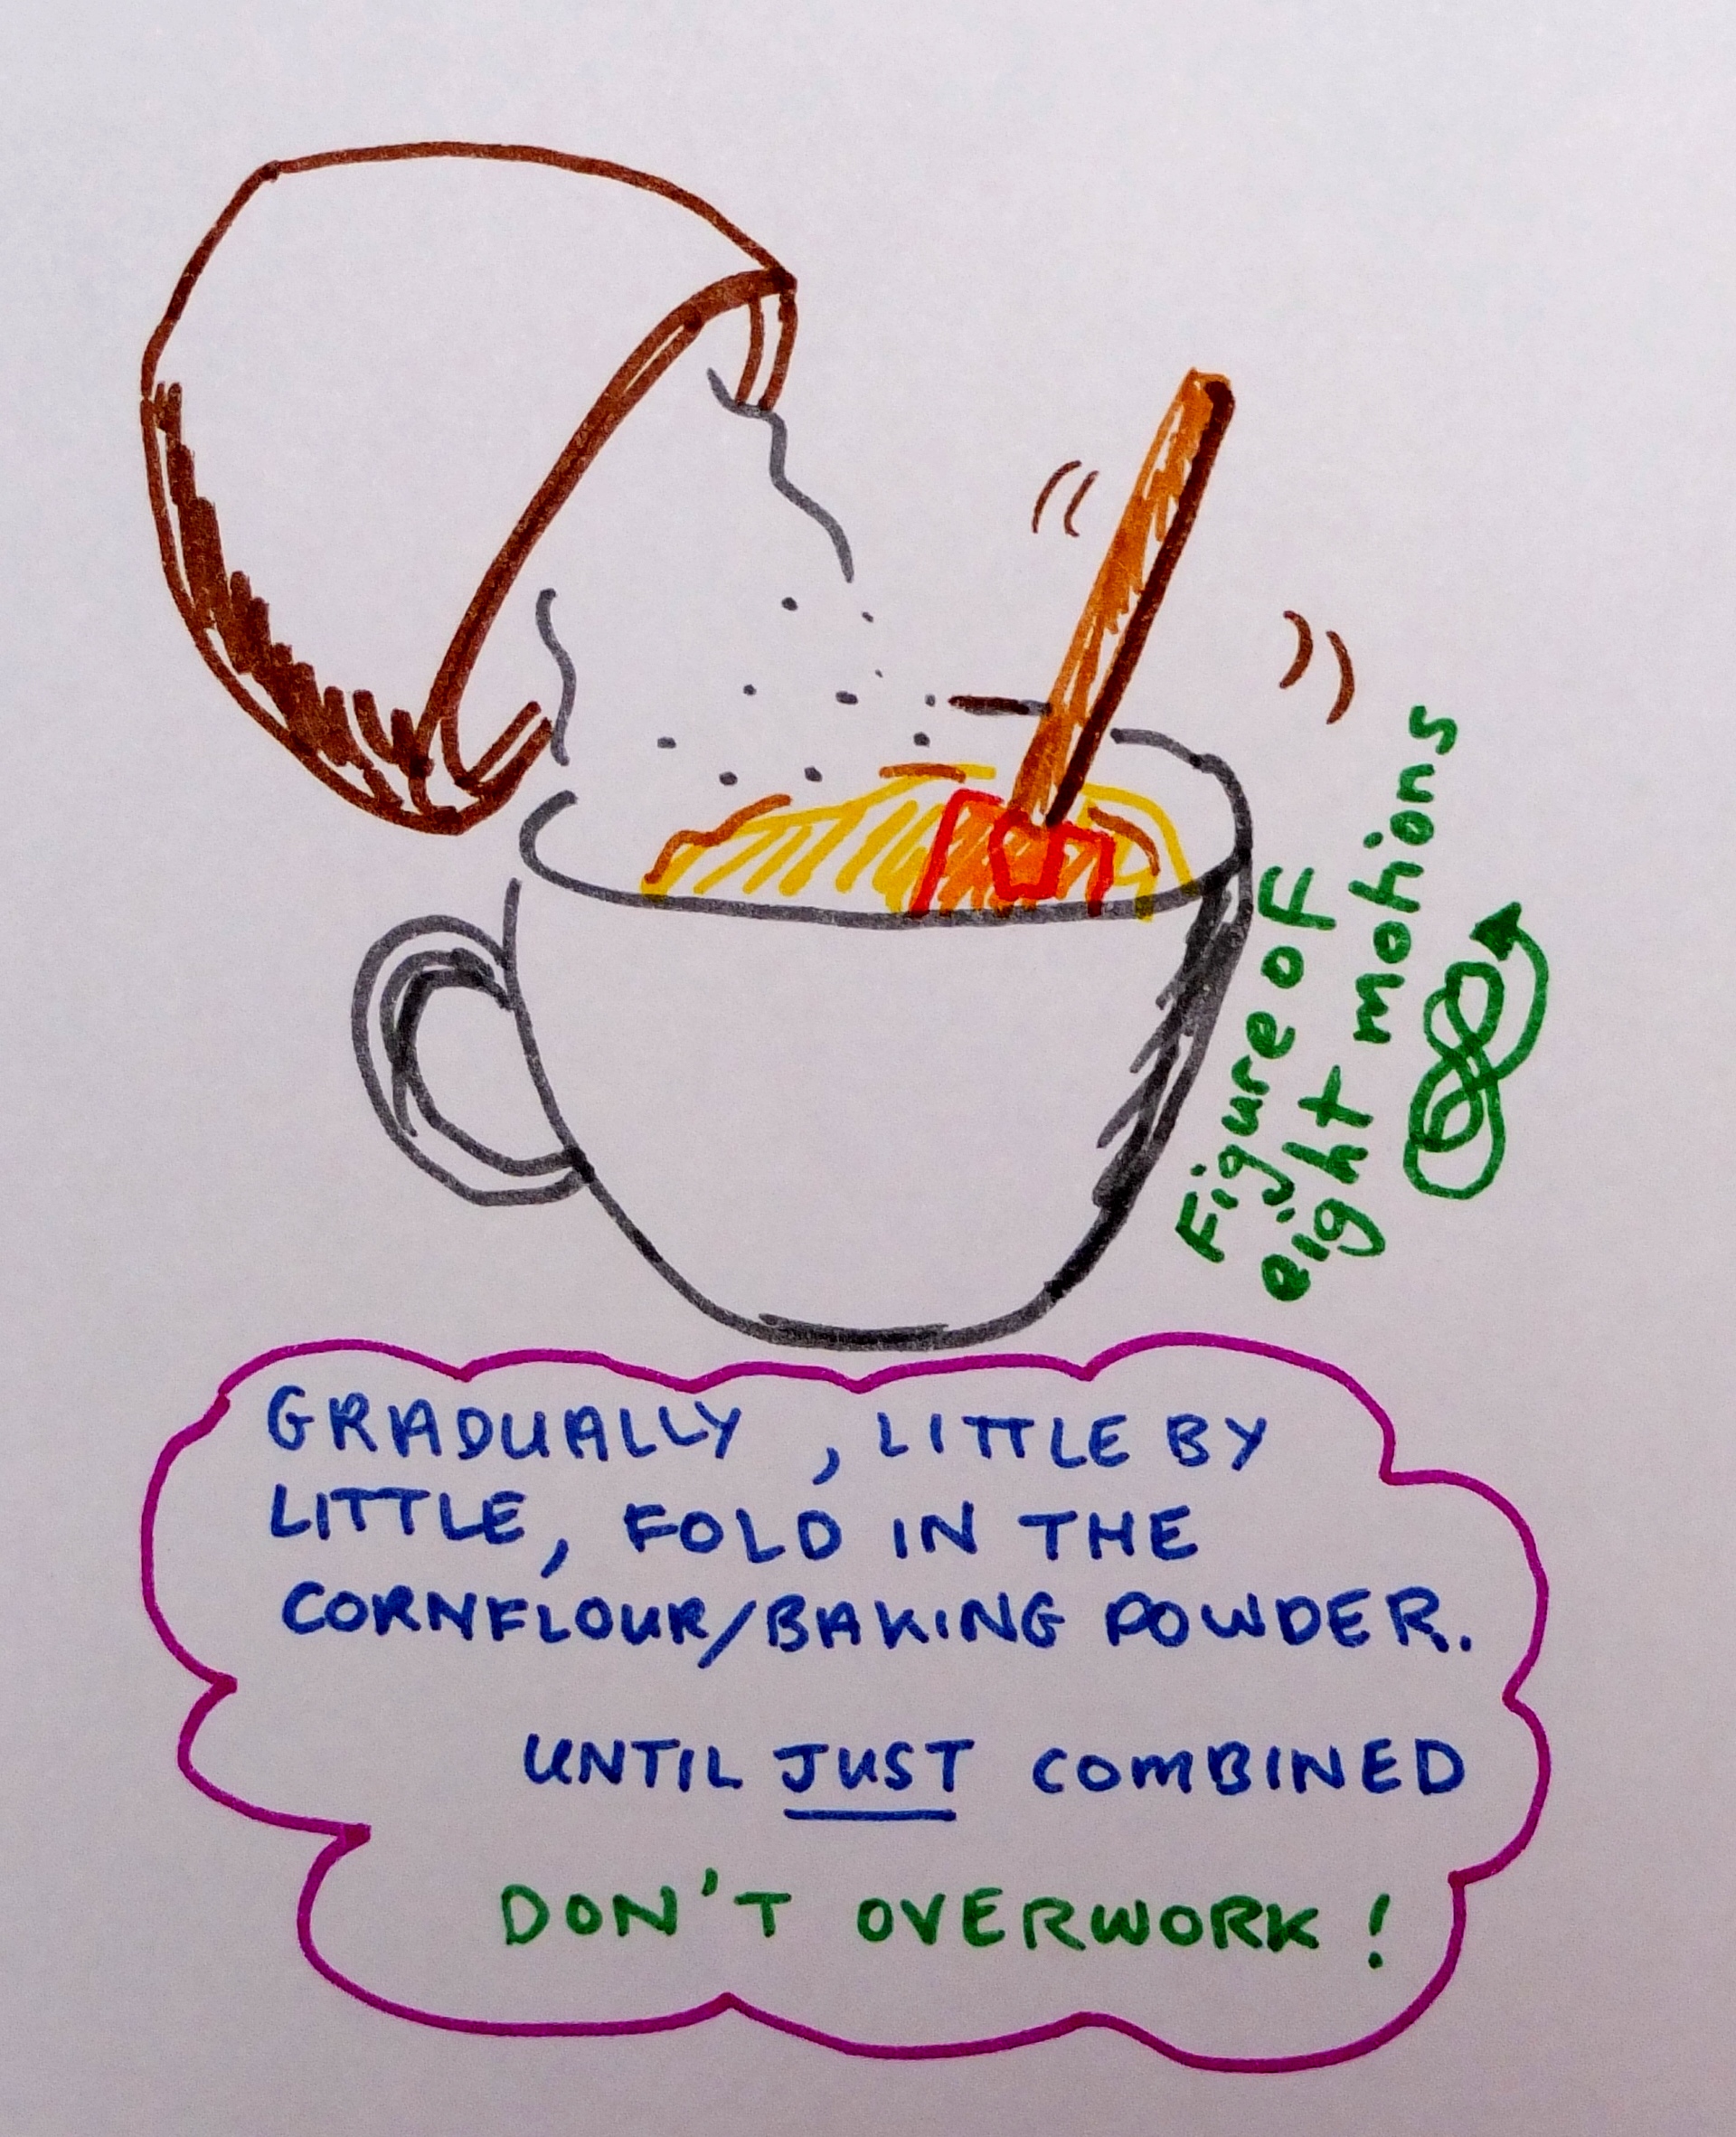
 When just combined, pour gently into your baking tin and level out. Put in the oven as soon as possible, like really fast, so that those rising agents can get into action when and where they should – in the oven.
Bake in the middle of the oven 20 to 25 minutes. The cornflour content can cause an unevenly risen crisp top to form. So to check the sponge insert a skewer which should come out clean and the sides should be coming away from the tin. You can press lightly with your finger and the sponge might spring back a little, if the top isn’t very crisp.
 Turn the sponge upside down and make light marks with a knife (and ruler) to show where you’ll be cutting your sponge into 24 pieces (6 x 4). You can cut in half to store overnight in an airtight tupperware container at room temperature.
DAY TWO – cutting, chocolate icing and assembly
With a long serrated bread knife, trim your sponge (optional) to remove the crust on the top, bottom or sides. Then cut the sponge into squares. Use a pastry brush to remove crumbs from the pieces and work surface.
 24 pieces! Woohoo!
 Now start preparing the chocolate icing by sifting the icing sugar and cocoa into a heatproof bowl.
 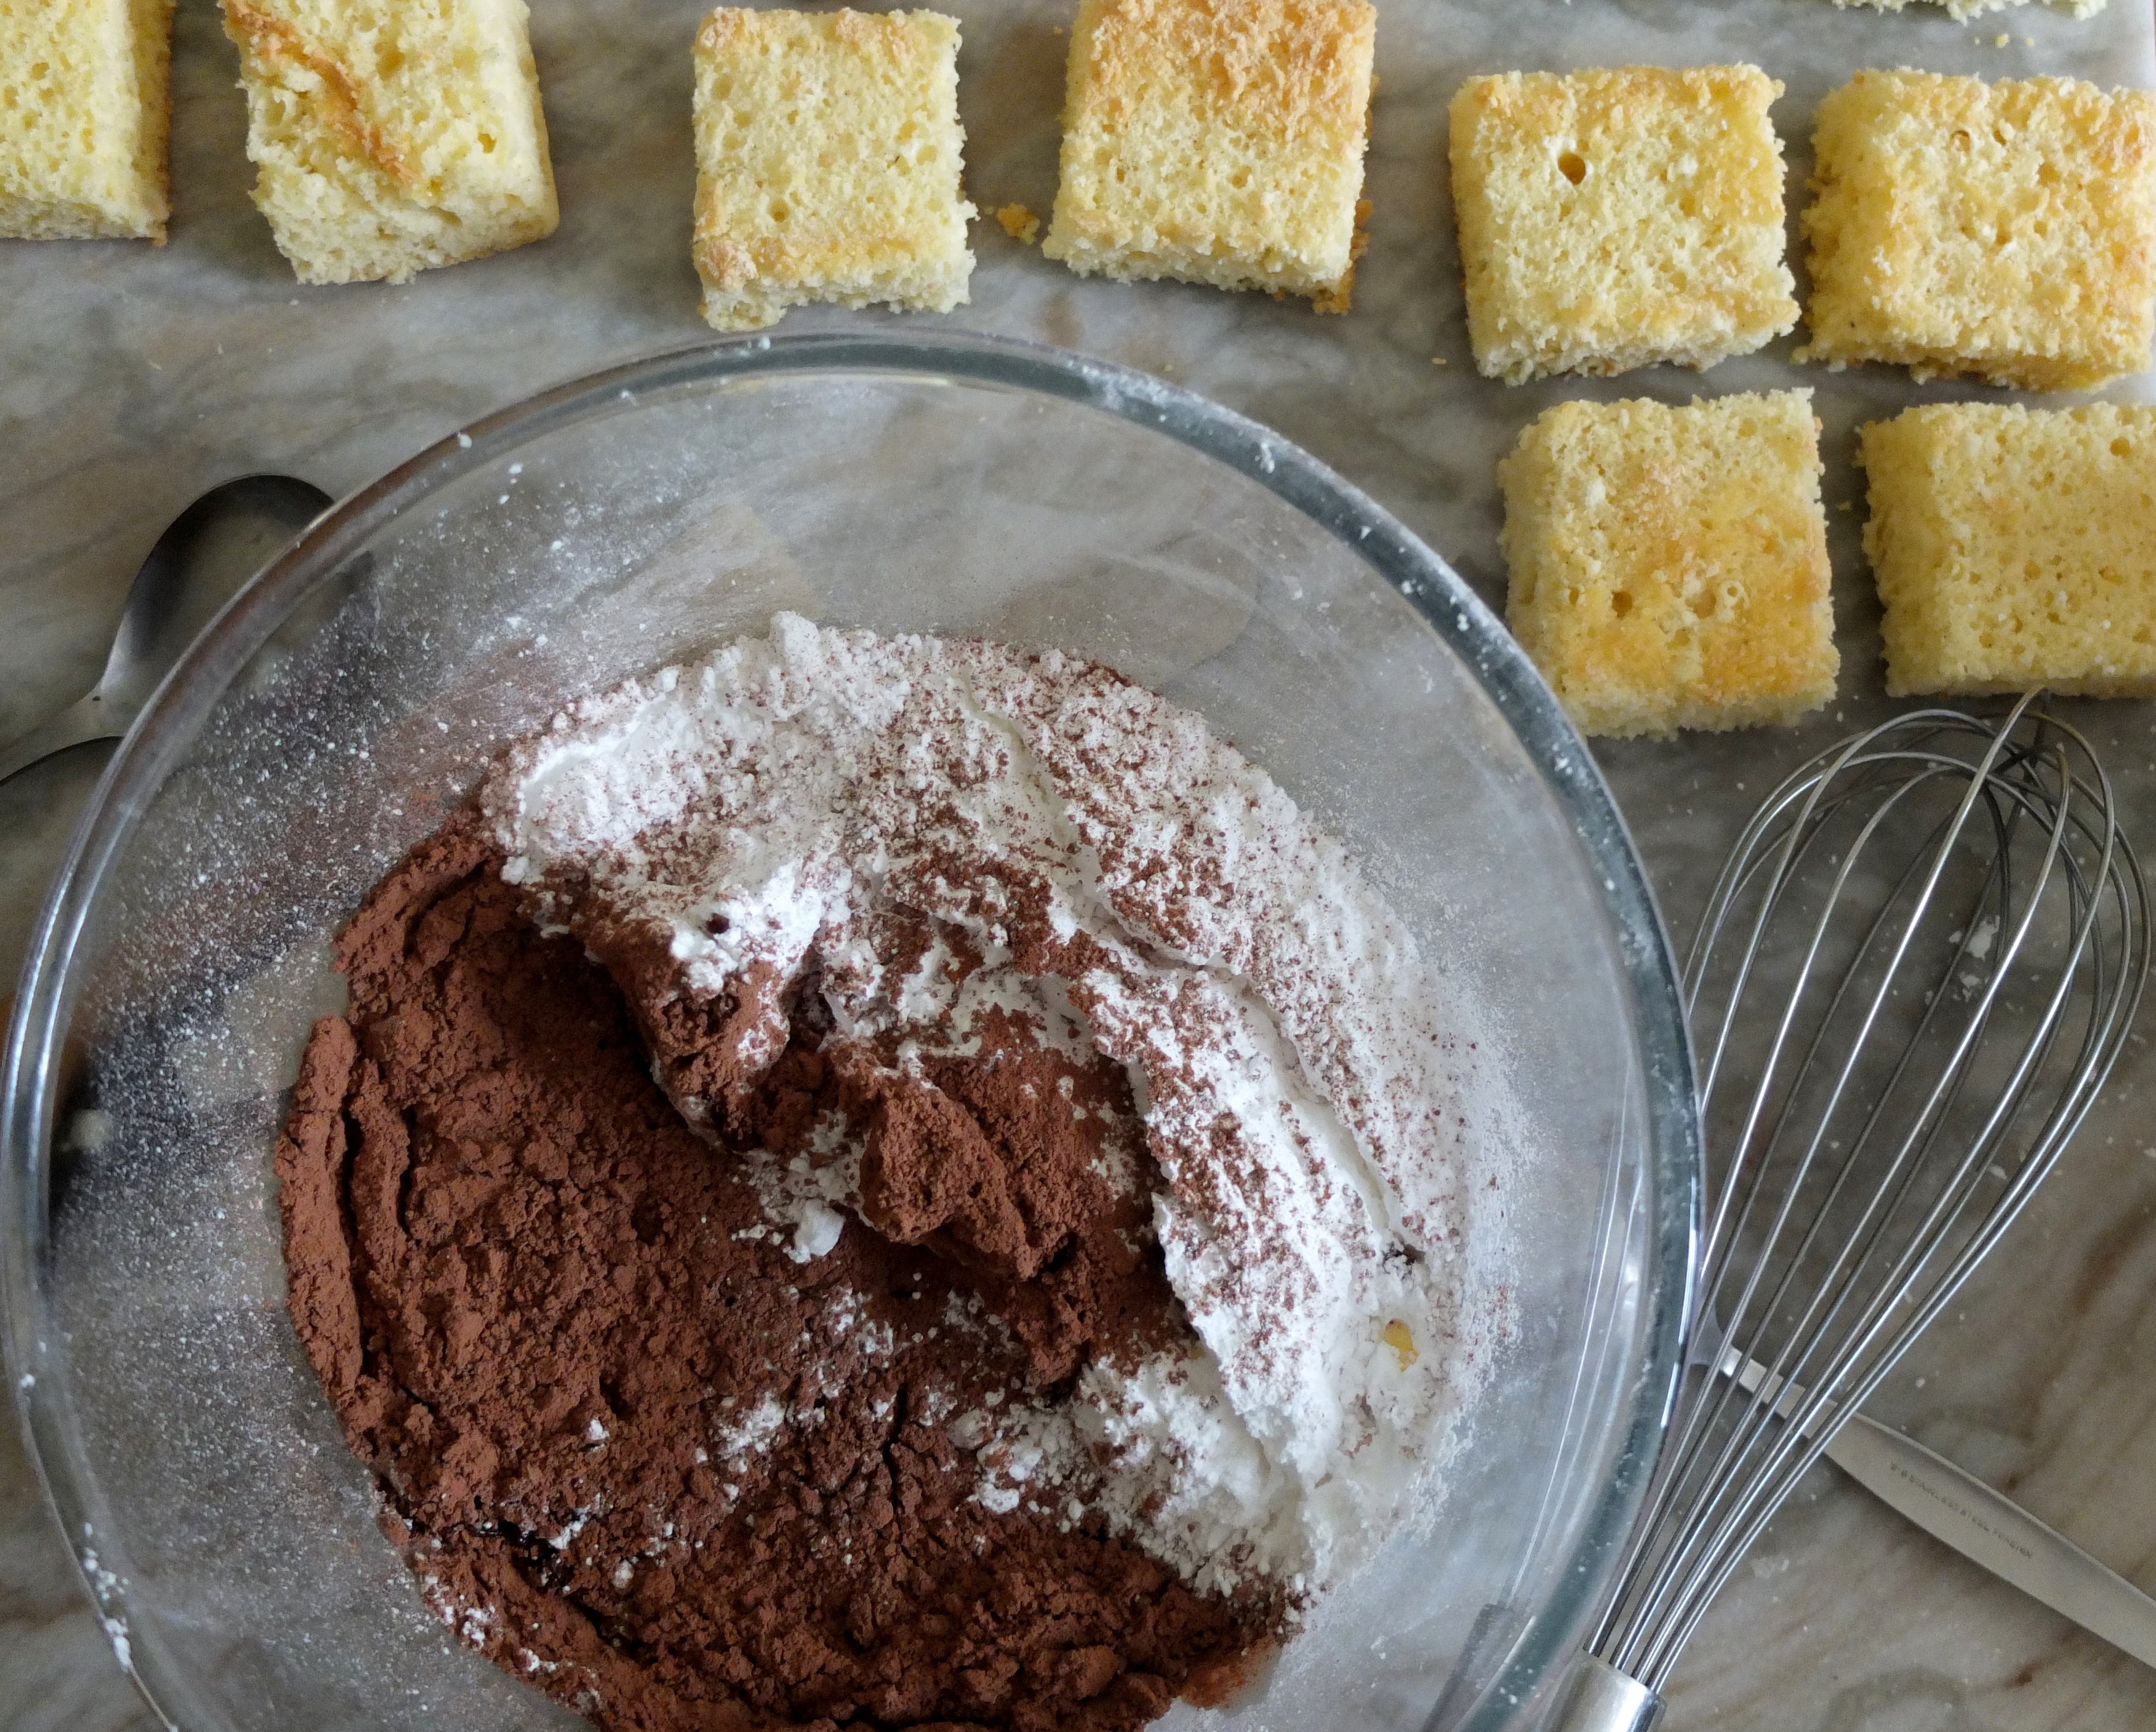 Whisk in the melted butter and 180g/1 cup of the milk. Add more to thin the icing if necessary. Taste to check if you need more sugar or cocoa (to taste). Whisk over a bain marie (a little water that’s simmering gently on a low heat – the water shouldn’t touch the bowl).
 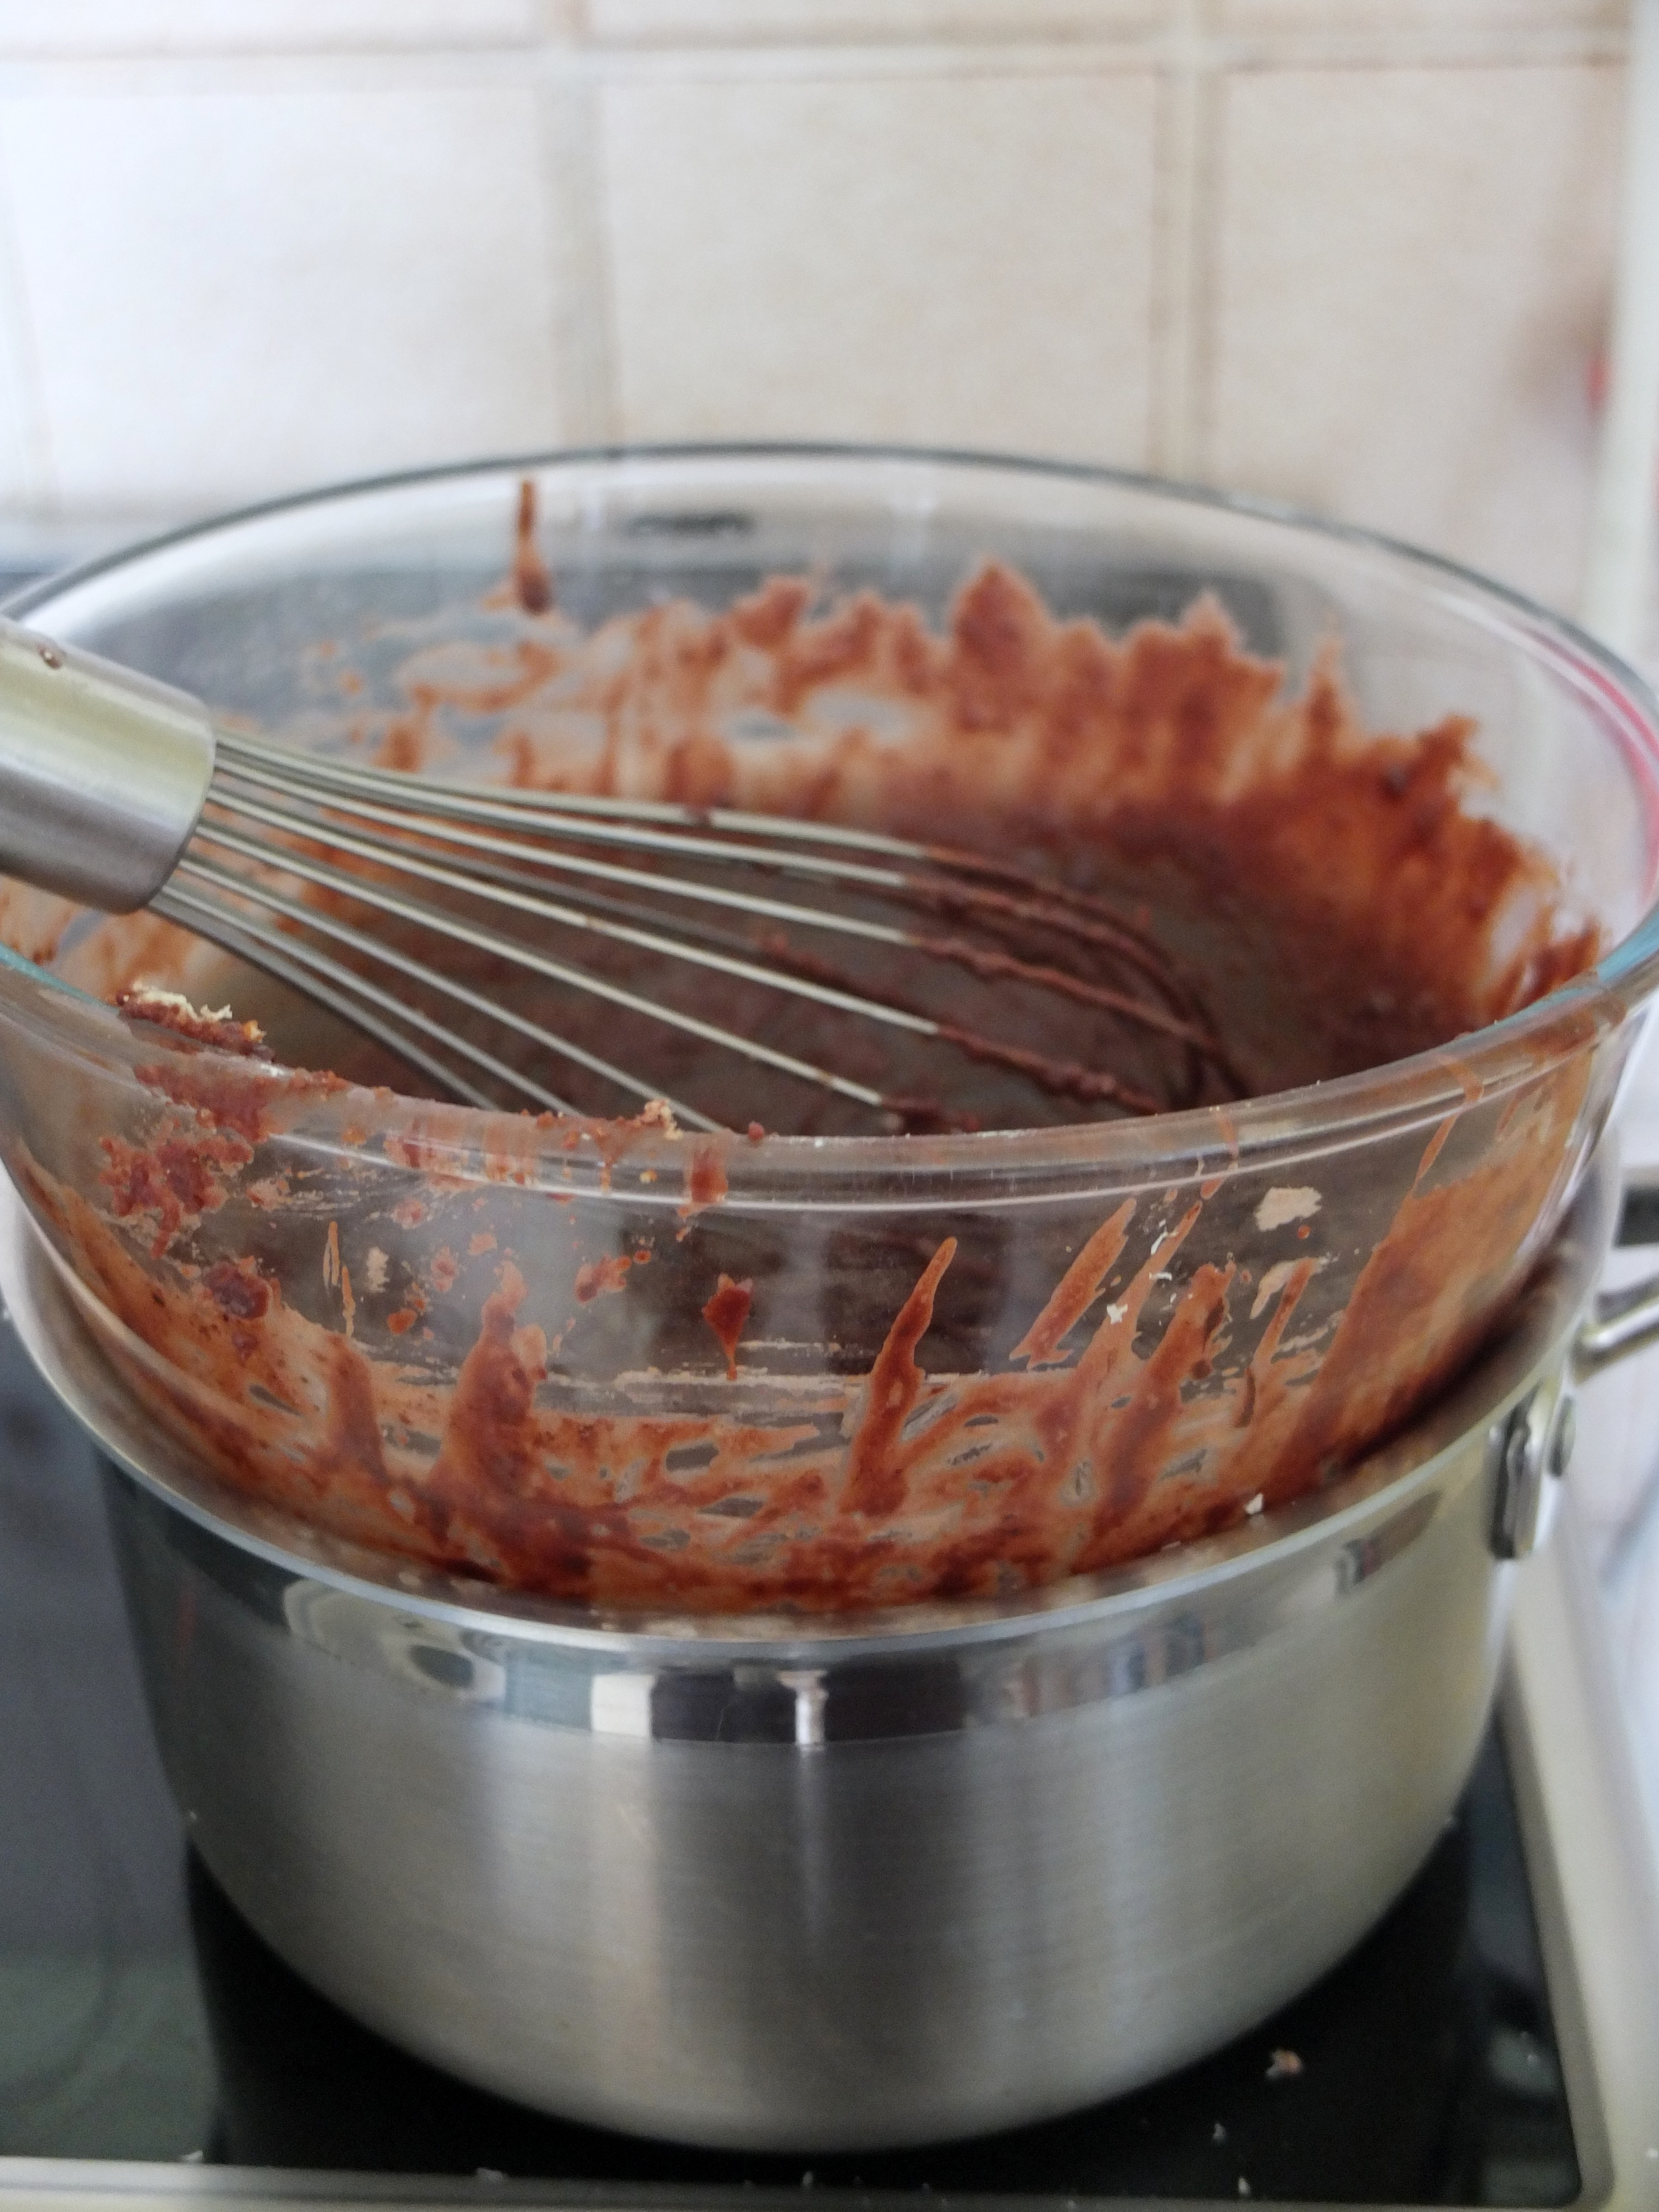 You want icing that’s liquid enough to cover the cake pieces with a thin layer but not too runny.
Use your fingers, prongs, fork or chopsticks to dip each piece of sponge (one at a time) into the chocolate (which you keep on the bain marie). Cover then let the surplus chocolate drip off so the layer is reasonably thin.
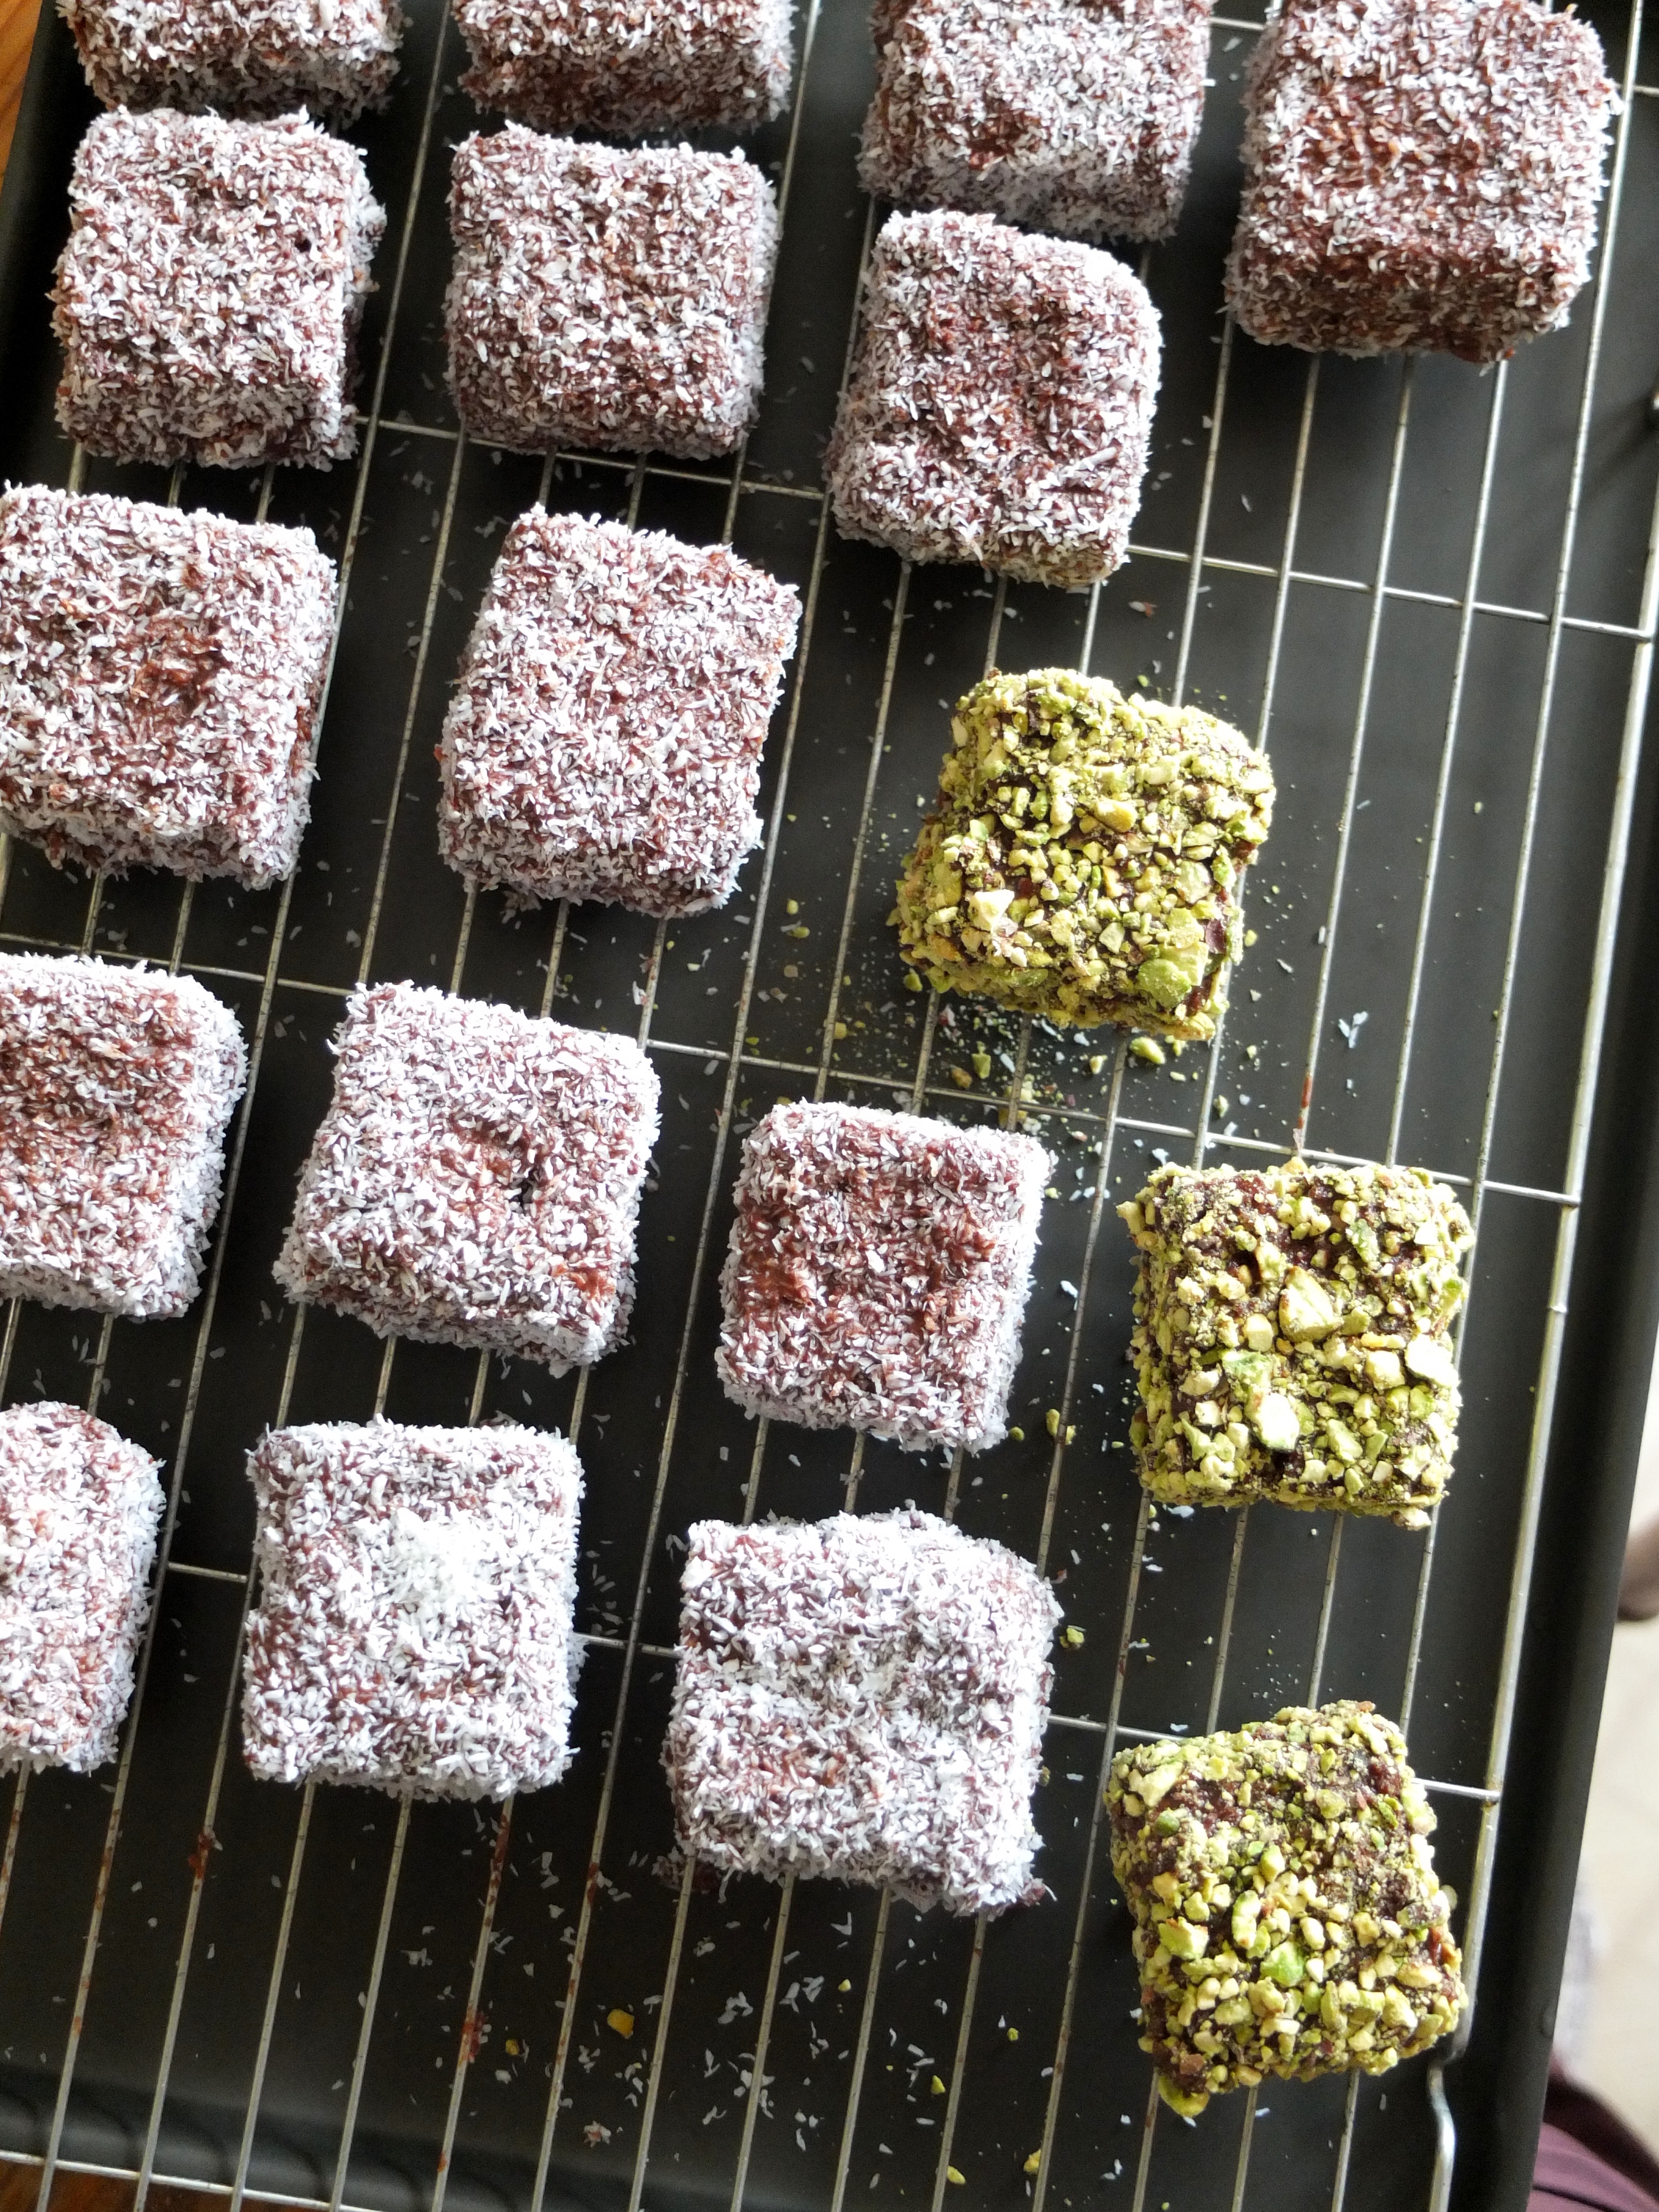
 Place your cube onto a deep plate of dessicated coconut and gently turn on all sides, so the coconut completely covers each cake. You can cover some in chopped nuts or sprinkles too.
As soon as it’s covered, place each piece of cake to set on a wire rack for 2 hours at room temperature.
 Storing and eating
Store in an airtight tupperware container in the fridge. They keep really well for a few days or so. And you can store in the freezer for a few weeks too, keeping them handy for unexpected visitors as Australians do! They defrost so fast. 🙂
Enjoy at home or take your precious Lamingtons on a daytrip like me and Mum did, to Brighton beach. It seems fitting since they are commonly eaten in Australia and New Zealand. I must confess I couldn’t resist eating mine on the train down so had to borrow mum’s for this photo! I’ll take more next time.

You could also take them to a party, like the wonderfully sociable Fiesta Friday hosted by Angie@the novice gardener and her co-host Mollie @ The Frugal Hausfrau.

A little Lamingtons perhaps?! 🙂
So just going to repeat myself sweet reader: doooooo try making and eating this cake!! Lamingtons will make you so happy! Have a lovely rest of the week with lots of happy moments! 🙂 x

These look perfect! And I love your blog. And your drawings. Well done!
LikeLiked by 1 person
Thank you so much Liz!! Very happy you like the blog, Lamingtons and drawings! 🙂 Look forward to following you too! 🙂
LikeLike
Your Lamingtons look beautiful. I loved how you stepped through the process. It will make it easier for me the next time!
LikeLiked by 1 person
Thank you Julie! Glad you like my little Lamingtons! 🙂 Also happy to be of any help… Popping over to visit your lovely Lamingtons now! 🙂
LikeLiked by 1 person
I have so much to marvel about in this post! Wow, firstly I’m really intrigued by the gluten free sponge! It looks so light and airy and perfectly structured! I really don’t know anything about gluten free baking but I imagined that gluten free cakes might come out a bit denser, but this doesn’t look the case at all. Secondly, I really love how your wrote out your recipe…it’s so colourful and much more approachable! And finally, you really set the tone with your opening photo of the lamington against the beach–so bright and such lovely water 😀
What can I say–I absolutely loved this post!
LikeLiked by 1 person
Thank you so much for all your lovely comments! Yes, I do recommend the cornflour sponge if you fancy experimenting with it – lots of the challenge participants loved it. My mum also wants to use this sponge in the future for other stuff! 🙂 Very happy you like the post; photo qnd recipe so much! I am pretty fond of Lamingtons and that photo of one on the beach too! See you later at FF! 🙂
LikeLiked by 1 person
Haha, yes, see you soon! 🙂
LikeLiked by 1 person
I have to say I’ve never really “gotten” lamingtons before! I mean, they always sounded good – cake dipped in chocolate can never be wrong, right? But now I SEE what it’s all about! Wonderful recipe to bring to Fiesta Friday, and I see Lamingtons sometime in my future, now! 🙂
LikeLiked by 1 person
🙂 So happy to be seeing a Lamingtons convert, who’s seen the Lamington! 🙂 Do let me know your thoughts once you’ve tasted some… And thank you for all the lovely and amusing comments! 🙂 Happy FF and thanks again for co-hosting! 🙂
LikeLike
These look wonderful! Congrats on also completing this month’s Daring Kitchen Bakers Challenge also!
LikeLiked by 1 person
Thank you Joanne! It was a lovely challenge – luuuuv Lamingtons! 🙂 Enjoyed reading your fun Lamingtons post too!
LikeLike
Pingback: Lamingtons – the greatest discovery ever! A gluten-free recipe! :) | homethoughtsfromabroad626
Pingback: Week (18) of cakes, jam and the three-great-cookbooks discovery! | lili's cakes