Sugar-free, guilt-free but not taste-free! Have you noticed every now and then you’re seized by the urge to make and eat healthy stuff before diving back into refined sugars, cream and more … ahem… sweet naughtiness? Well, you can have your healthy snack and decadent treat in one fell swoop with these! Woohoo! Salted caramel balls made of dates, coconut oil and peanut or almond butter (the healthy kind) are coated in dark chocolate. And you could add pecan nuts or fill mini chocolate cups. They’re healthy, easy, no-bake, fast and delicious. And they’re mine, all mine! Muahaha…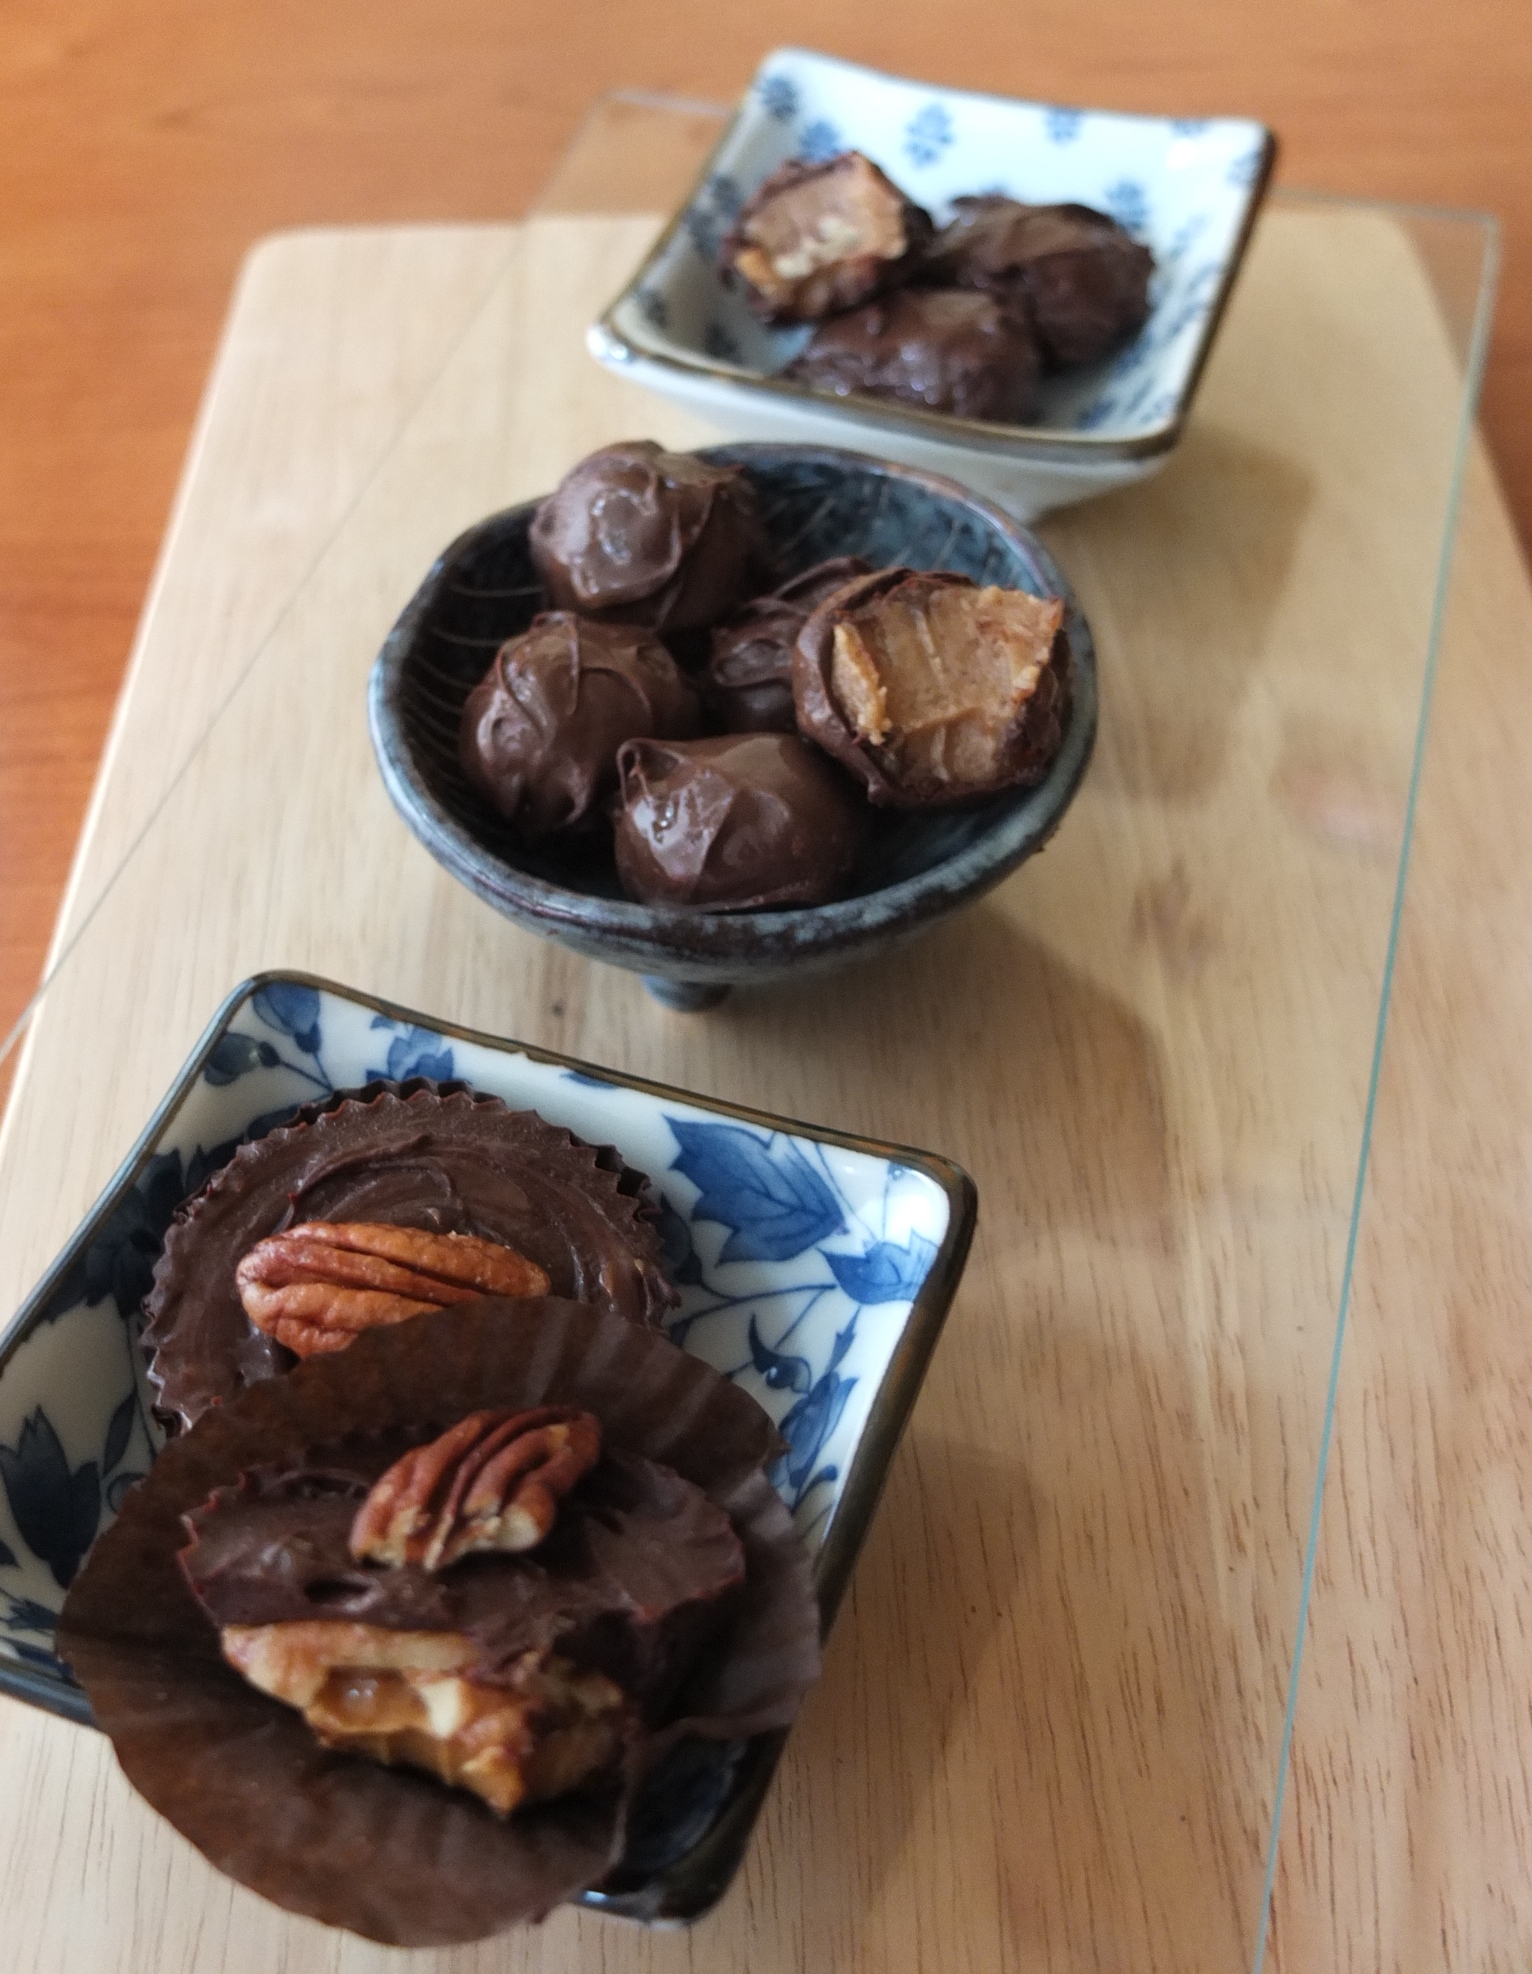 Okay, I might share. And maybe I’ll make a load more so it’s easier to separate myself from a few. Let me practise here. Would you like a healthy chocolate? Imagine I’m offering you a plate of them
 then hesitating, pulling back and running off with a big encouraging smile.
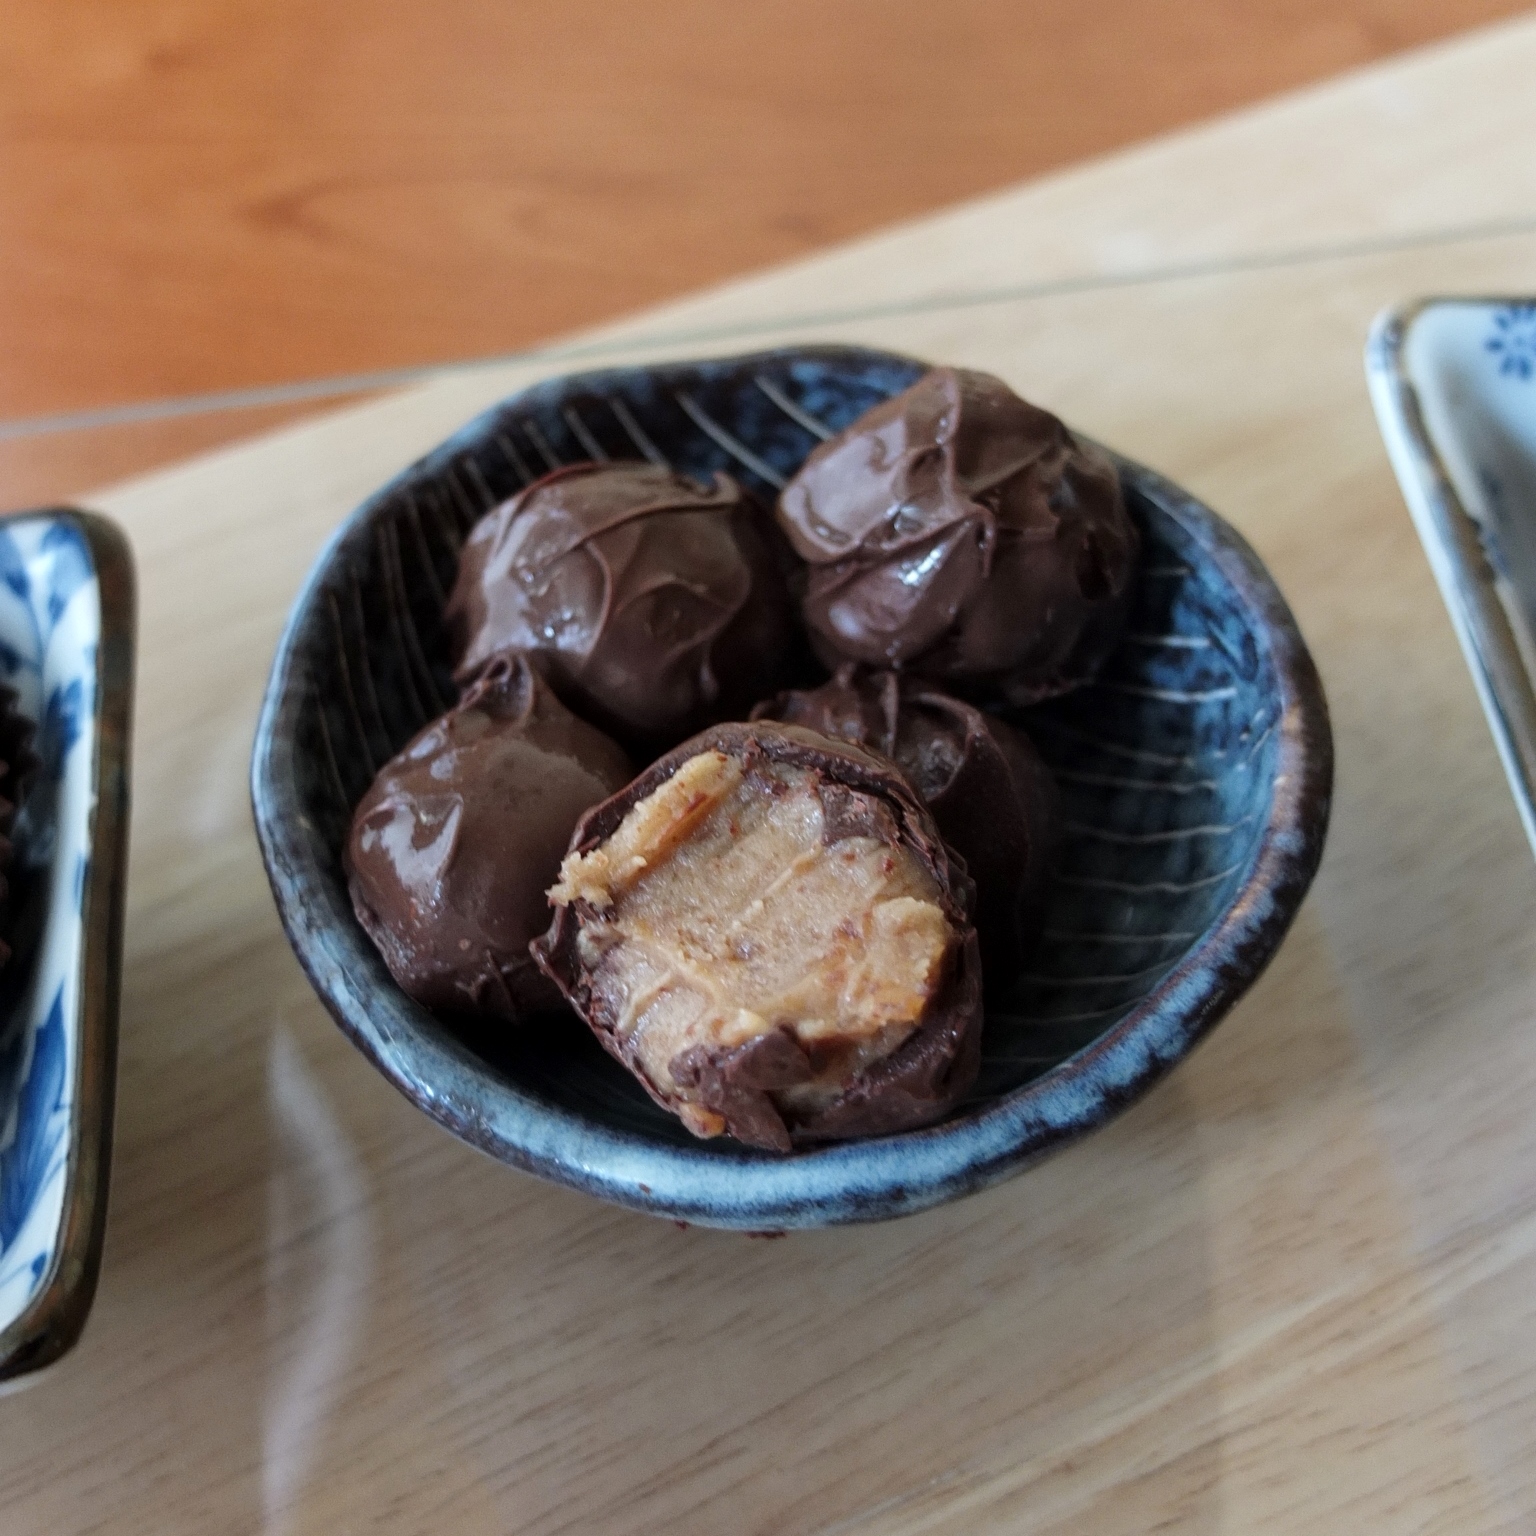
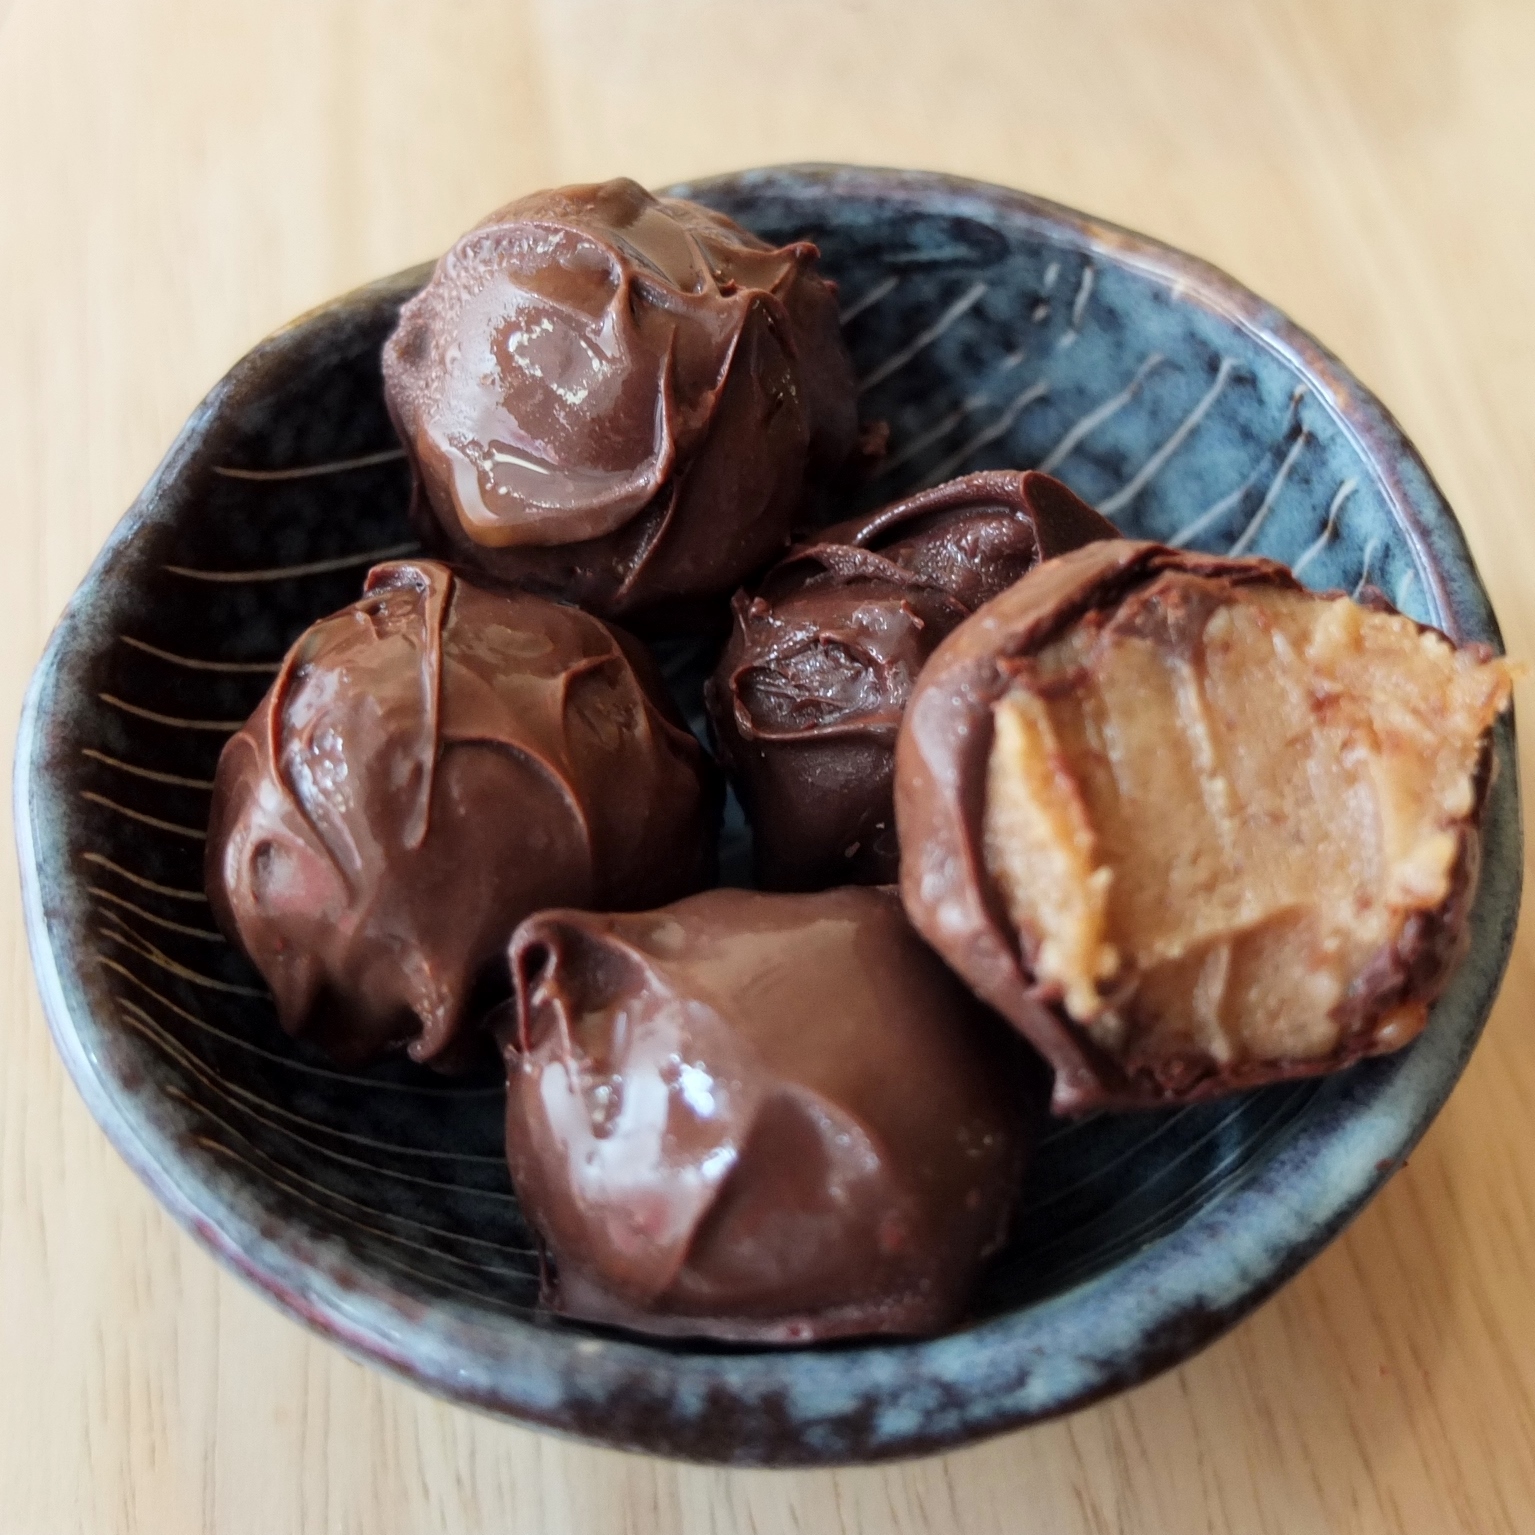
Caramel made from dates is a big thing in the world of healthy treats now, right? Well maybe it’s been around a while but it’s new to me and pretty exciting! Initially I found the taste of dates quite strong, but then the other flavours and chocolate coating balance it out. The texture is very pleasant and kind of creamy and gooey in a caramel-like way. You store these treats in the freezer and if you eat them very cold they’re fudge-like. Hey, it’s not CARAMEL but it’s very yummy. If you’ve made it before or try it now I’d love to know what you think of them.
And don’t be fooled by these treats’ decadent appearance. It’s true dates are quite high in natural sugar (some of this is good for you) so you should only eat a few a day, which is fine because I find just 2 or 3 of these little chocolate caramels satisfy me. But dates have amazing health benefits for your heart, digestive system and so much more, also relieving hangovers (!) as you’ll see from online articles such as Health Benefits of Dates by Organic Facts. Yay! 🙂
The recipe
 The peanut butter cups are inspired by Reese’s and the balls are based on the chocolate-covered caramels in Jenna Zoe’s books Super healthy snacks and treats. I’ve made the balls smaller, added vanilla extract and more salt and tried to temper the chocolate (optional) so it would stay nice and shiny and because I’m trying to practise this skill. Crazy crazy, since the chocolate has to cool to 28-29°C and it was 30°C in my kitchen late evening. The chocolate eventually cooled to 30° but refused to go below. Still, you can see it’s kind of shiny.
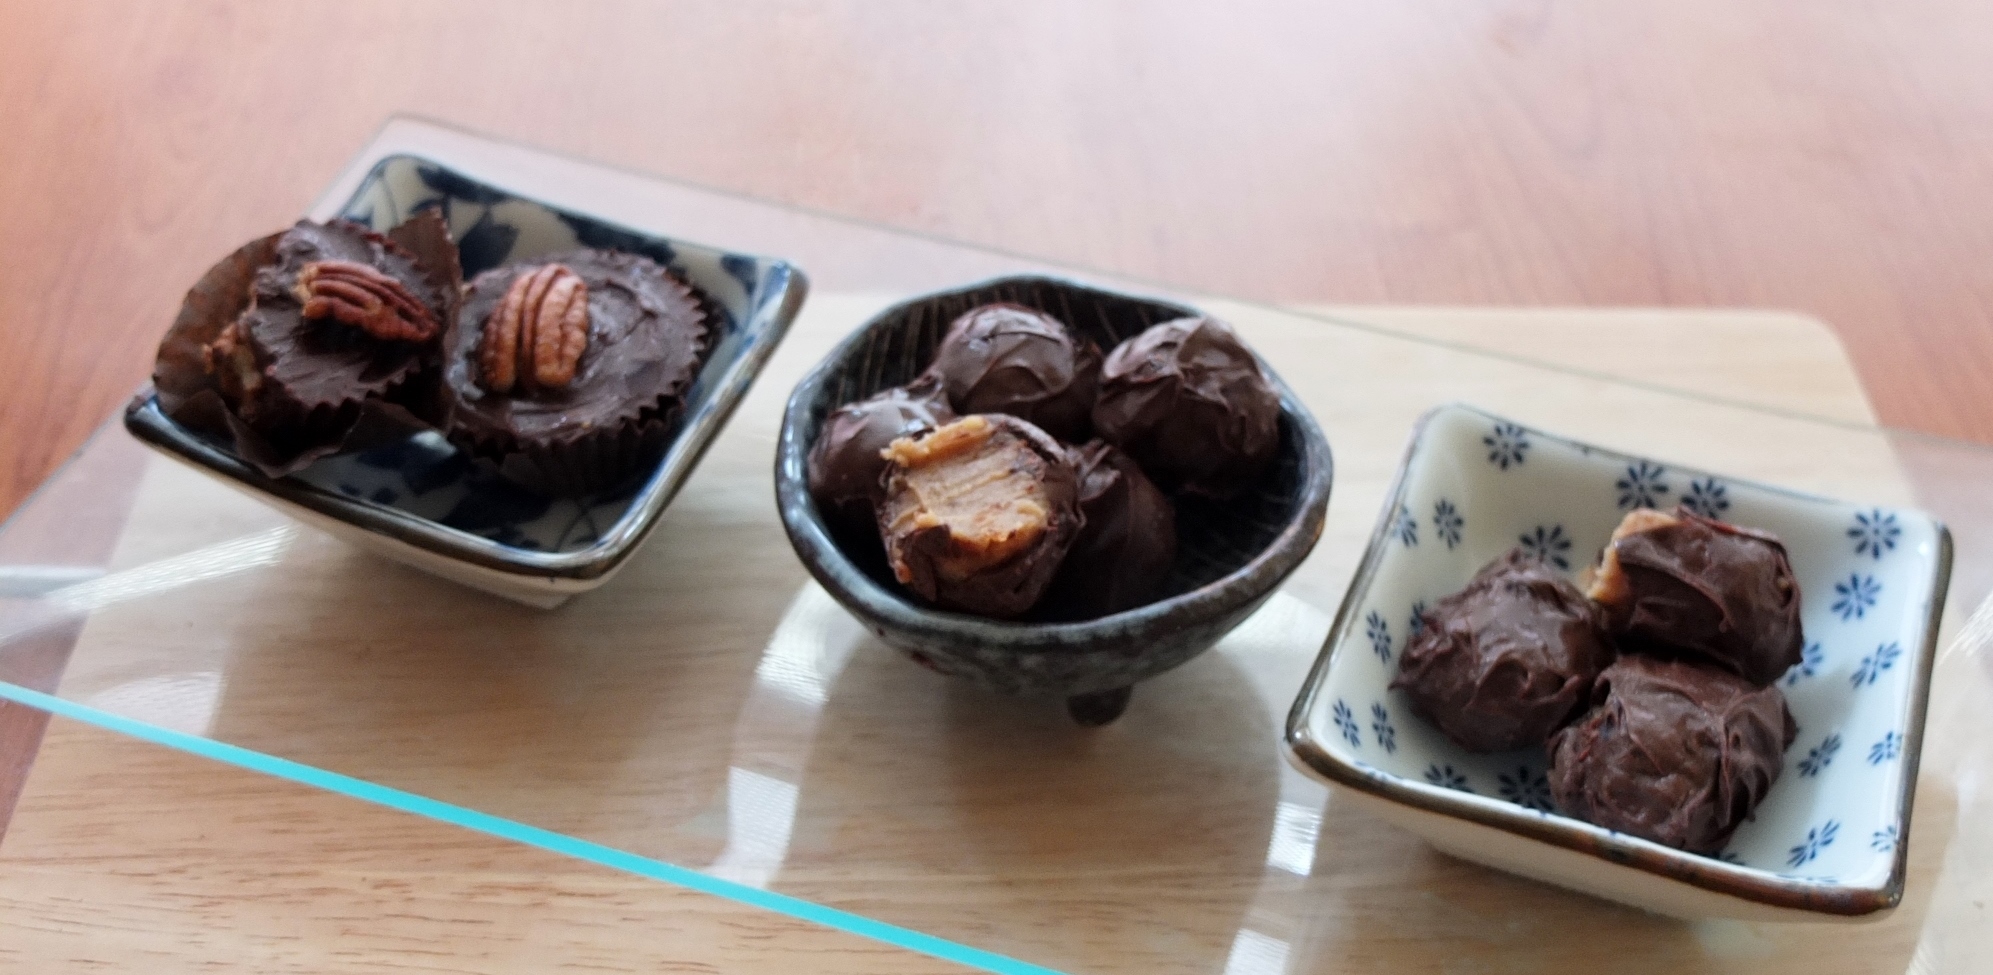
Please feel free to play around with quantities, ingredients and sizes. The quantities below produce 20 to 25 chocolates, depending on sizes and the kind you make.
Date caramel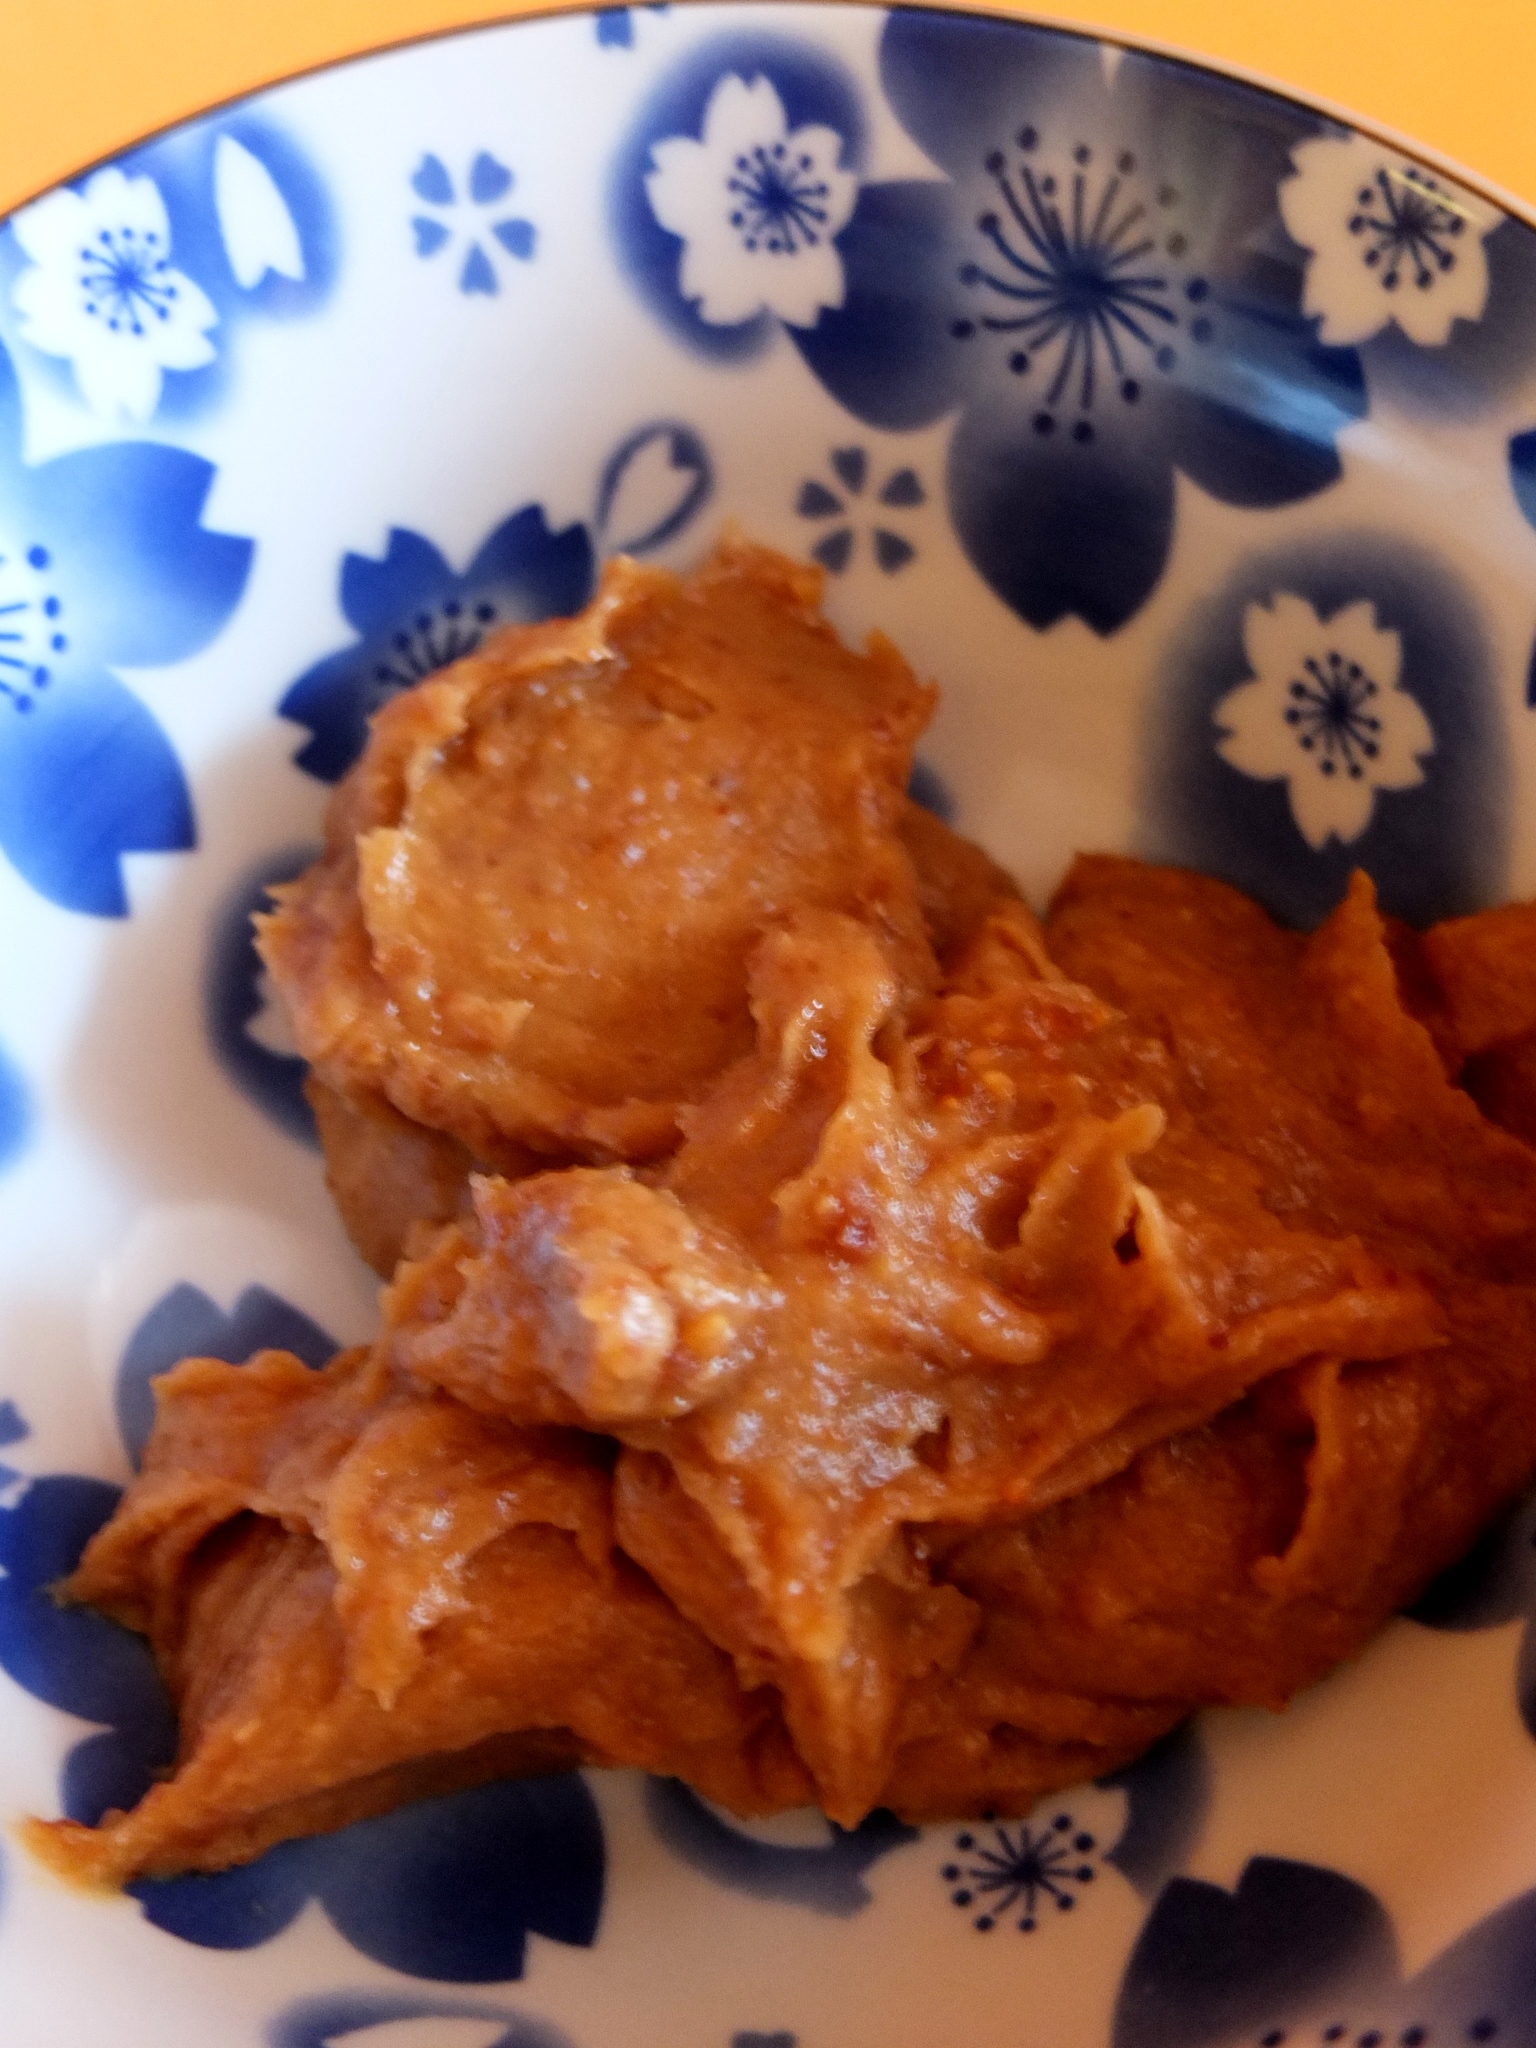
- 200g/2 cups stoned dates
- 2 tablespoons peanut/almond butter (unsweetened from your healthfood store)
- 2 tablespoons coconut oil
- 2 teaspoons pure vanilla extract, or more (to taste)
- 5 good pinches of salt, or more (to taste)
- Soak your dates in water for 2 hours then rinse and pat dry.
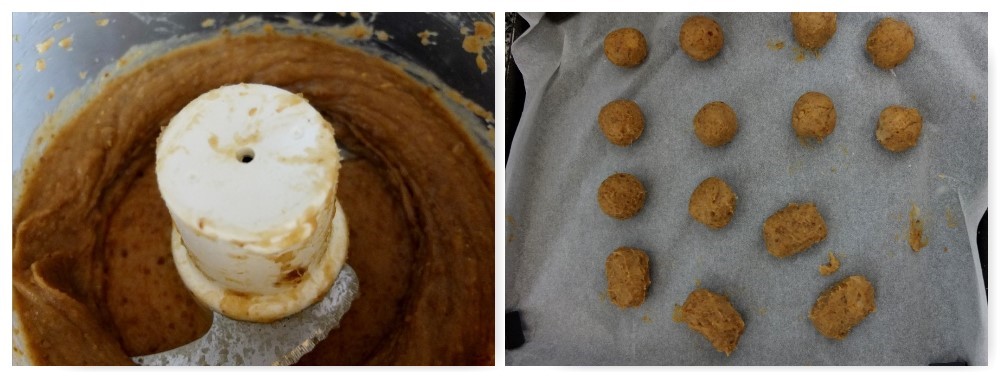
- Blitz your dates in your food processor till you get a smooth paste then add the peanut butter, coconut oil and salt, to taste.
- If the mixture’s very soft spread on a clean tray and pop into the freezer at least 30 minutes until firm enough to shape.
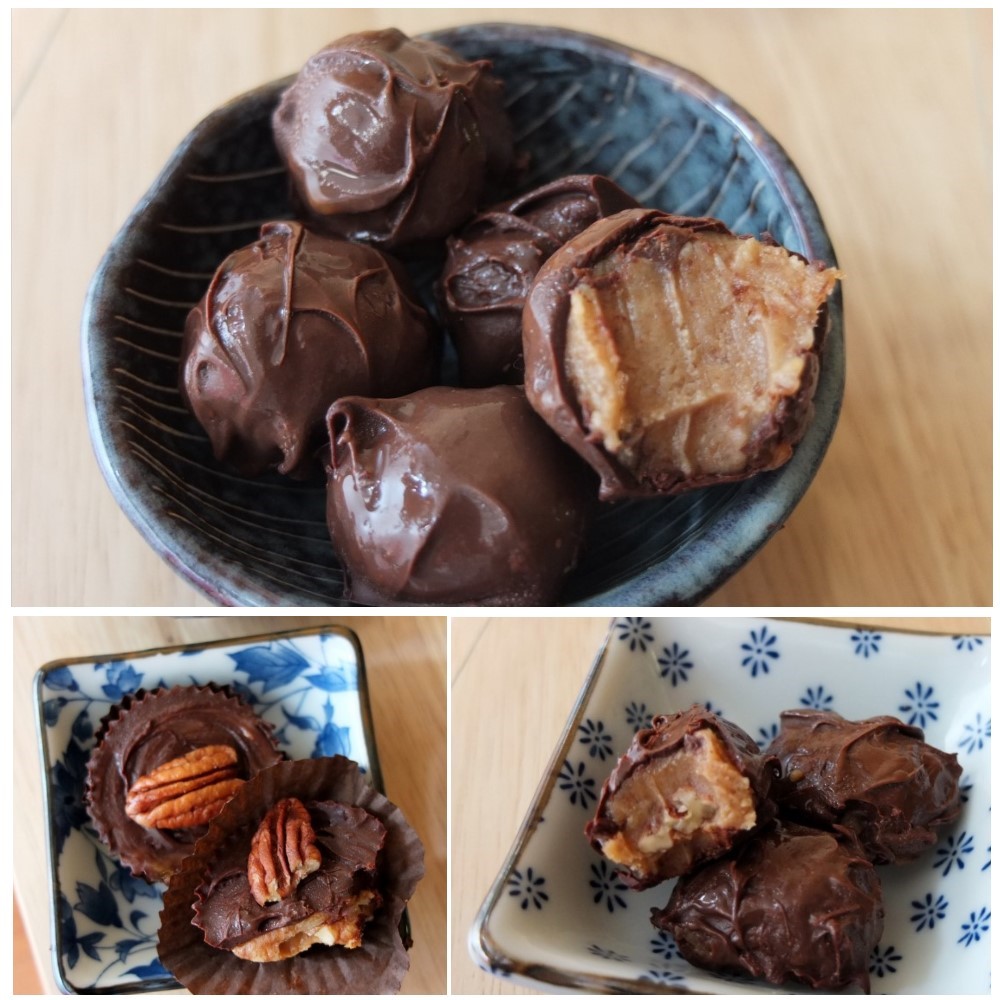
- Make balls by rolling them between the palms of your hand. You can add pecans, nuts or dehydrated raspberries inside if you like.
- Place on a baking tray lined with greaseproof paper in the freezer for at least an hour till firm enough to coat in chocolate.
Chocolate coating
- 300 to 350g dark chocolate (good quality) – 55% if you’d like it less strong, or 70% (to avoid using chocolate try dusting with pure cocoa powder instead)
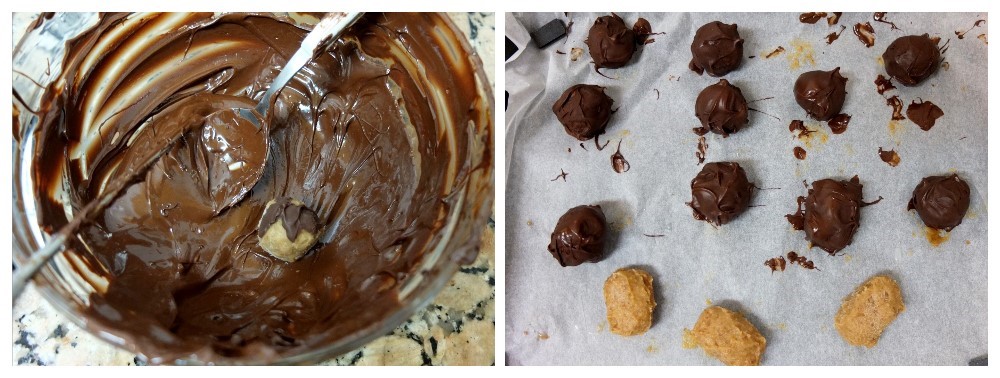
- Melt the chocolate over a bain marie, stirring occasionally with a metal spoon till smooth. You can temper your chocolate so it stays glossy (see instructions on my tempering chocolate page) but you really don’t have to.
- Roll the balls quickly in the melted chocolate (you can use two teaspoons) and place on a baking tray lined with greaseproof paper to set in the freezer around 30 minutes. Look out for any little bits of caramel oozing out, and cut them off or plug with some leftover melted chocolate.

- To make salted caramel peanut butter cups pour a little chocolate in some mini paper cups and brush to line the sides evenly. Fill with a mixture of peanut butter, caramel and pecan nuts. Cover with chocolate and half a pecan.
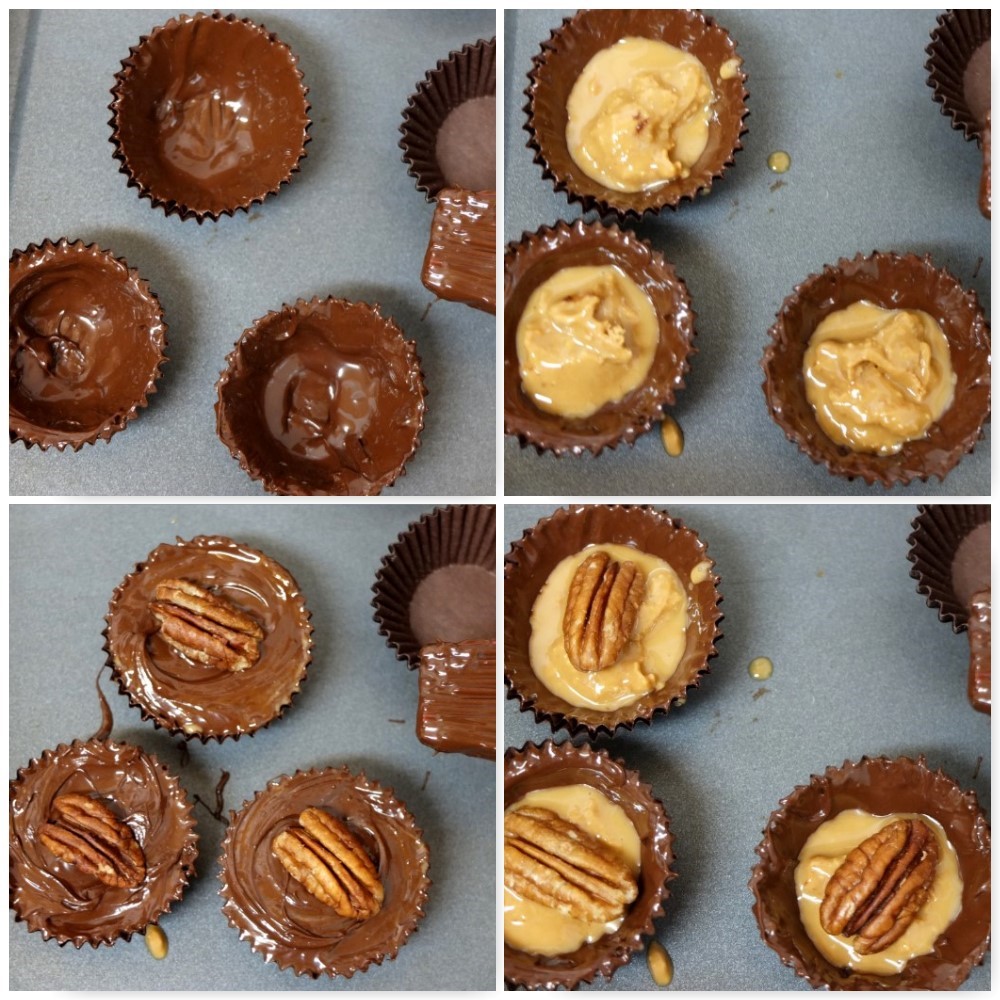
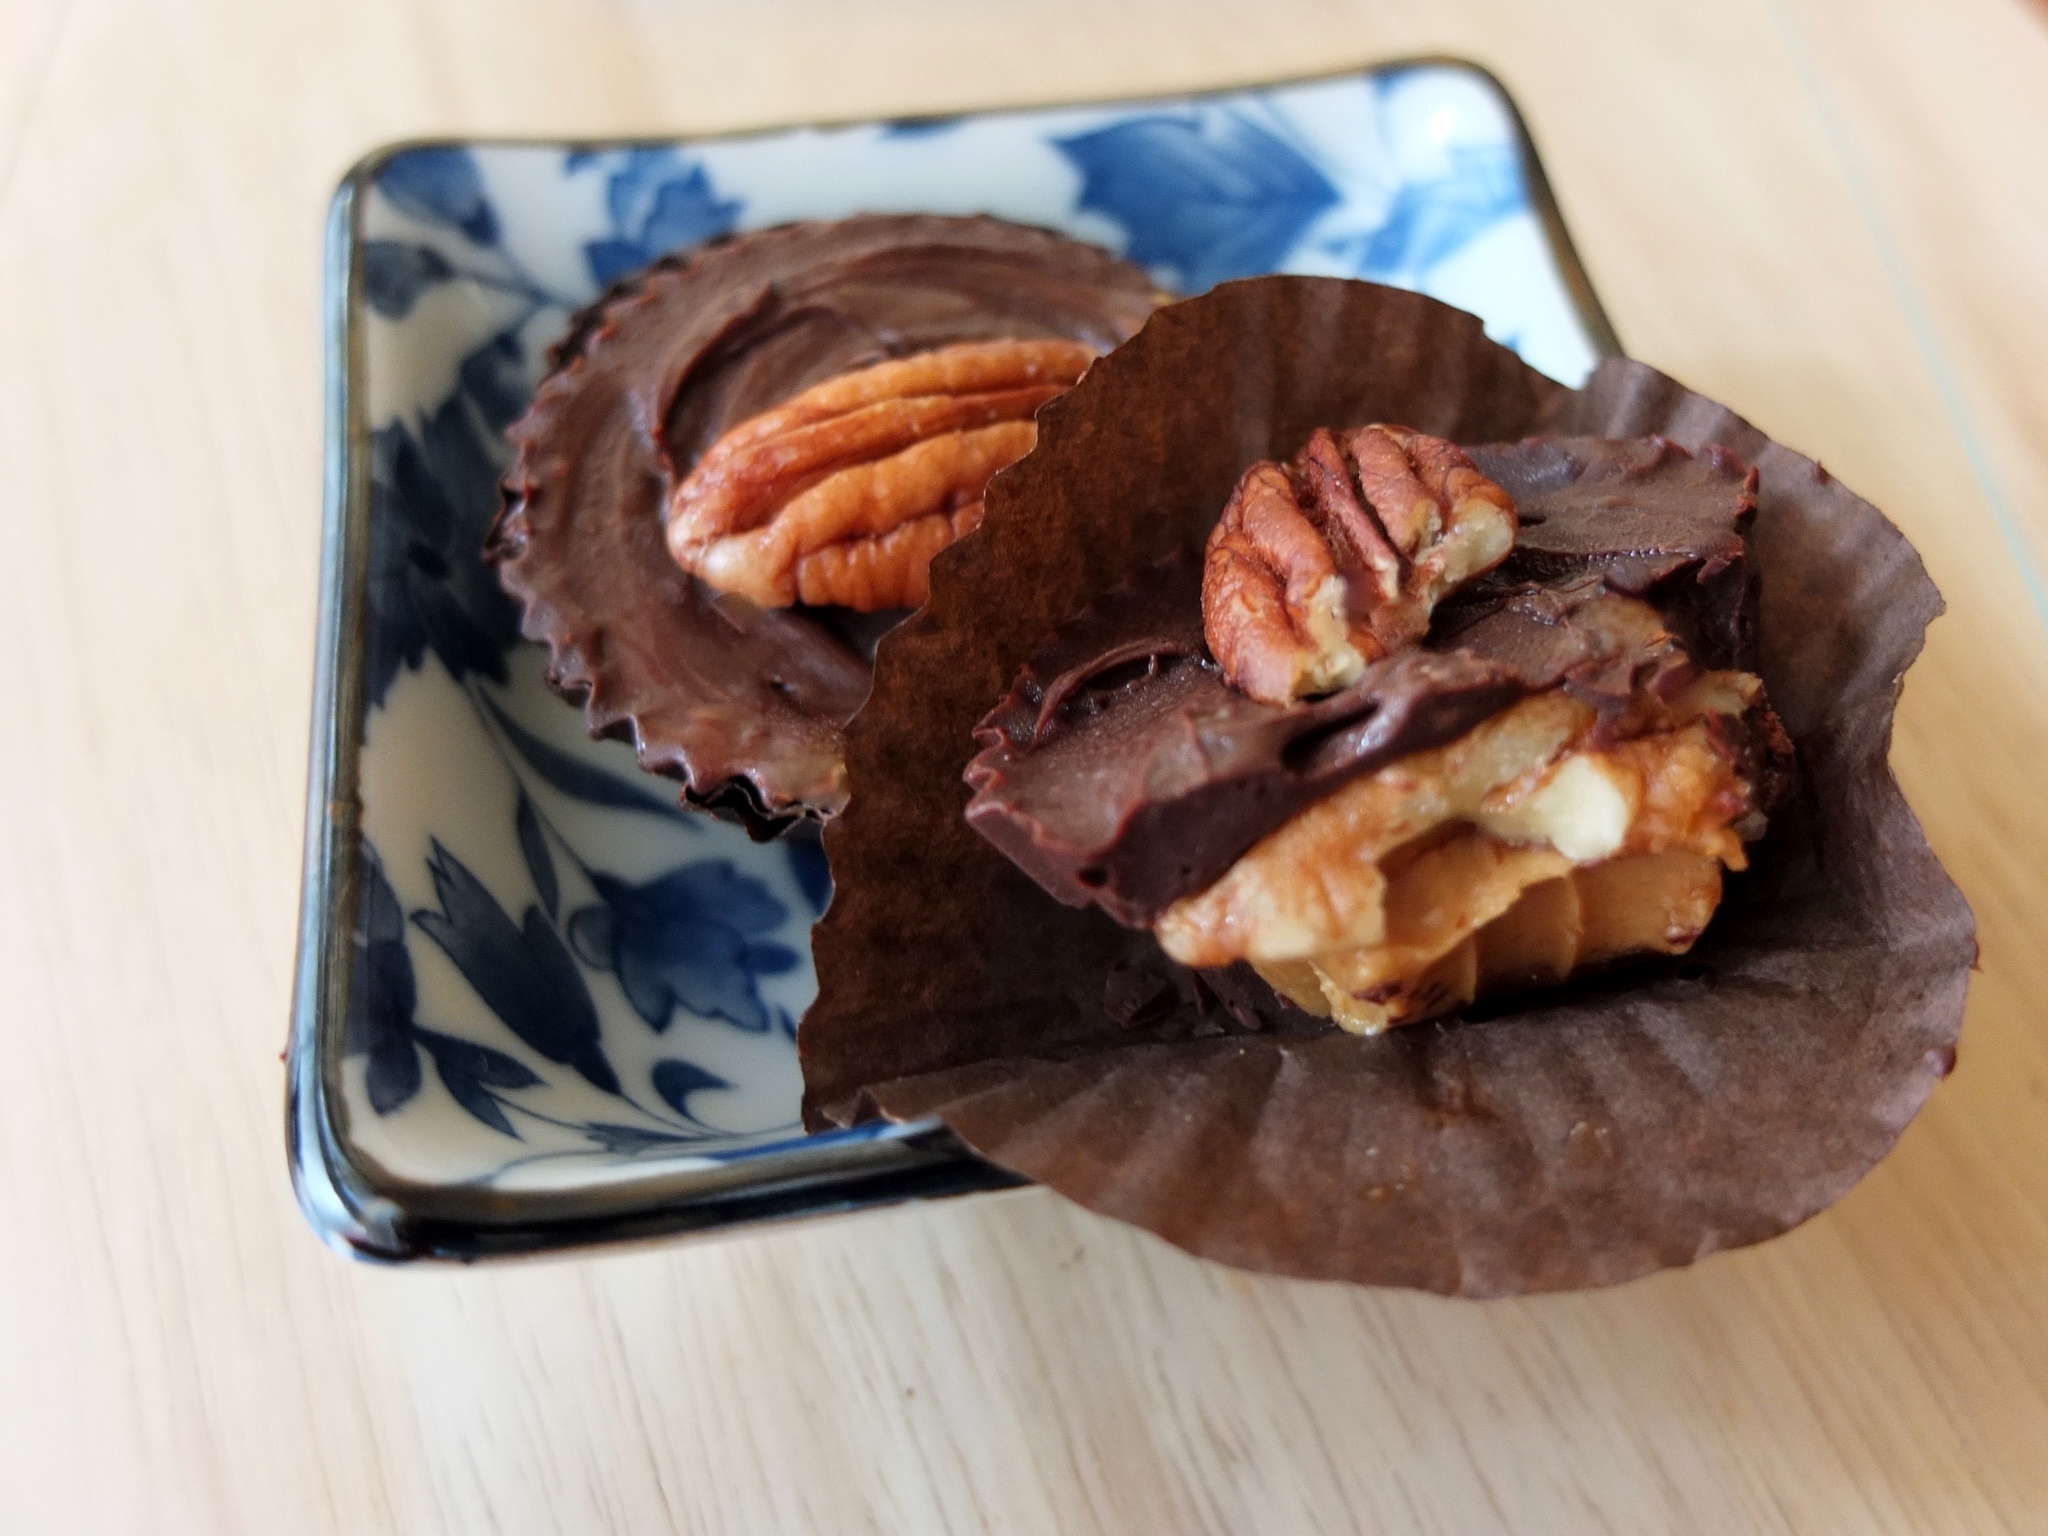
Salted date caramel peanut butter cups
Storing and eating
The caramel chocolates keep in the freezer 2 weeks. You can eat them as soon as they’re out of the freezer when they’re firmer and fudge-like. Or wait several minutes so the caramel becomes more gooey and the chocolates (especially if tempered) lose their white bloom, to look shiny and more presentable. If your stomach’s worried about presentable. 🙂
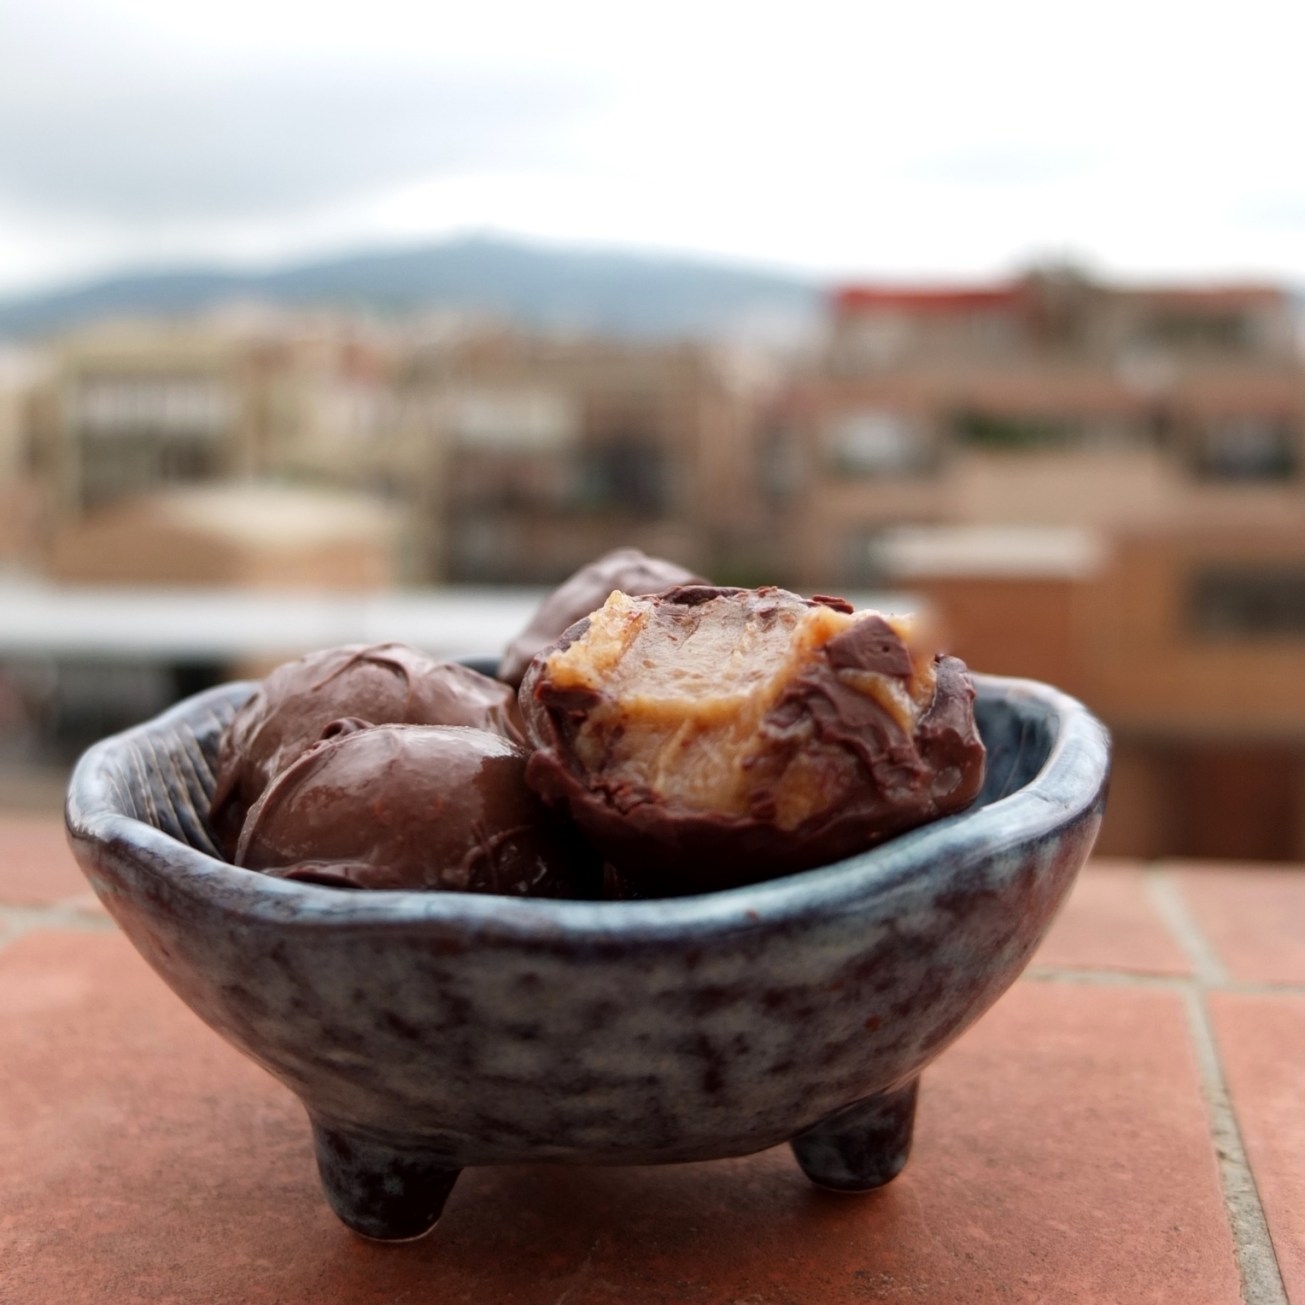
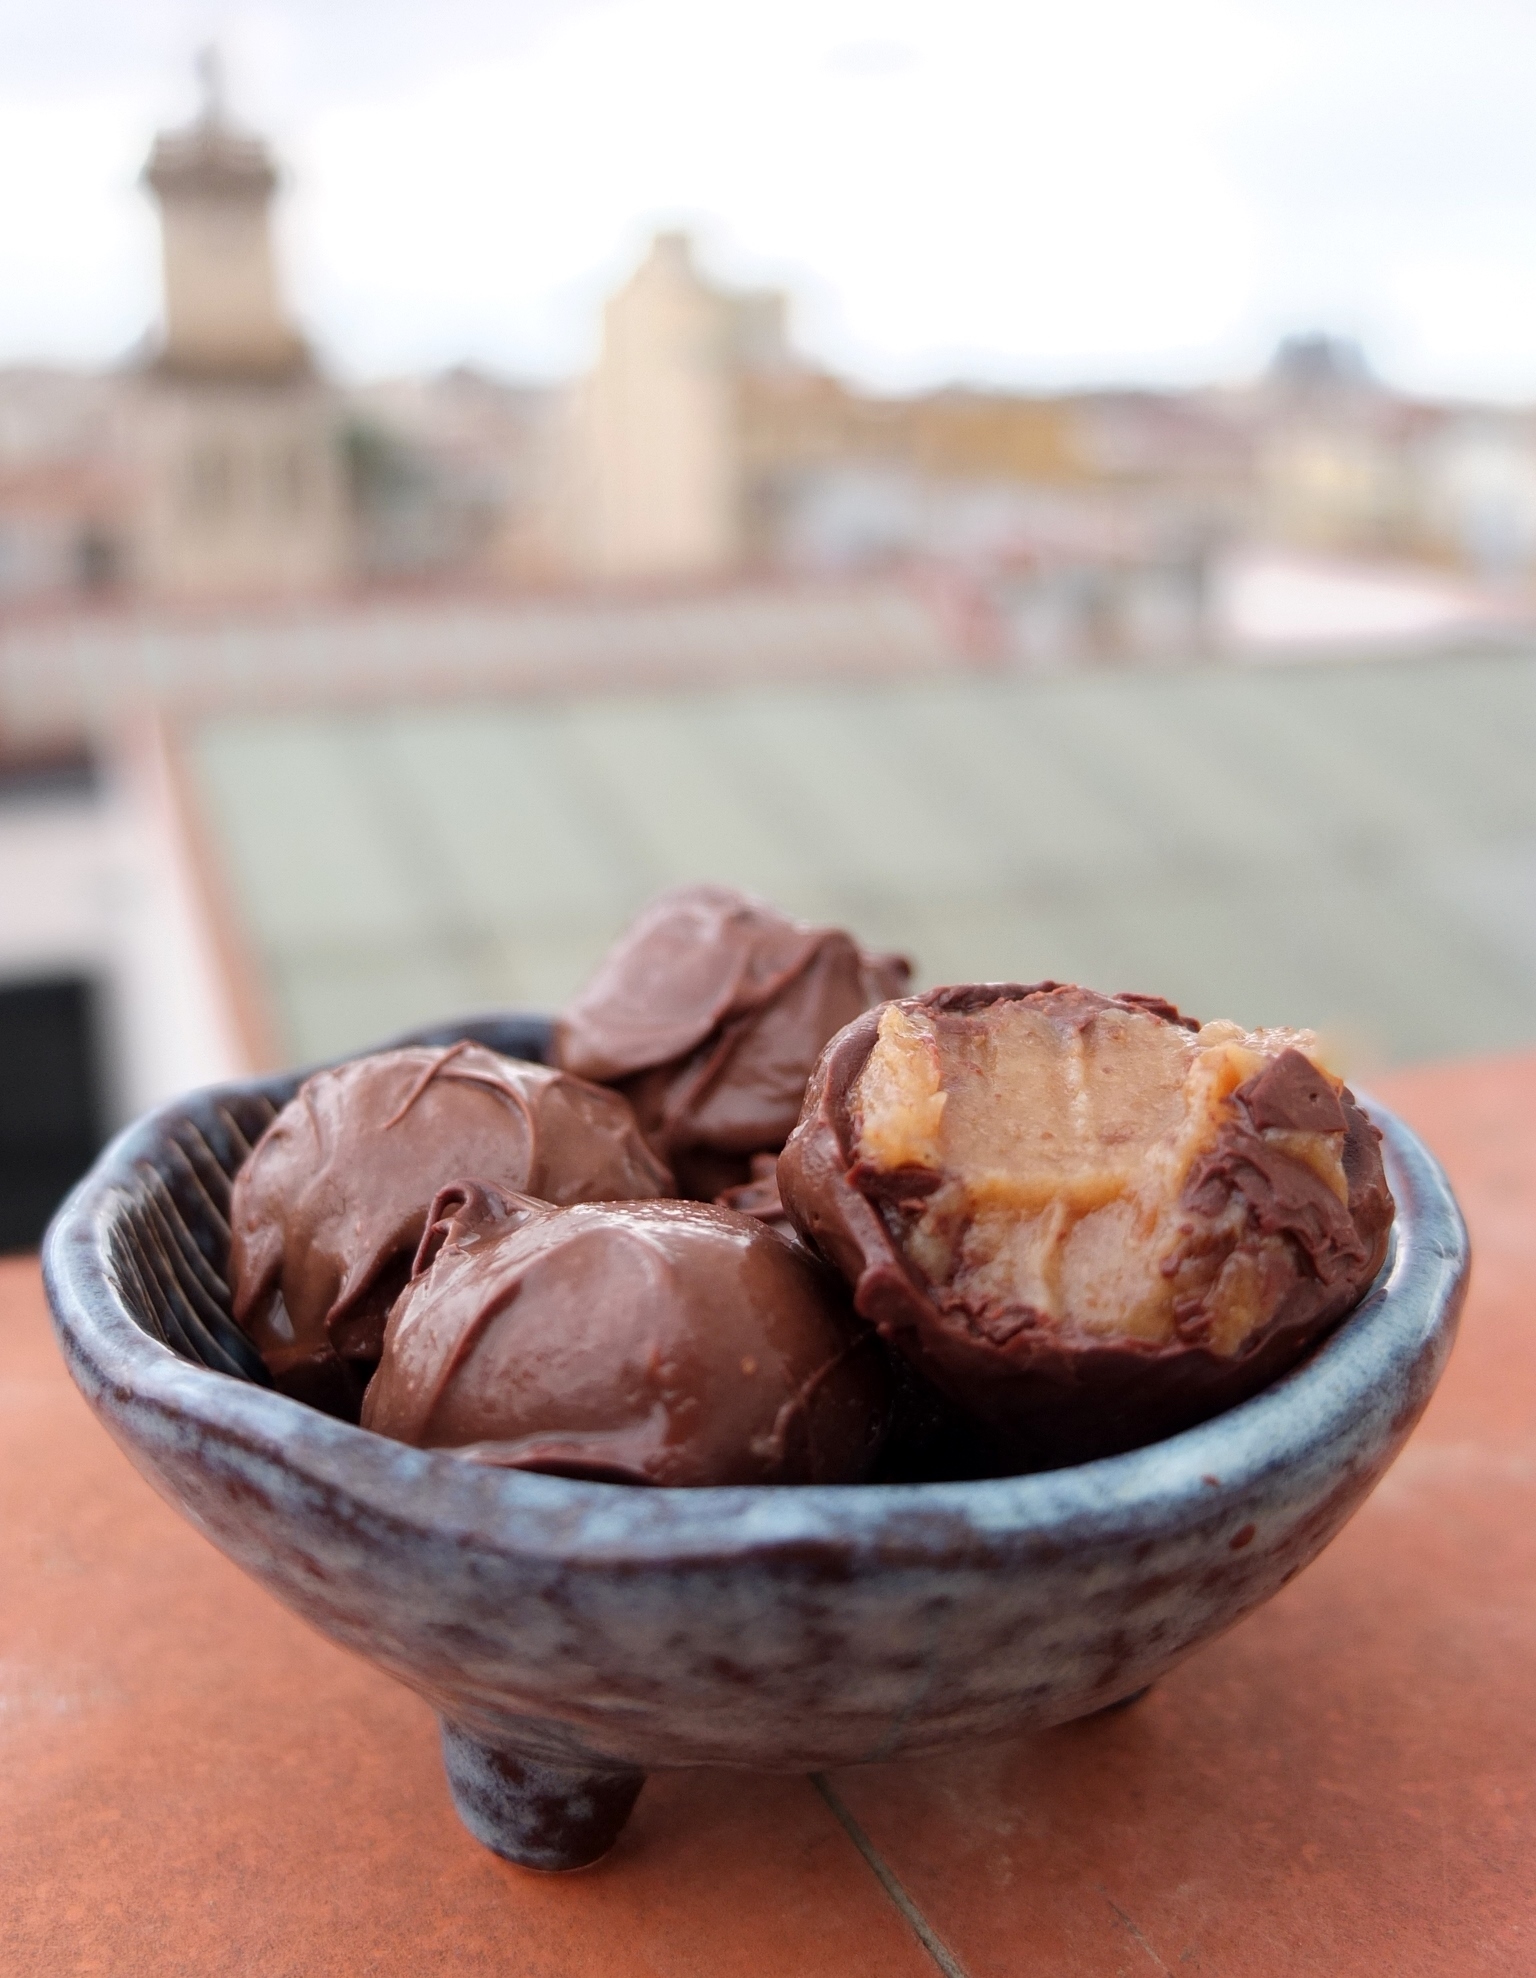
A view from the rooftops
My caramel treats went up with me to my rooftop terrace. It’s a cloudy day in Barcelona but everything’s just hunky dory since chocolate and date caramel both make you happy. The photo at the top shows a very blurry Tibidabo mountain in the background and in the one below there’s a local church and Gaudi’s Sagrada Familia on the right. They’ve finally announced a completion date: 2026 (the centenary of Gaudi’s death) or 2028, more than 140 years after construction began! If recently-constructed train tunnels nearby don’t cause it’s collapse, as predicted by various engineers!
 At the moment the Sagrada Familia’s completely surrounded by scaffolding. It must be all systems go. As it is on the caramel-eating front here.
You might be inspired to make some too and even invent your own version with the date caramel. In the meantime, do have another. Just going to run off with them again. No, really. Please help yourself. 🙂 I’ll even share them with my friends at Fiesta Friday hosted by Angie@thenovicegardener, Free from Fridays hosted by Emma@freefromfarmhouse and Fabulous Foodie Fridays hosted by Lucy@BakePlaySmile and Lauren@CreateBakeMake. Come along, mingle and see the great food. And … um… yes, have a caramel! 🙂
Wishing you a wonderful remainder of the week sweet reader. May your happiness reach up to the rooftops and beyond. And as far as your kitchen too of course! 🙂 x

These sound and look sinful! I love the top image. I think you should print, mat, and frame it. Perhaps hang it in your kitchen.?
LikeLiked by 1 person
Thanks Deborah! Yes, it’s nice to know healthy nutrional treats can be yummy and decadent. 🙂 Thank you for the idea about the photo and I’m so pleased you like it. I’m going to see where I can get photos printed… I love the idea of having a food photo or 2 in the kitchen, or around the house. Thanks again for the suggestion! 🙂
LikeLiked by 1 person
That’s marvelous:) love your creativity!!
LikeLiked by 1 person
Thank you Lina! 🙂 x
LikeLiked by 1 person
Yummy! Pinned it 🙂
LikeLiked by 1 person
That’s great Linda! Woohoo! Let me know what you think if you try them… 🙂
LikeLiked by 1 person
This looks so good Lilli! Great idea I am going to give it a try!
LikeLiked by 1 person
Thank you Indu! And yes… they’re pretty yummy! Brilliant you’re going to make them… let me know your thoughts about them some time … 🙂
LikeLiked by 1 person
Looks so good
LikeLike
Thank you! 🙂
LikeLike
I love the look of these and will definitely be trying them. Thanks for linking up with #freefrofridays
LikeLiked by 1 person
You’re welcome and thanks Emma! Glad you like the look of these caramels and do let me know your thoughts once you’ve tried them! 🙂 Thank you for hosting Free from Fridays! 🙂
LikeLike
Now that’s a good place to eat some chocolate!
LikeLiked by 1 person
Very true Sarah! Although any old place will do… 🙂
LikeLiked by 1 person
Very true!
LikeLiked by 1 person
Oh wow these look absolutely stunning and I really love your photos 🙂
LikeLiked by 1 person
Thanks so much! That’s really sweet and motivating! 🙂
LikeLike
hm yumm y
LikeLiked by 1 person
Thank you!! 🙂
LikeLike
What a wonderful post! Pinned it for trying 🙂
LikeLiked by 1 person
Thank you so much Aruna!! A friend of mine tried some yesterday and said they could be in a patisserie!!! He wasn’t at all interested in the fact they were healthy. lol. Let me know how it goes… 🙂
LikeLiked by 1 person