
Ever thought of making a seed and nut bread? Don’t be put off by the dense texture. I once was but now I’ve seen the light and just luuuuuv this bread! And I have Susan from The Kiwi Cook to thank for this discovery. When she set this Daring Kitchen challenge I initially thought ‘Hmm not the prettiest challenge’ but my body was going ‘Yay! Something healthy for us’. Plus it’s great having something to spread my Marmite on. You should seriously consider making this gluten-free seeds and nuts bread which health-conscious friends and family will also really appreciate. Easy, fast, no yeast, no kneading and delicious… Yay for superfood bread!!! 🙂

Superfood seed and nut bread
Not just hype
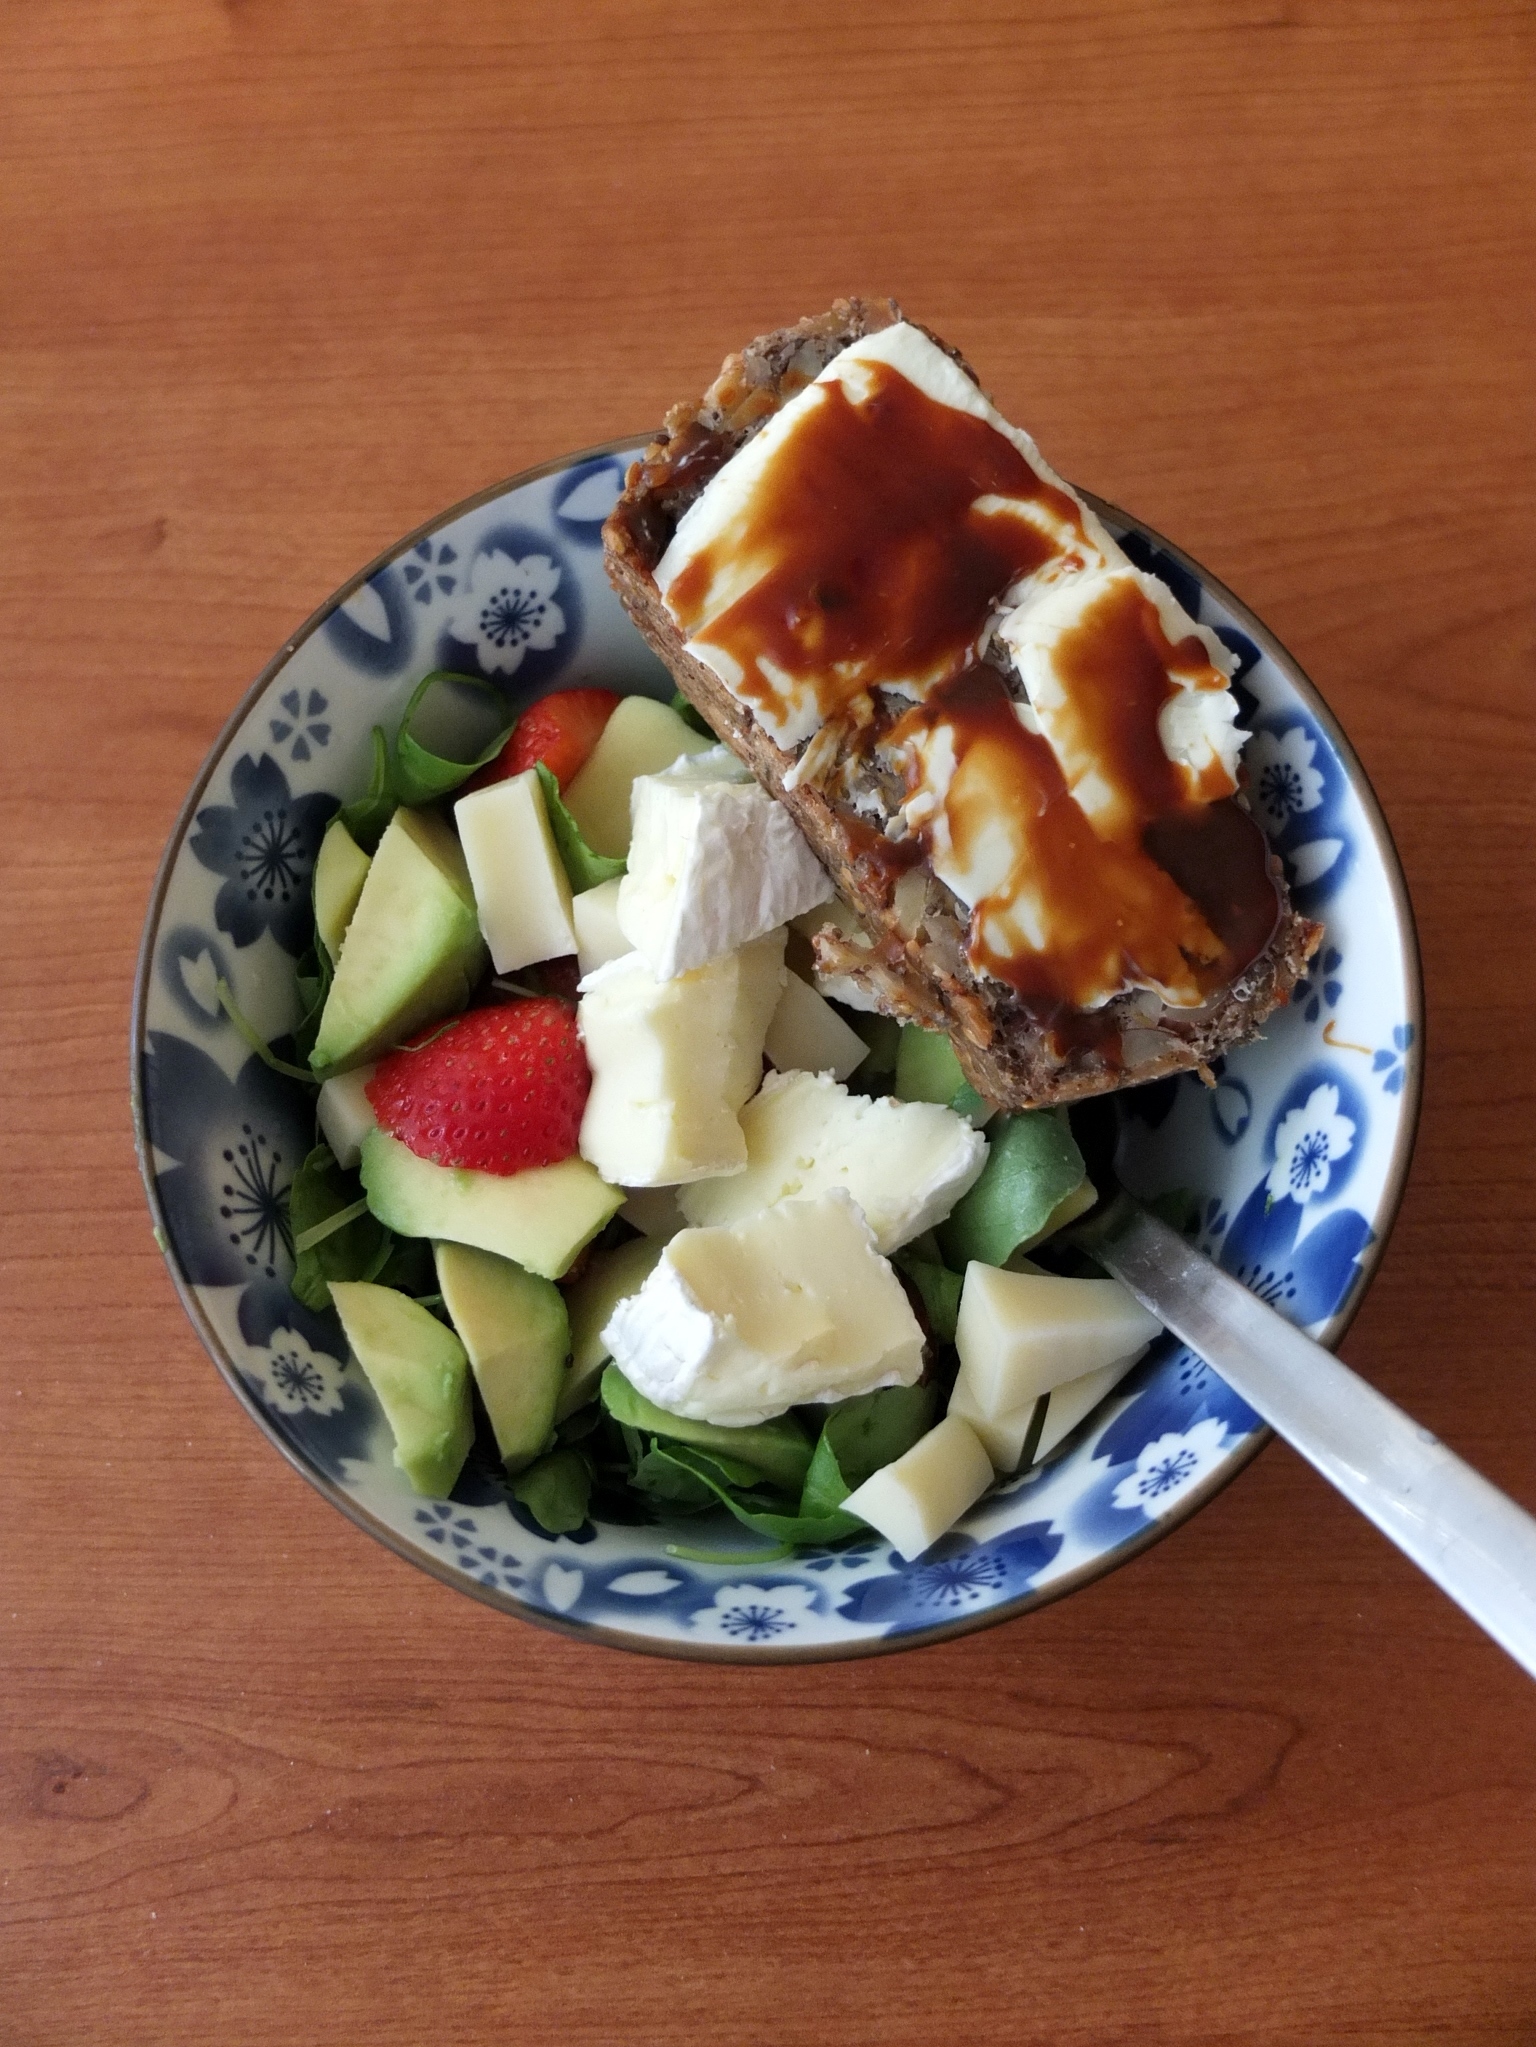
Yes, you too could instagram your superfood bread lathered with avocado, almond butter and all that healthy stuff to join the world of the online superfit tagging #healthyliving or #eatclean. Loads of pings. But seriously, it’s not just hype. This is really tasty bread and your body feels good after you eat it. Hey you know I’m not a health fanatic but between all the cakes (lol) I love eating this bread. Two slices is a satisfying and delicious treat. Yup, treat! I thanked Susan at the Kiwi Cook for the challenge and told her I’d be making this bread regularly! A constant supply on hand, and the other hand reaching for my pot of Marmite. Yeeha! After all, studies report that Marmite Could be a Superfood and Boost Immune System too! 🙂

Hurdle number one – psyllium husks powder
Yes, aargh. I too automatically switched off when I saw those words. Psy…. what? And how is that pronounced or translated into Spanish? I went on a dairy-free monster-free Odyssey, searching high and low for … you-know-what. Explaining the stuff in pharmacies and health foodstores here in Barcelona: it’s a kind of glue that sticks bread together…? Oh dear. Rachel Koo and Deliciously Ella both confirm it’s absolutely necessary so it must be true. I persisted, googled the translation (cáscaras de psyllium – not that different really) and showed it to all and sundry. On day two of my search, bingo! In a local healthfood store it wasn’t in stock but they ordered a jar for me which arrived the next day! Not much of an Odyssey in the end so take heart: you too can get your paws on this stuff and make this bread! Any protests about difficulties obtaining it and I’ll tell you my looooong psyllium Odyssey story again! 🙂
Anyway, to cut a long story short (ho ho) I now have a humongous jar of psyllium stuff which will last for many many loaves, so let’s start baking!
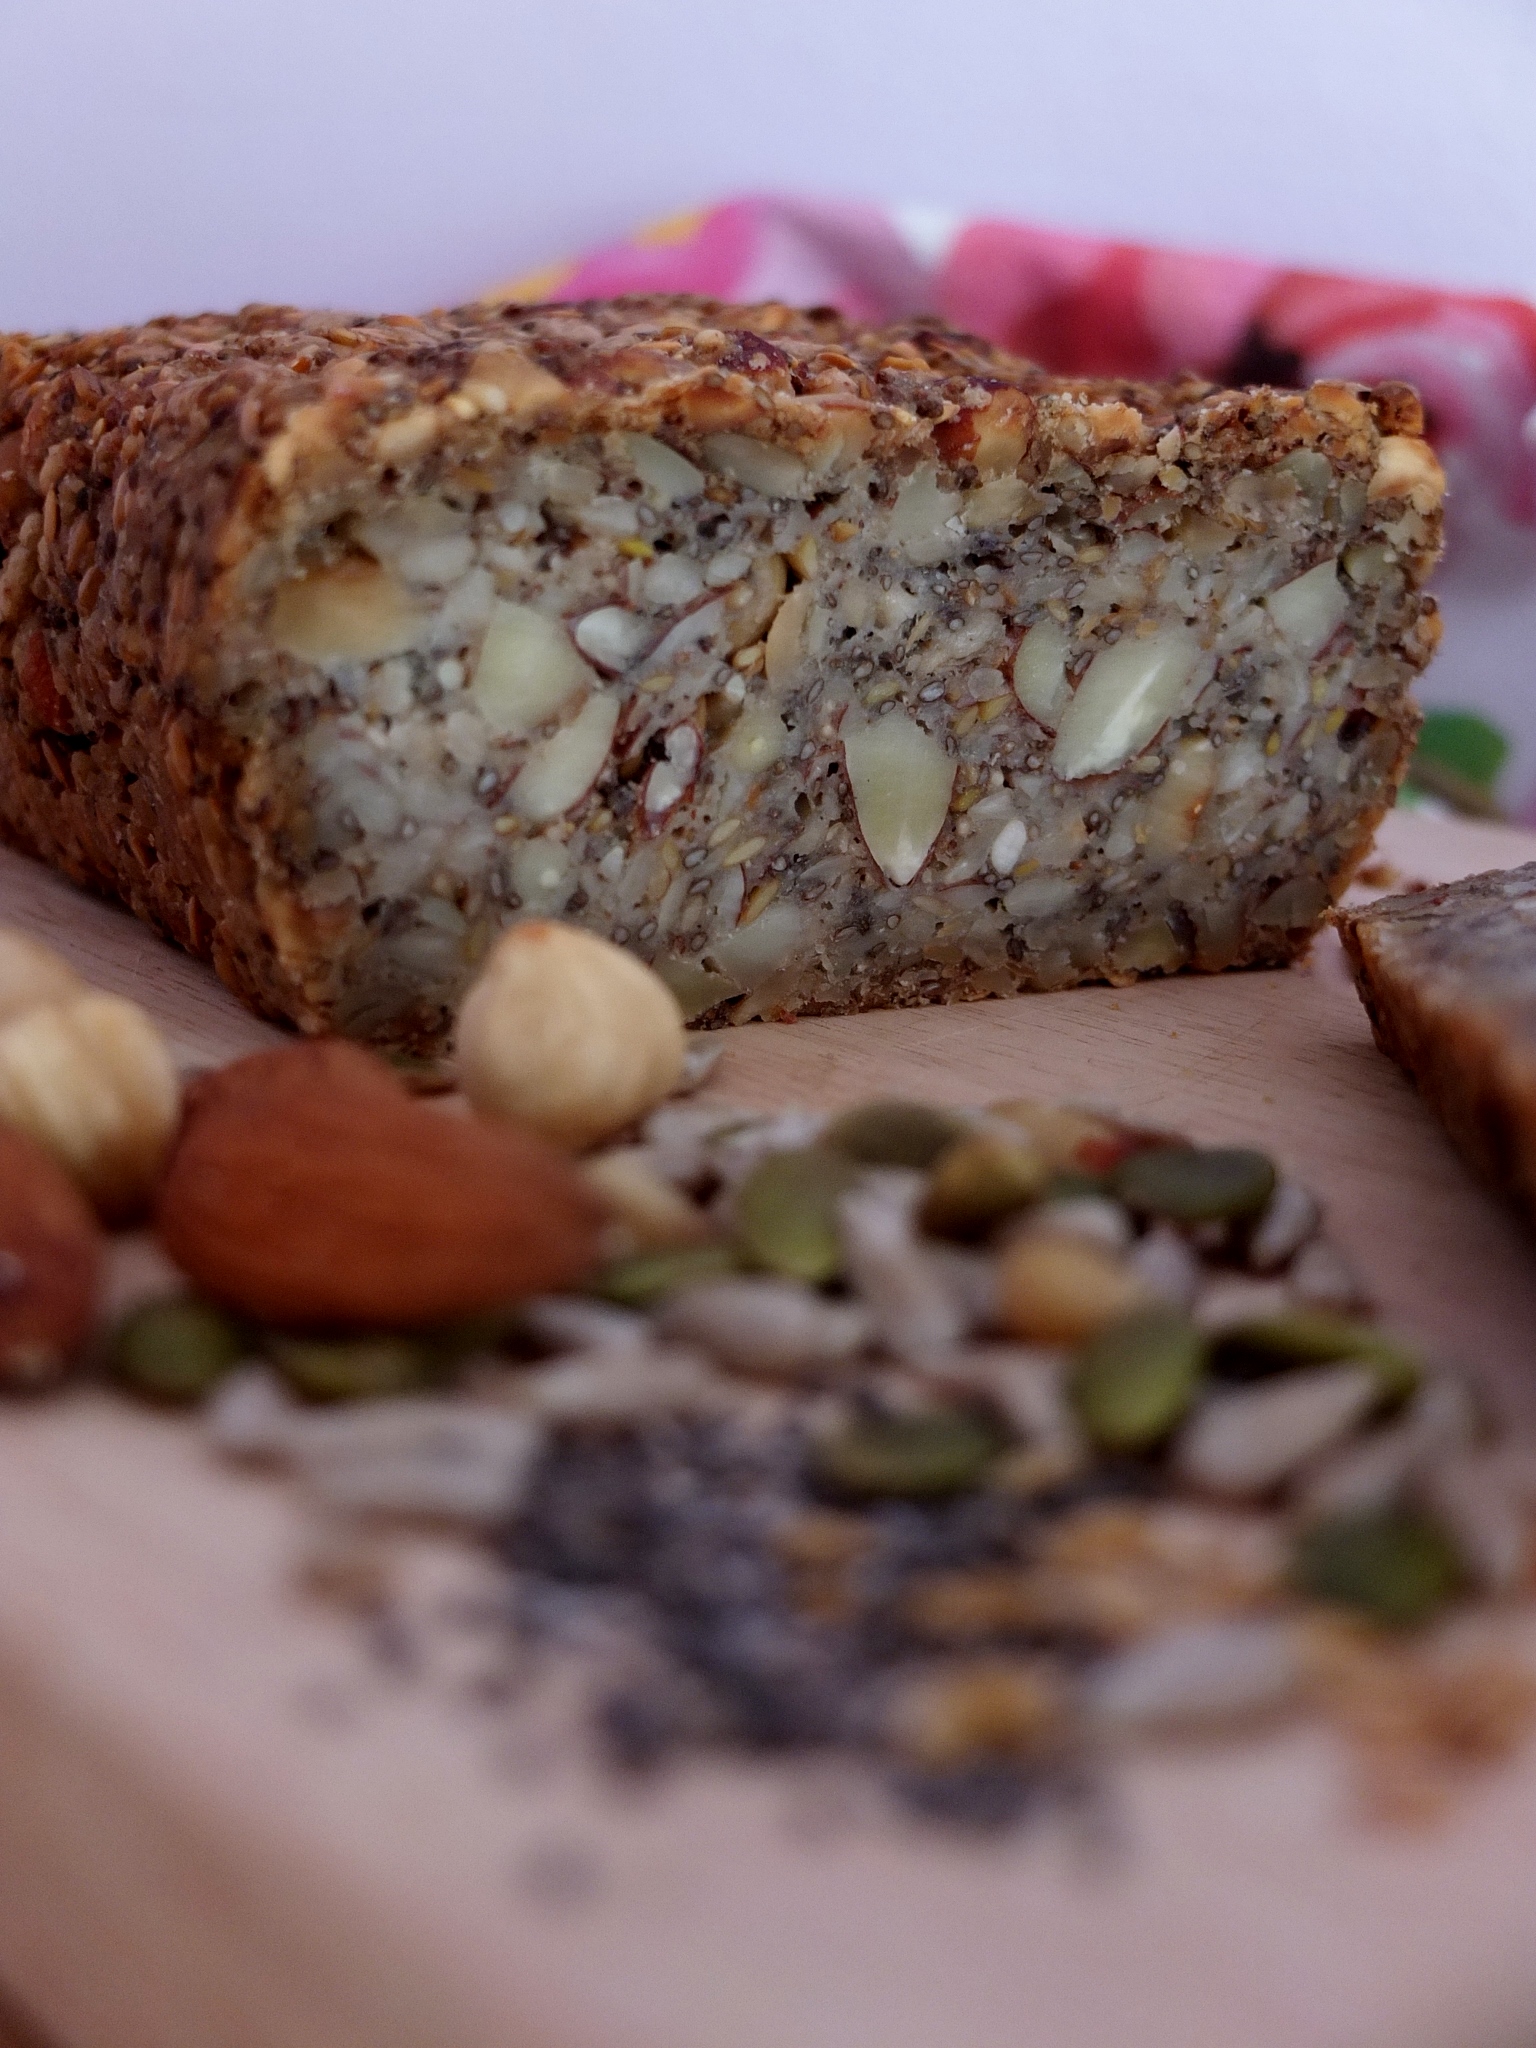
Gluten-free superfood seeds and nut bread
Recipe
This recipe was based on the paleo bread at Green Kitchen Stories. I adapted the method, quantities and ingredients slightly to include rice flour and what I could find in my kitchen. You can also adapt as you wish, eliminating nuts and flour or including other types of gluten-free flour. Personally I prefer having more seeds than nuts, sensing the bread could hold together better that way. You can also include raw grated vegetables.
Preheat your oven to 180°C/350°F (static, non-convection oven) or 160°C/320°F (fan-assisted) and lightly grease your baking tin with coconut or olive oil.
Ingredients
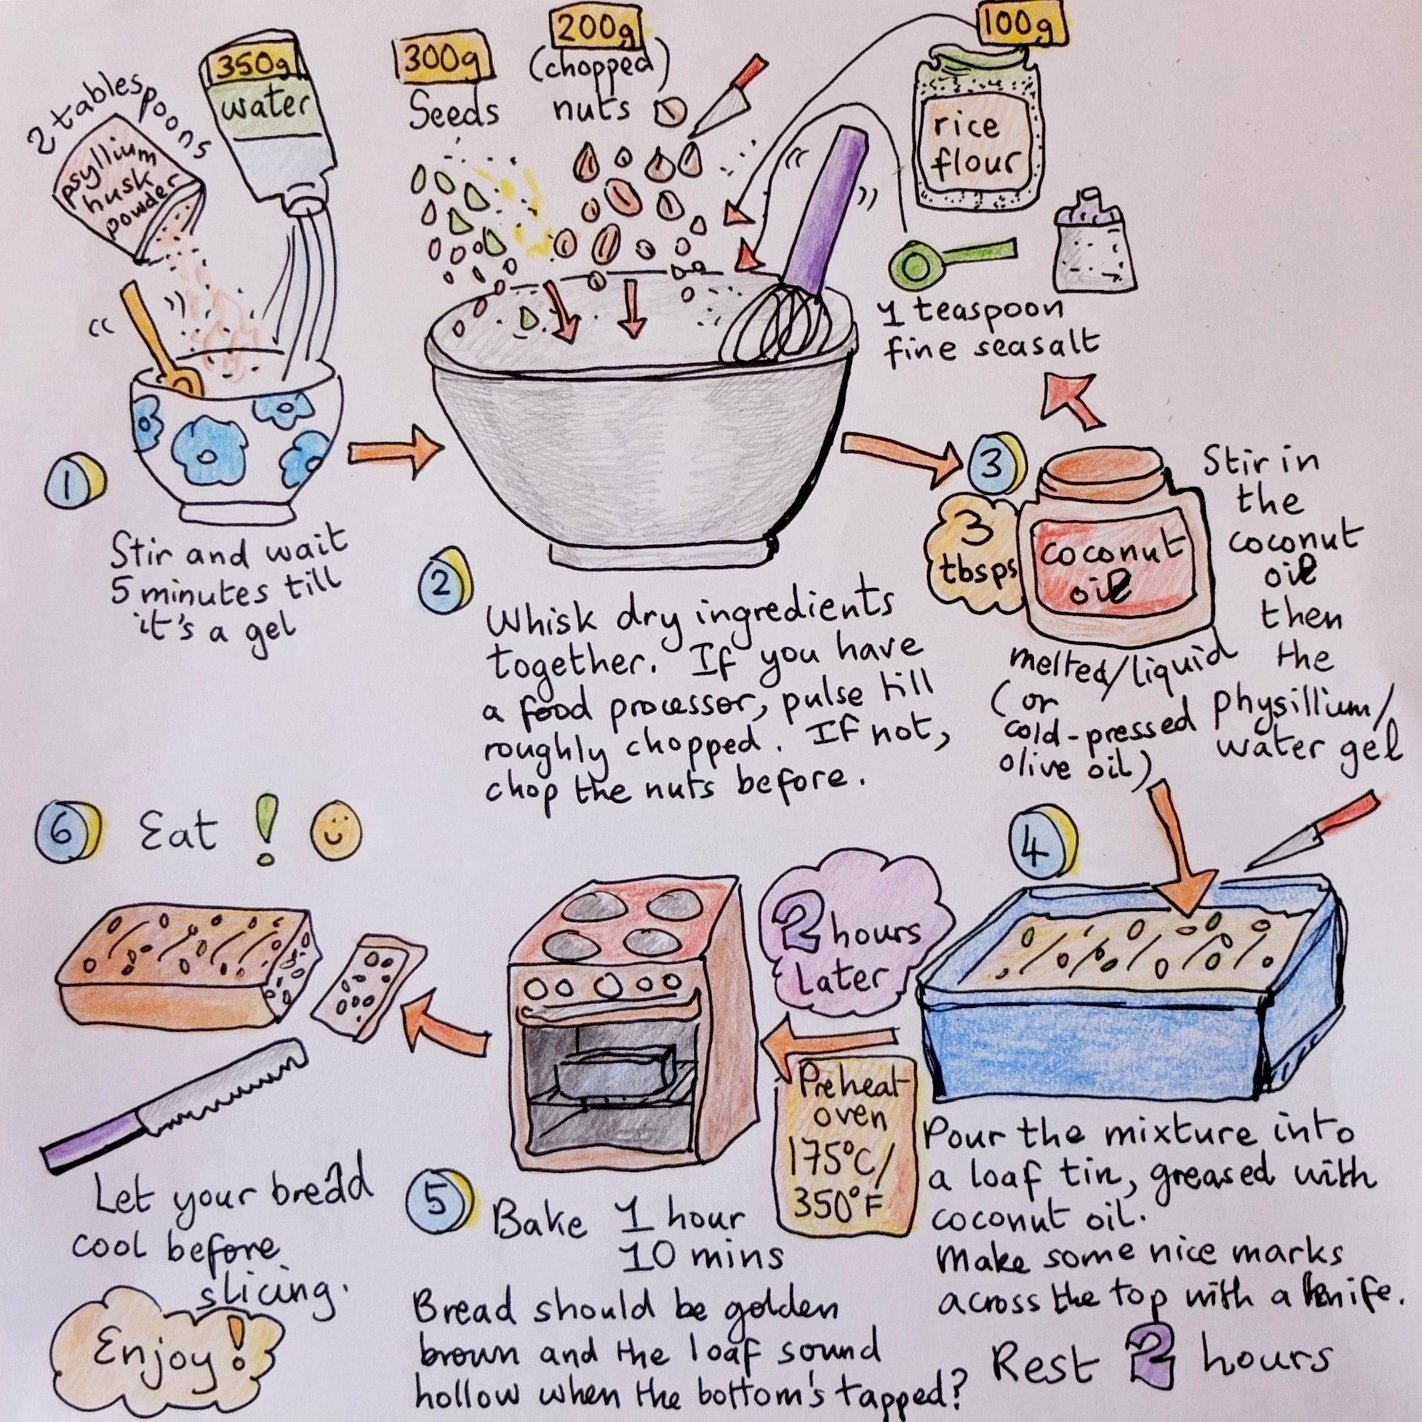
- 2 tbsp psyllium husks powder
- 350g/1 and a half cups water at room temperature
- seeds (300g in total)
- 100g/three quarters of a cup sunflower seeds
- 70g/half a cup pumpkin and sunflower seed mix
- 50g/quarter of a cup plus 1 scant tbspoon golden linseeds
- 50g/quarter of a cup chia seeds
- 30g/quarter of a cup and 2 teaspoons sesame seeds
- nuts (200g in total) – chop roughly after weighing if you don’t have a food processor
- 140g/1 cup whole almonds
- 60g/half a cup whole toasted hazelnuts
- 100g rice flour
- 1 teaspoon fine sea salt
- a pinch of Stevia (or half a teaspoon to 1 tsp maple syrup/sugar) – optional
- 3 tablespoons coconut oil (melted/cold pressed) or cold-pressed light olive oil
Optional: 1 handful of raisins or chopped dark chocolate
How to make it
Notes
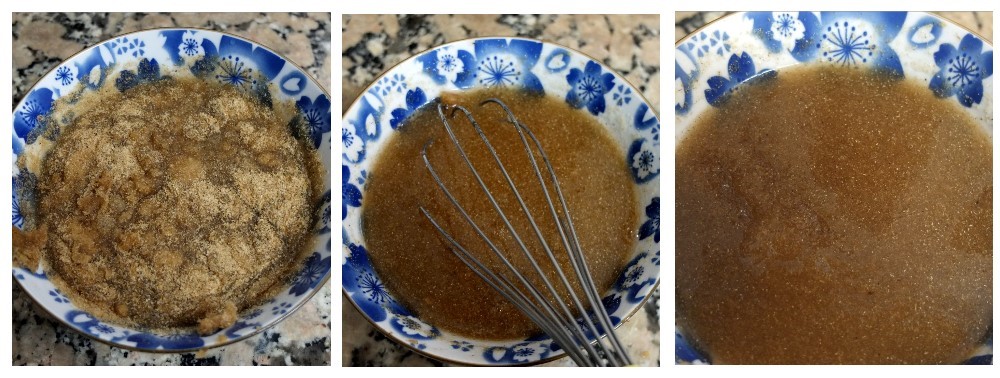
- Here’s psyllium becoming a gel.

- You can stir and knead in the psyllium gel in with your hands at the end.
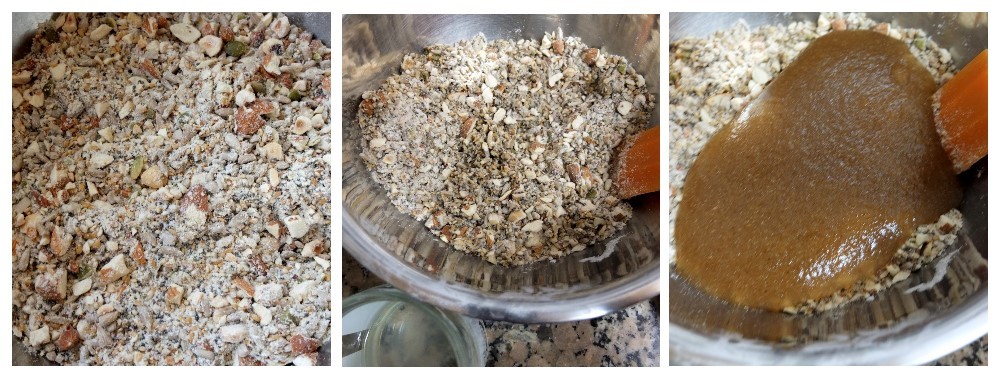
Dry ingredients then coconut oil then psyllium gel

- The resulting dough will be quite solid, more so after 2 hours. Don’t be alarmed, this is normal.

Ready to go in the oven

- If you’re baking muffins they should take 45-50 minutes.
- I used a silicone loaf mould; baking time depends on your own mould, loaf and oven. To be honest this is a solid loaf and when I tapped the bottom to check if it was fully baked it just sounded solid. So I cut a thin slice – it looked set but moist and the flavour wasn’t great so I put it back in the oven another 10 to 15 minutes. The bread tasted better after baking longer (for 1 hour plus 15 or 20 minutes, or so).
- I love my bread as it is but many Daring Bakers said they preferred theirs toasted.

Gluten-free superfood seed and nut bread
Storing
Store in the fridge for up to a week in an airtight container or wrapped in plastic film. Or up to 2 months in the freezer cut into individual slices for easy access, perhaps to accompany a salad on a rainy day?
I think I’ll take some along to Fiesta Friday hosted by Angie@thenovicegardener with cohosts Jhuls@The Not So Creative Cook and Elaine@foodbod. And to Free from Fridays hosted by Emma@Freefromfarmhouse. Check out all the great recipes there! 🙂
 You’ll also see lots of photos of ‘superfood’ breads and various recipe links over at the Daring Kitchen challenge. Perhaps you’ve made one before? Or would like to? Give this easy gluten-free superfood seed and nut bread a go and let me know what you think.

Gluten-free superfood seed and nut bread
So it’s farewell again sweet reader! Thanks for popping in and I wish you a glowing and healthy week feeling good, with a few cakes thrown in maybe? Happy baking and eating! 🙂 x

Oooh I’m going to make this tomorrow to have ready for breakfasts during the week! It looks amazing and so moist!
LikeLiked by 1 person
Thanks Lucy, glad you like it! And that’s great you’re going to make it … yay! Do let me know how it goes. 🙂
LikeLike
Pingback: Week 38 of cakes and Paris | lili's cakes
Pingback: The mojito lemon drizzle loaf, how to paint on a cake and the May cake collection! | lili's cakes